


Page 17
Tyres and Wheels
Countax tractors are fitted with grassland tyres that are designed
to present a large area to the ground for grip; and are soft profile
to prevent marking your turf. They are of thicker section and
tougher than most 4 ply tyres.
Persistent punctures and tyre deflation are nevertheless a
problem experienced by about 5% of Countax customers. This is
not a problem just for Countax owners - it is shared by the users
of all types of off-road machinery fitted with pneumatic tyres. In
practically every case there is one common cause – THORNS!
Blackthorn, Hawthorn, and Rose are usually at the bottom of it
and will puncture any tyre not fitted with very expensive guards.
There are less expensive ways to overcome this problem.
Check and avoid these possible causes:
1. The rim of the wheel has become damaged – breaking the seal
on the tubeless tyre. There are two possible solutions:
• If the damage is not severe, treat with Countax tyre sealant
(Pt No. 52903501)
• If the damage is significant – order a new wheel
Front wheel – (Pt No.198000500)
Rear wheel – (Pt No. 198000700)
2. You have Hawthorn, Blackthorn or Wild Rose in your hedges
– these will puncture any tyre. It makes sense to check the area
you intend to cut or drive over and to remove any branches.
The long-term solution is to treat all four tyres with Countax
tyre sealant – follow the instructions on the bottle.
If your tyres spin or lose grip check:
1. Are the tyres inflated to the correct pressures, check
back page?
2. Are you driving too fast for the conditions? If so, select a
slower speed.
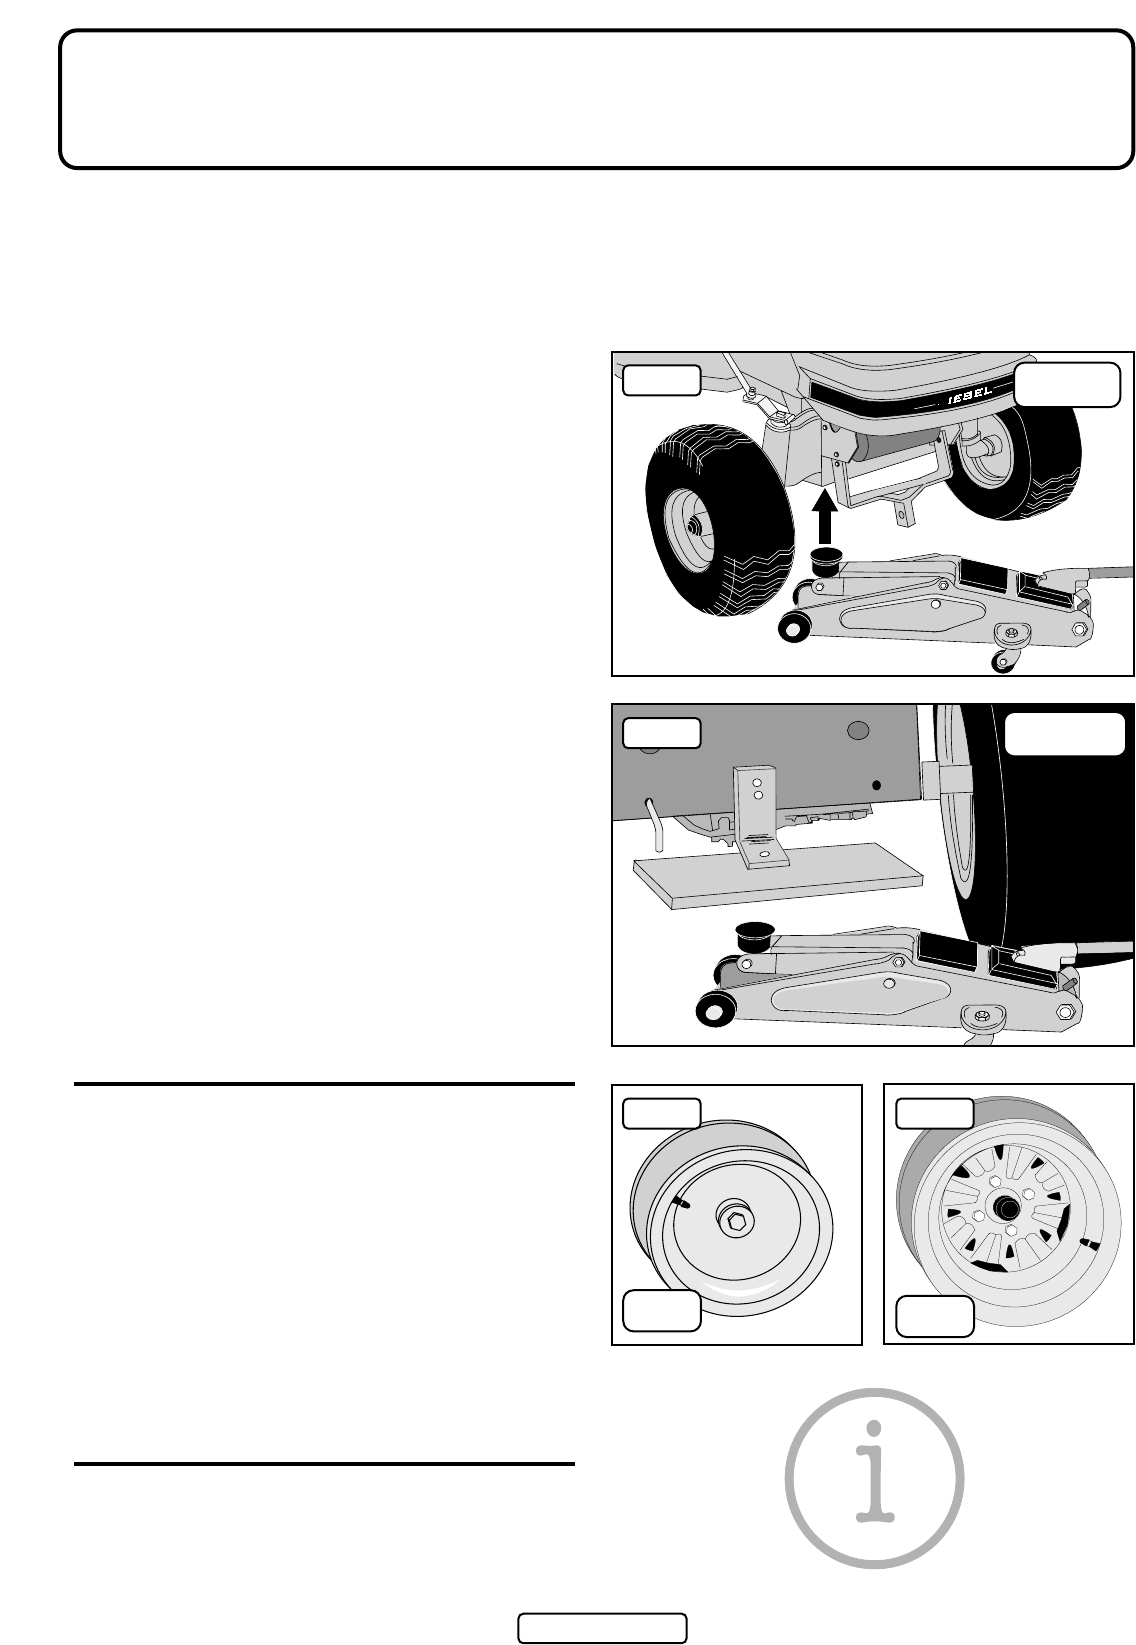
REMOVAL OF FRONT WHEEL
1. Apply the parking brake.
2. Place chocks under all wheels that are to remain on the
ground.
3. Remove the hubcap.
4. Use a 3/4" (19mm) socket spanner and ratchet to slacken off
the wheel nut – do not remove.
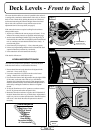
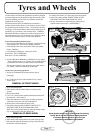
5. Place jack under the front axle (fig 1) and jack up until the
wheel to be removed is well clear of the ground.
6. Remove the nut and washer and keep it safe,
7. Pull off the wheel carefully TAKING CARE NOT TO
DISLODGE THE TRACTOR FROM THE JACK.
When the tyre is repaired replace the wheel preferably using a
new 12mm Nyloc nut, Part No. 049381100.
REMOVAL OF REAR WHEEL
1. Apply the parking brake.
2. Place chocks under wheels that are to remain on the ground.
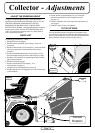
3. Place the jack under the Transaxle (see fig 2) and raise until
the wheel is well off the ground.
4. Undo the four 19mm (3/4”) nuts using socket and wrench.
5. Pull off the wheel carefully TAKING CARE NOT TO
DISLODGE THE TRACTOR FROM THE JACK.
6. Reverse instructions to complete the job making sure to
tighten wheel nuts (to torque – 68NM/50ftlbs).
-Warning-
Never jack the tractor up by jacking under the running
board. We do not advice owners repair punctures.
It is best to take the wheel to your local tyre
specialist or use Countax tyre sealant.
fig 1
fig 2
fig 3 fig 4
Front
Jacking Point
Rear Jacking
Point
Front
Wheel
Rear
Wheel