


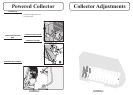
Page 20 Page 9
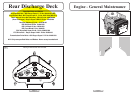
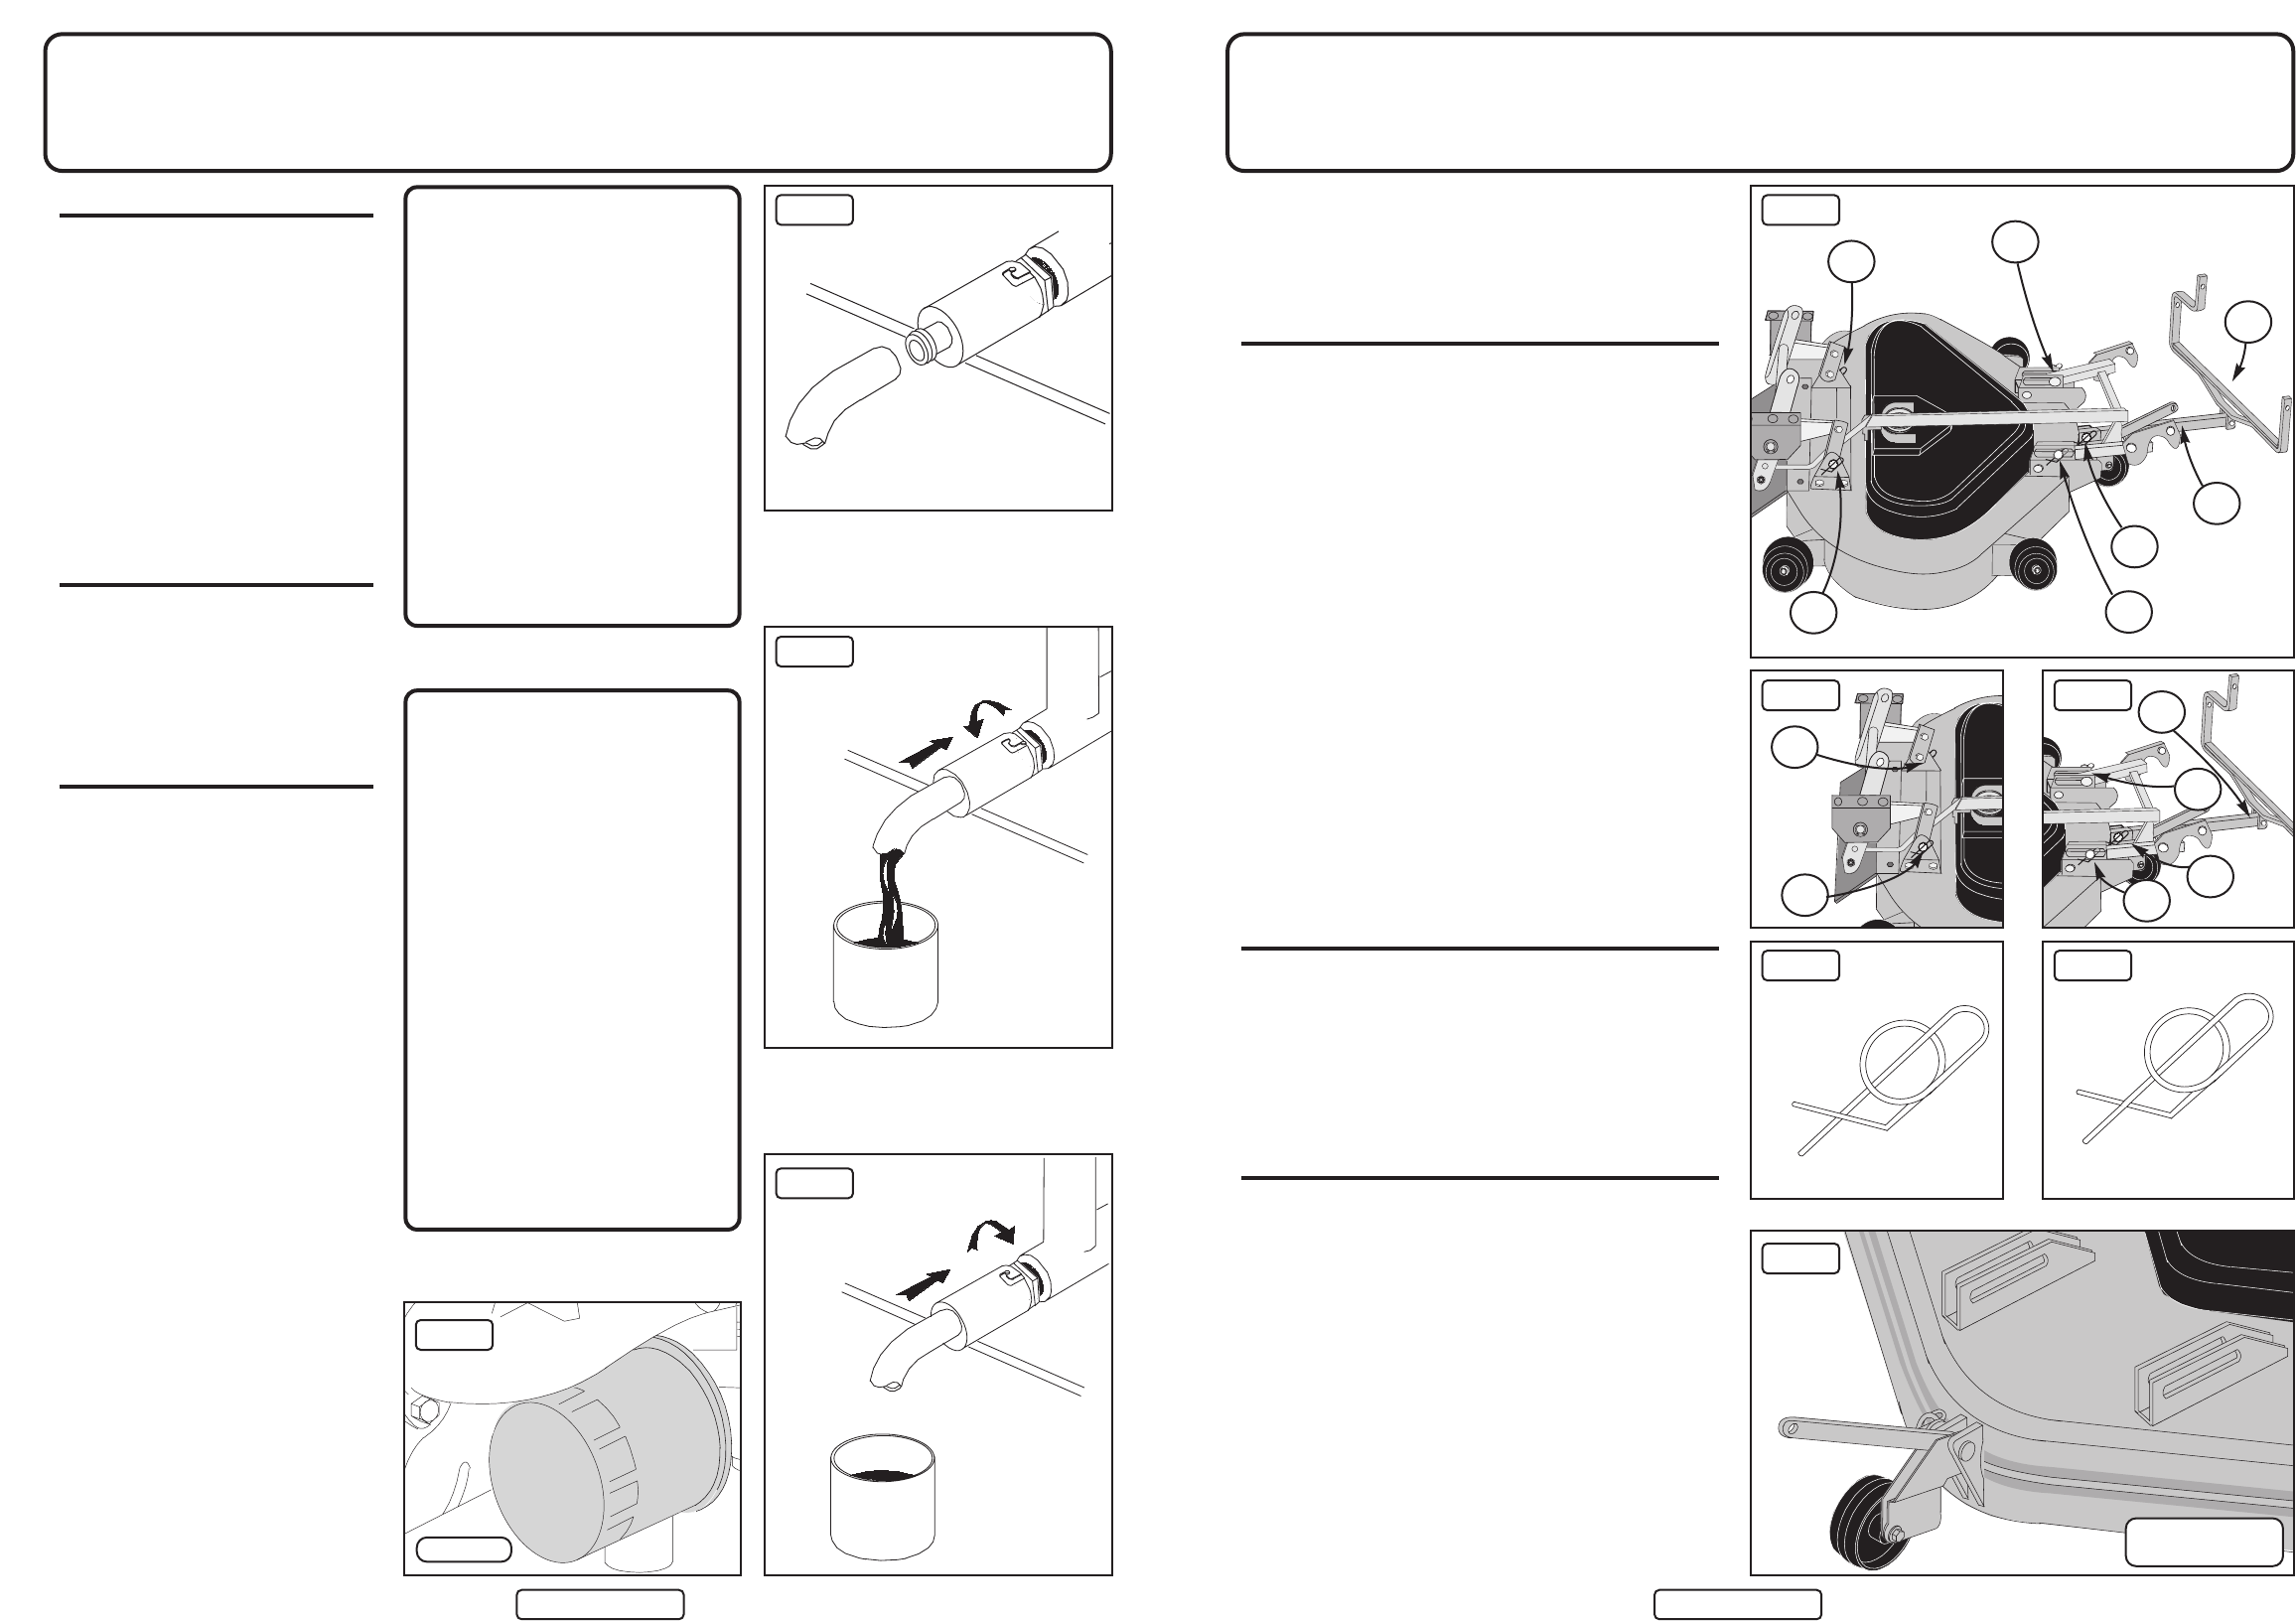
Cutter Deck Removal
(Mulch/Rear Discharge Deck)
Engine - Oil
The Rear Discharge Deck is used in conjunction with the
PGC. It ejects the grass rearwards after cutting for the
Powered Grass Collector to collect. Either the Mulch Deck or
the Rear Discharge Deck can be fitted to the A20/50 using the
following instructions:
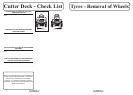
REMOVAL OF CUTTER DECK
The cutter deck can be quickly removed for servicing or
cleaning or to give greater clearance when driving or towing
over uneven ground.
Follow this sequence:
1. Put cutter to lowest position.
2. De-tension the Cutter Drive Belt with the lever under the
left (nearside) running board.
3. Remove the 3 securing pins from the front of the deck
(fig 3 – A, B and C) by pulling out the spring clips.
4. Remove pin G and remove deck tension bar.
5. Remove fifth anti-scalp wheel (fig 6)
6. Remove the 2 securing pins from the back of the deck
(fig 2 – D and E).
7. Slip the Cutter Drive Belt off the Engine Pulley.
8. Slide the deck out.
9. If you are going to use the Tractor without the deck, remove
the Securing Bar (F).
WHEN REPLACING THE CUTTER DECK, RE-TENSION
THE BELTWITH THE LEVER UNDER THE RUNNING
BOARD. Then check the belt tension (see page 13).
TO CLEAN CUTTER DECK
Remove the deck as instructed, stand it on its side and hose off
accumulated cuttings. This may be necessary routinely to
prevent build-up of cuttings, particularly at the beginning of
the season when the grass is lush and wet. Thoroughly wash
the underside of the cutter deck as regularly as possible.
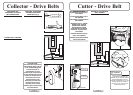
ENGINE TO CUTTER DRIVE BELT
REPLACEMENT
Follow this sequence:
1. Pull the Belt Tension Lever (page 13 fig 1) forward.
2. Lower the Cutter Deck to the lowest position.
3. Remove the belt from the forward Electric Clutch Pulley –
it will slip off.
4. Remove the Cover of the Cutter Deck Pulley Housing –
loosen and remove the 1/4" UNF nut and bolt using two
7/16" spanner/sockets – then slide (tap) the cover off.
5. Remove the belt from the Cutter Deck Pulley – you may
have to ease it off by rotating the pulley.
6. Now replace with the CORRECT BELT (see previous page)
by reversing this procedure, taking care to fit the belt
into the ‘V’grooves.
7. Pull back the Belt Tension Lever so the belt is tensioned.
Now check and adjust belt tension as detailed on page 13.
fig 1
fig 2
fig 4
fig 3
fig 5
SECUREDUNSECURED
C
B
A
F
G
D
E
D
E
F
C
B
A
fig 6
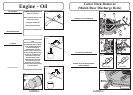
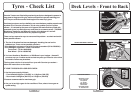
OIL DRAINING
NOTE: OIL SHOULD BE CHANGED
WITHOUT FAILAFTER THE FIRST
FIVE HOURS OF RUNNING.
The A20/50 Tractor has an oil drain
adaptor (fig 1) located on the right hand
(off side) of the engine. This is like a
bayonet light fitting, which you push in
and turn anti-clockwise to release. A
short length of clear hose is supplied in
the toolkit that fits on this adaptor so that
waste oil can be poured into a can or
bottle.
BEFORE DRAINING
* Start up the engine and allow to idle
until it is warm (about five minutes).
* Switch off the engine, lift open the
bonnet, and unscrew the oil
cap/dipstick.
TO DRAIN
* Locate the Oil Drain (fig 1).
* Remove the Yellow Dust Cap.
* Fit the short length of hose supplied
over the nozzle of the adaptor (see fig
2) and direct the other end into a
container large enough to take 2 litres
of waste oil.
* Press the adaptor in; turn anti-
clockwise to lock (fig 3). Remove hose
and store for next use. Replace Yellow
Dust Cap.
* Refill with recommended oil (SAE30
detergent oil classified for service -
SG, SF, SE) to engine manufacturer’s
instruction.
DO NOT OVERFILL
The use of lubricants that are not
recommended may lead to excessive
wear or damage - and this will NOT be
covered by warranty.
ALWAYS READ AND FOLLOWTHE
ENGINE MANUFACTURER’S
INSTRUCTIONS ON ALLMATTERS
RELATING TO USE AND
MAINTENANCE. OBSERVING THE
OIL CHANGE INTERVALS WILL
GREATLY ENHANCE THE SERVICE
LIFE OF YOUR ENGINE!
N.B.
The information contained in
the following pages is given
on the understanding that
Countax accepts no
responsibility for work
carried out by a customer or
for any damage thus caused
whether or not the service
instructions have been
misunderstood. To be
absolutely sure that your
warranty terms are not
breached, service work
should only be carried out by
a Countax dealer.
Before carrying out any
repair or servicing
Ensure that the Tractor is on
a firm level surface.
Apply the handbrake.
Disconnect the battery.
Extinguish all naked flames.
Oil Filter
fig 4
fig 1
fig 2
fig 3
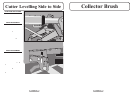
Removal of Fifth
Anti-scalp wheel