3
provide reasonable protection against harmful interference in a residential
installation. This equipment generates, uses and can radiate radio frequency
energy and, if not installed and used in accordance with the instructions,
may cause harmful interference to radio communications. However, there is
no guarantee that interference will not occur in a particular installation. If this
equipment does cause harmful interference to radio or television reception,
which can be determined by turning the equipment off and on, the user is
encouraged to try to correct the interference by one or more of the following
measures:
• Reorient or relocate the receiving antenna.
• Increase the separation between the equipment and receiver.
• Connect the equipment into an outlet on a circuit different from that to
which the receiver is connected.
• Consult the dealer or an experienced radio/TV technician for help.
• Fixture must be connected to a 120 Volt, 60 Hz power source. Any other
connection voids warranty.
• Installation must be in accordance with the National Electrical Code
and local building codes.
• Aim lampholder adapter a minimum of 15 degrees below horizontal.
• Locate motion sensor a minimum of 3” away and below lampholder.
• For proper operation and protection against damage, the motion sensor
head adjustment knobs must be facing the ground.
• Use maximum 150W BR type bulb. This retrofit unit is not designed to use
with double-walled PAR 38 type bulbs.
• Do not exceed maximum wattage marked on existing fixture.
• Disassembly of your adapter will void the warranty.
SAVE THESE INSTRUCTIONS.
For best results
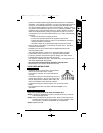
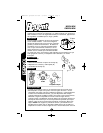
• Install your fixture 6-10 feet above ground (motion
detector is less sensitive above 10 feet).
• Locate fixture so motion moves across detection
zone (D).
• Locate fixture away from heat producing sources to
prevent false triggering. Also be very careful not to
include objects such as windows, white walls, and
water in the detection zone whenever possible.
• Locate fixture away from moving objects such as trees and street
traffic.
• Do not install more than one motion-activated floodlight on one
wall switch.
Installation and mounting
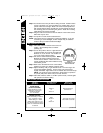
Step 1: Turn off the power at the main fuse/breaker box.
Step 2: If necessary, allow bulb in fixture to cool before removing. Remove
bulb from the light socket.
Step 3: Screw the adapter into the light socket. Make sure the coiled cord
protrudes from the bottom of the adapter once it is installed. It may
be necessary to rotate the lampholders to accomplish this.
Step 4: Replace the bulb.
D
Installation and mounting
MSRU180W spreads 300-1052 8/12/05 10:52 AM Page 3


