Operation
Q-Spot™ 460-LED User Manual Rev. 5 13
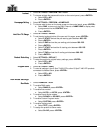
Lockout
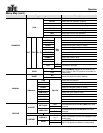
1. Select SETTINGS > PERFORM > KEY LOCK.
2. To choose activate the password function on the control panel, press <ENTER>.
a. Select YES or NO.
b. Press <ENTER>.
Homepage Setting
1. Select SETTINGS > PERFORM > HOMEPAGE.
2. To choose what to show on the home screen on the control panel, press <ENTER>.
a. Select DMX, to show only the DMX Channel or NAME+DMX to display what
is programmed via the CONTENT level.
b. Press
<ENTER>
.
Limit Pan/Tilt Range
1. Select SETTINGS > RANGE.
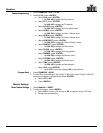
2. To set the start and end points of the pan and tilt ranges, press <ENTER>.
a. Select P.START and set the pan starting point between 000~255.
b. Press <ENTER>.
c. Select P.END and set the pan ending point between 000~255.
d. Press <ENTER>.
e. Select T.START and set the tilt starting point between 000~255.
f. Press <ENTER>.
g. Select T.END and set the tilt ending point between 000~255.
h. Press
<ENTER>
.
Product Defaulting
1. Select SETTINGS > DEFAULT.
2. To reset the product to original factory settings, press <ENTER>.
a. Select YES or NO.
b. Press
<ENTER>
.
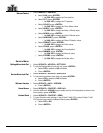
Program Send
1. Select SETTINGS > SEND.
2. To send all settings in the Q-Spot™ 460 LED to other Q-Spot™ 460 LED products
connected via Master/Slave, press <ENTER>.
a. Select YES or NO.
b. Press
<ENTER>
.
Run Mode Settings
Run Mode
1. Select RUNMODE > RUN.
2. To enable DMX mode:
a. Select DMX512, press <ENTER>.
3. To enable Auto modes:
a. Select AUTO1 or AUTO2, press <ENTER>.
4. To enable Sound-Active modes:
a. Select SOUND1 or SOUND2, press <ENTER>.
5. To enable Custom Program mode:
a. Select CUSTOM, press <ENTER>.
6. To enable Testing mode:
a. Select TEST, press <ENTER>.
7. To assign the product to Slave mode:
a. Select SLAVE, press <ENTER>.


