


9
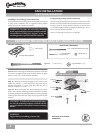
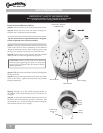
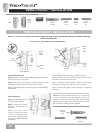
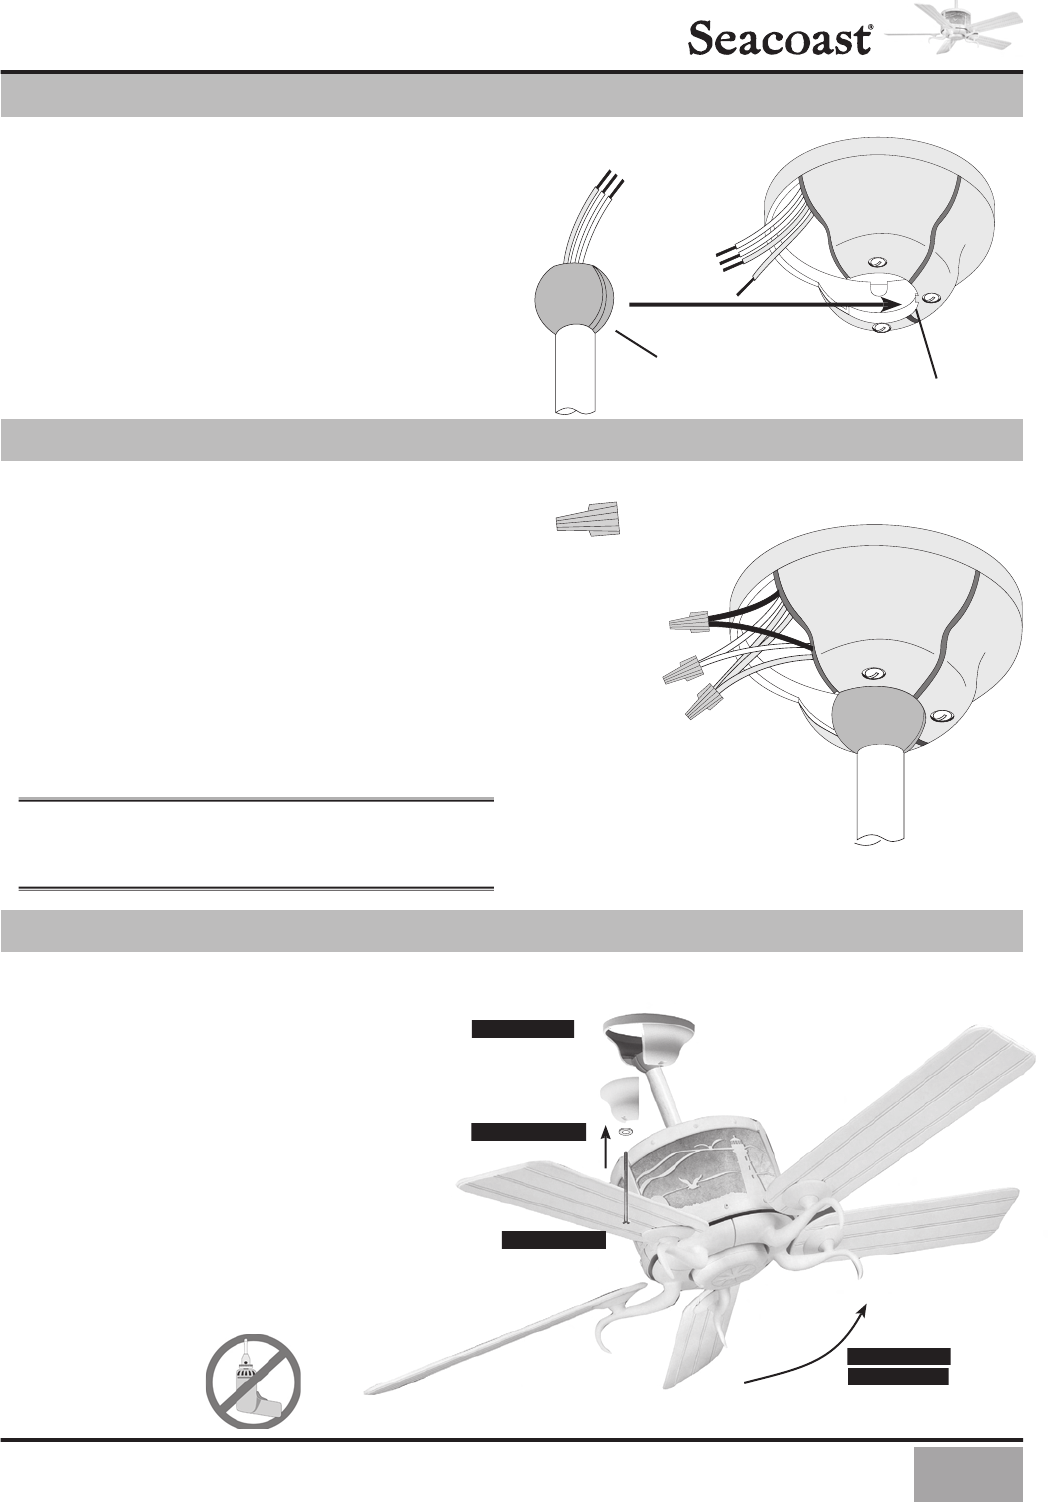
Canopy Washer
Canopy Screw
Canopy Hatch
Step 9a.
Tuck the wires into the canopy
with the wire nuts pointed upwards so
that the WHITE and BLACK wires are
on opposite sides of the canopy and all
wires are clear of the canopy opening.
Step 9b.
Install the canopy hatch with the
last canopy screw and lock washer using
the provided Phillips screwdriver. To do
this, tilt the fan body away from the hatch
opening. Tighten the screws fi rmly.
Step 9c.
Straighten the fan, then check
to ensure that there is no movement
between the canopy and the ceiling or
the Perma•Lock™ downrod and the ball
assembly.
CANOPY HATCH INSTALLATION
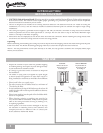
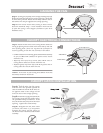
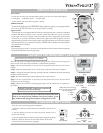
Step 8
. Attach the fan wires to the ceiling fi xture outlet box
wiring by placing the bare ends of the wires side by side and
then securing with a wire nut. Test that the connection is
secure by pulling on the wire nut. Connect in this order:
• GREEN leads from mounting plate and downrod assembly
of fan to GROUND conductor of power source. Secure
with wire nut.
• WHITE wire from fan to white NEUTRAL wire in
ceiling fi xture outlet box. Secure with wire nut.
• BLACK power wire from fan to BLACK power wire in
ceiling outlet box. Secure with wire nut
NOTE:
If the color of your ceiling wires diff ers from that
described, consult an electrician.
2 White Wires
2 Black Wires
Wire Nut
3 Green Wires
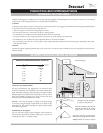
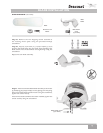
Step 7a.
To hang the fan body in the canopy, hold the fan body
fi rmly and insert the ball into the canopy opening. Check that
no wires were pinched. Rotate the fan body until the slot in
the ball fi ts into the pin opposite the canopy opening.
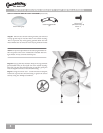
Step 7b.
Trim excess motor wires, leaving at least 6 inches
above the downrod. Strip
1
/
2
-inch insulation from the end
of each wire using a wire stripper (available at your local
hardware store).
Pin
Slot
Ball
HANGING THE FAN
CANOPY ELECTRICAL CONNECTIONS
Tilt away from
hatch opening