


8
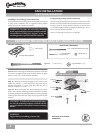
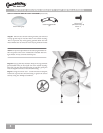
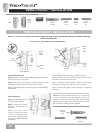
Step 6b.
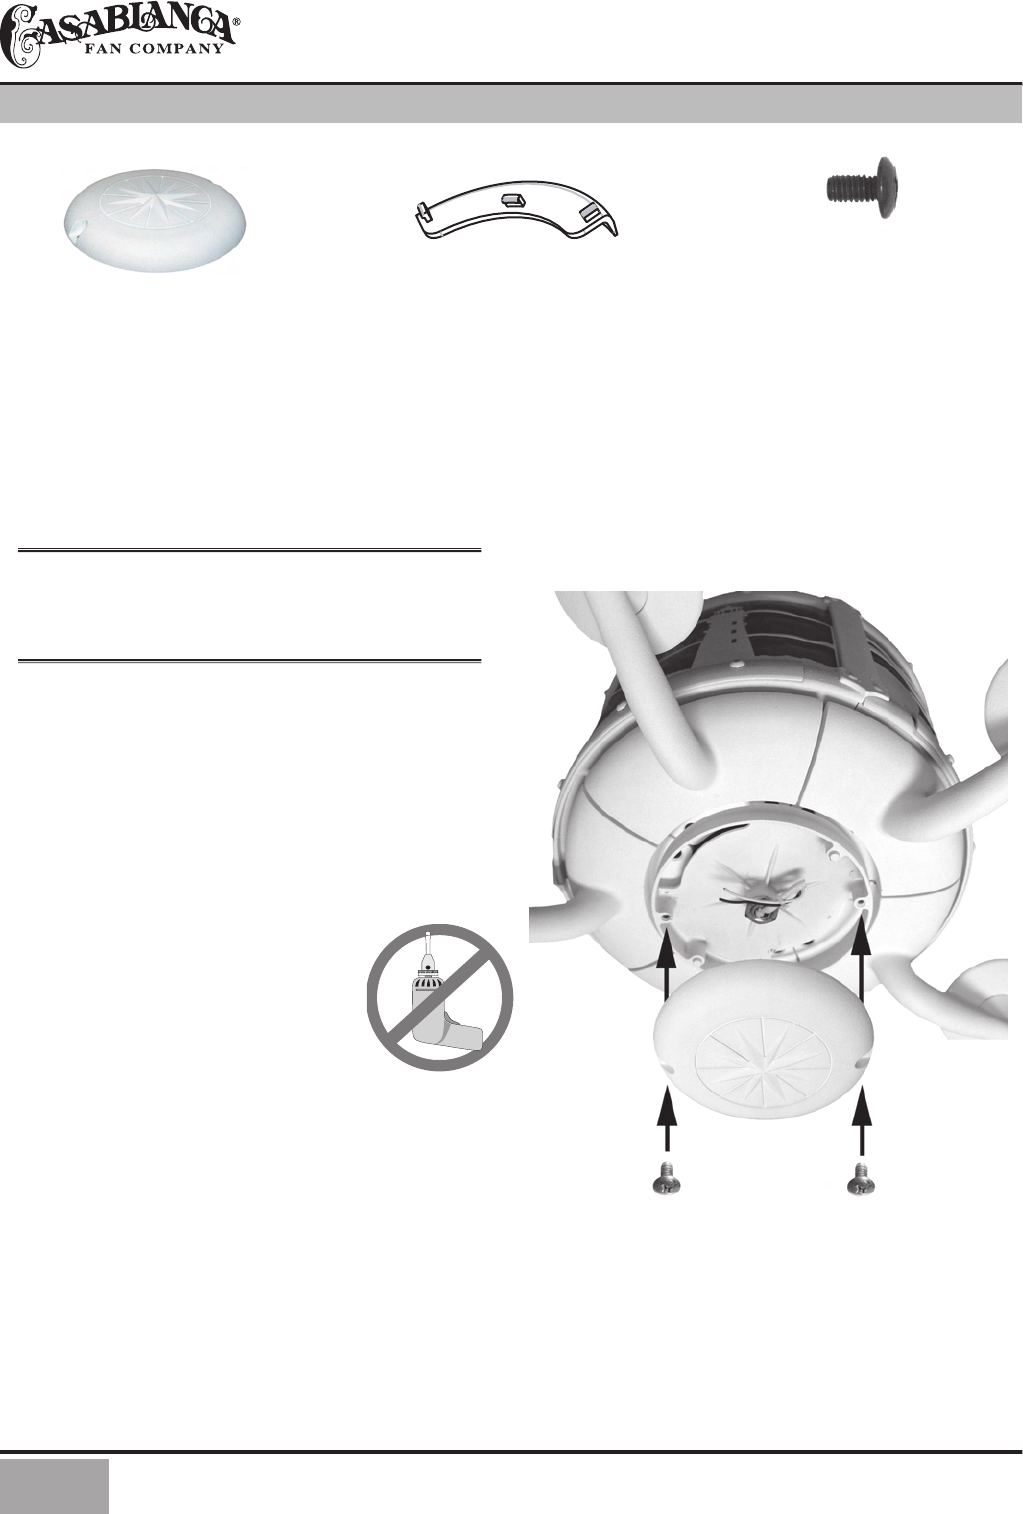
Line up the two clearance holes in the cap with the
two threaded holes on the raised rim of the switch housing.
Press the cap onto the switch housing to seat the guide pins
into the alignment holes of the switch housing.
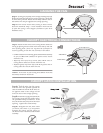
Step 6c.
Using the two 8-32
3
/
8
ʺ
screws removed in Step 4h,
install the cap onto the switch housing. Tighten the screws
securely using the Phillips screwdriver.
NOTE:
If you have purchased an accessory light fi xture for
this fan, please refer to the instructions included with the
light fi xture. If not, continue with Step 6b.
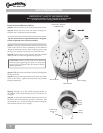
Switch Housing
Mount Screw
(Removed in Step 10)
8-32 X
3
/
8
(2)
Switch Housing Cap
SWITCH HOUSING BRACKET/ CAP INSTALLATION
Switch Housing Bracket
(2)
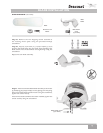
Step 6a.
Take the two switch housing bracket you removed
in step 4g and snap it into the holes in the switch housing.
is is to prevent any wires getting pushed down near the
motor. Make sure no wires are in the way or pinched in these
SWITCH HOUSING BRACKET/CAP HARDWARE
(not to scale)