


5
www.chpower.com
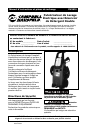
PW1810
PRESSURE WASHER
INFORMATION
Specifications:
Maximum pressure . . . . . . . . . .1800 psi
Maximum capacity . . . . . . . . . .1.6 gpm
Voltage . . . . . . . . . . . . . . . . . . . . .120 V
Current . . . . . . . . . . . . . . . . . . .13 amps
Maximum water inlet
temperature . . . . . . . . . . . . . . . . .100°F
Unit weight . . . . . . . . . . . . . . . . . .51 lbs
REVIEW SAFETY INSTRUCTIONS
BEFORE OPERATING THIS UNIT!
Pre-operation Instructions
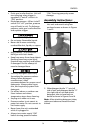
System Connection
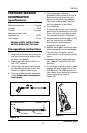
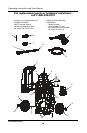
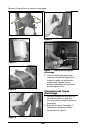
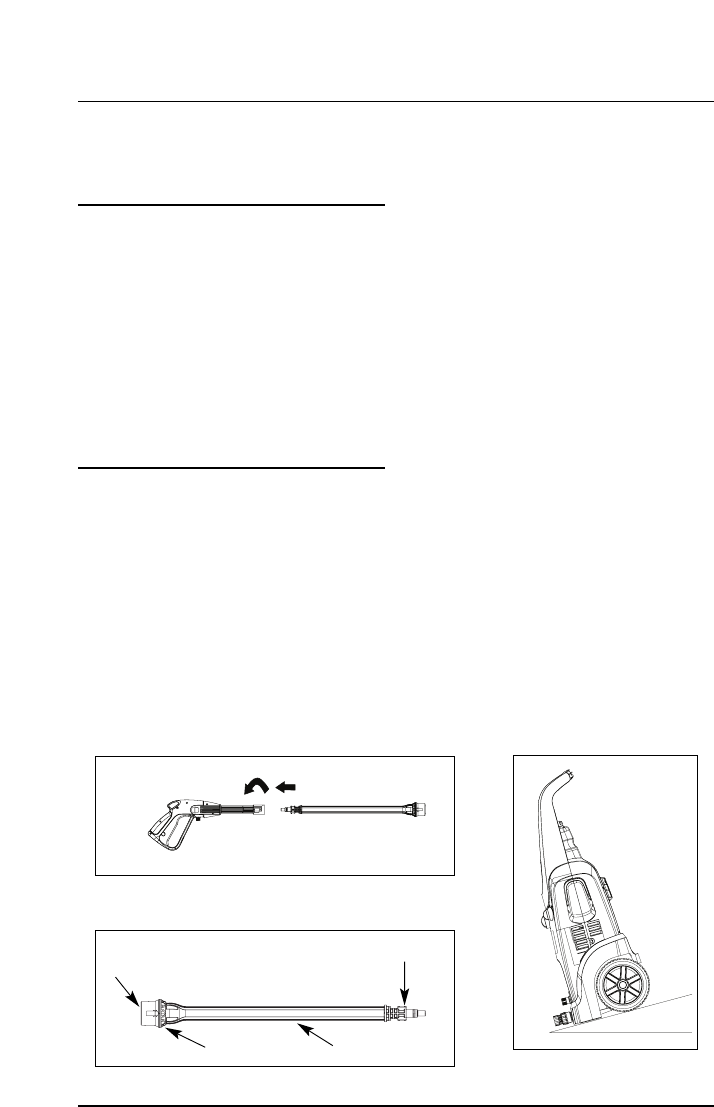
1. Insert quick connect lance into gun
and turn clockwise to positive stop
as shown in Figure 8.
2. Ensure that the power switch is in
the “OFF” position.
3. Attach the high-pressure hose and
gun assembly to pump outlet. Use
wrench to tighten hose to gun.
4. Connect garden hose as explained
under Garden Hose Connection
Instructions.
5. Plug the power cord into a
grounded 120V outlet, that is on a
dedicated circuit. Press the reset
button on the GFCI plug adapter.
This must be done each time the
unit is plugged into an outlet.
6. Turn water on.
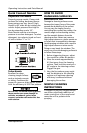
7. If operating the unit on an inclined
plane such as a driveway or hill, the
front of the unit must face toward
the descent as shown in Figure 9.
8. Depress and hold the trigger on the
gun for one minute to release
pressure and remove any air
trapped in the system.
9. Release the trigger and firmly insert
either the quick connect adjustable
fan nozzle or the quick connect
turbo nozzle into the quick connect
lance.
10.Squeeze the gun trigger and turn
the “ON/OFF” switch to the “ON”
position.
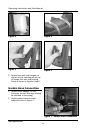
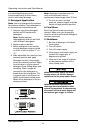
11.To exchange a quick connect nozzle
engage the gun trigger lock in the
safe position. Pull sliding collar on
lance away from nozzle and remove
nozzle from lance (refer to
Figure 10).
Figure 8
Figure 9
Figure 10
Collar
Lance
Bayonet tabs
Nozzle attaches
here