


Cabela’s
®
Gun Dog
®
— Owner’s Manual
3
Cabela’s
®
Gun Dog
®
— Owner’s Manual
2
C
C
a
a
b
b
e
e
l
l
a
a
’
’
s
s
®
®
G
G
u
u
n
n
D
D
o
o
g
g
®
®
R
R
e
e
m
m
o
o
t
t
e
e
T
T
r
r
a
a
i
i
n
n
e
e
r
r
K
K
i
i
t
t
to Charge Cradle
GS-7001
Transmitter
Quick Start Guide
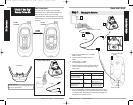
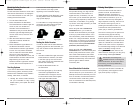
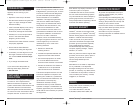
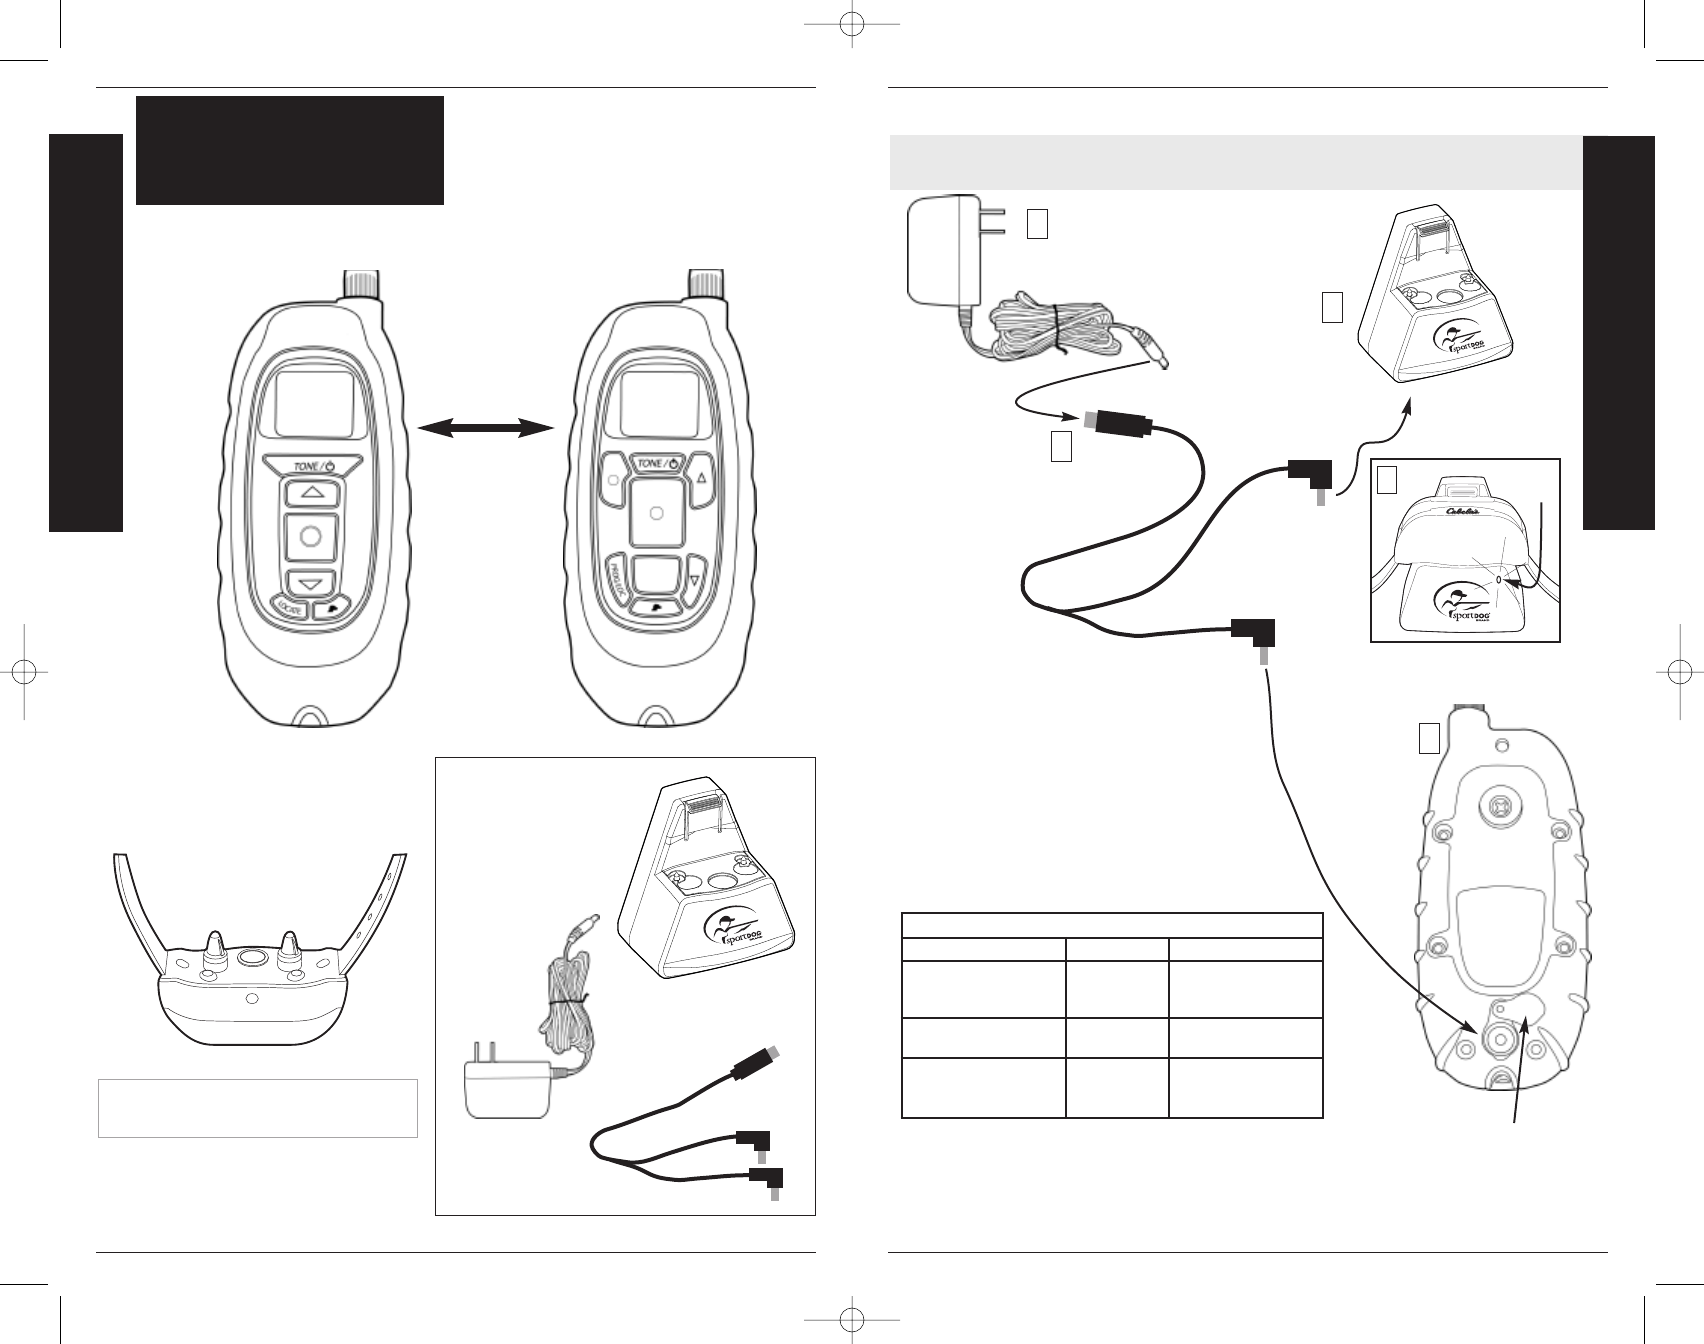
SStteepp 11
CChhaarrggiinngg tthhee BBaatttteerriieess
1. Plug the AC Adapter into a 120VAC
electric outlet.
2. Connect the AC Adapter to the “Y”
cable.
3. Connect the “Y” cable
to the Charge Cradle.
4. Put the Receiver on the Charge Cradle as
shown in figure 4 (both logos are on the
same side).
5. On the Transmitter, move the Charge Port Cover away
from the Charge Port. Connect the remaining end of the
“Y” cable to the Transmitter’s Charge Port. Charge the
transmitter for at least 2 hours.
“Y” Cable
AC Adapter
t
o
T
r
a
n
s
mi
t
t
e
r
Ch
a
r
g
e
P
o
r
t
Back view of Transmitter
1
2
3
5
From AC Adapter to “Y” Cable
AC Adapter
Gun Dog
®
Charging System
Charge Cradle
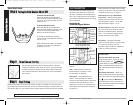
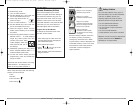
FIRST THINGS FIRST
Y
ou will need to charge your Gun Dog
®
®
Transmitter and Collar Receiver before you
can use them. While your Gun Dog
®
®
Transmitter and Collar Receiver are charging,
read this manual to become familiar with the
devices.
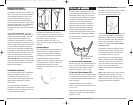
Gun Dog
®
Hardware
includes Antenna,Test Light, Lanyard, Belt Clip, Long
Contacts, and Contact Wrench.
Charge Port Cover
K
K
i
i
t
t
C
C
o
o
n
n
t
t
e
e
n
n
t
t
s
s
Q
Q
u
u
i
i
c
c
k
k
S
S
t
t
a
a
r
r
t
t
G
G
u
u
i
i
d
d
e
e
Collar Receiver
GS-6001
Transmitter
“Y” Cable
OR
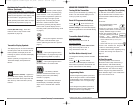
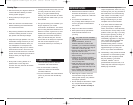
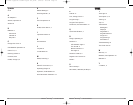
CHARGE CRADLE INDICATOR LIGHT
OPERATIONAL MODE
LIGHT COLOR
LIGHT FUNCTION
No Collar Receiver on
the Charge Cradle but
charger is connected
Green
Light is solid in color
Unit is charging
Red
Light is solid in color
while charging
Unit is fully charged
(Collar Receiver on
Charge Cradle)
Green
Light flashes once per
second once the battery
is completely charged
Receiver
Light
4
400-1139-1.qxp:two column layout for print 9/25/09 4:03 PM Page 2