


ASSEMBLY
2387 01/11 Assembly Section 3-6
© 2011 Alamo Group Inc.
ASSEMBLY
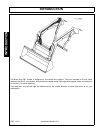
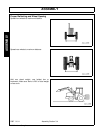
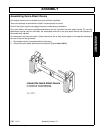
Mounting Loader
Mounting is basically reverse of dismounting.
1. Slowly drive tractor up to loader until hoses will reach from loader to tractor. Engage tractor brakes and
shut off tractor engine.
2. Make sure quick couplers are clean and connect between tractor and loader, matching color coded bands.
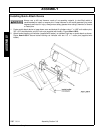
3. Remove bolts, nuts and washers from hinge.
4. Start tractor engine and release tractor brakes. Slowly drive tractor ahead until front mounting brackets are
directly under loader catch flats. Activate lift control lever so that catch flats hook securely on front
mounting bracket tubes. Continue driving loader forward while rolling the loader on the front mounting
bracket tubes until side frame uprights are fully resting on midmounting assembly. Engage tractor brakes
and shut off engine.
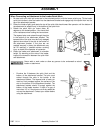
5. Hook rubber strap around hoses and back on itself. Attach other end of rubber strap to bolt at front of
corner or side frame.
6. Clamp hinge assembly around midmounting tube. Install bolts, washers and nuts. Torque cap screws to
126 Ft. Lbs.
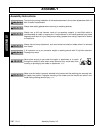
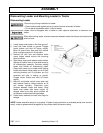
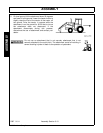
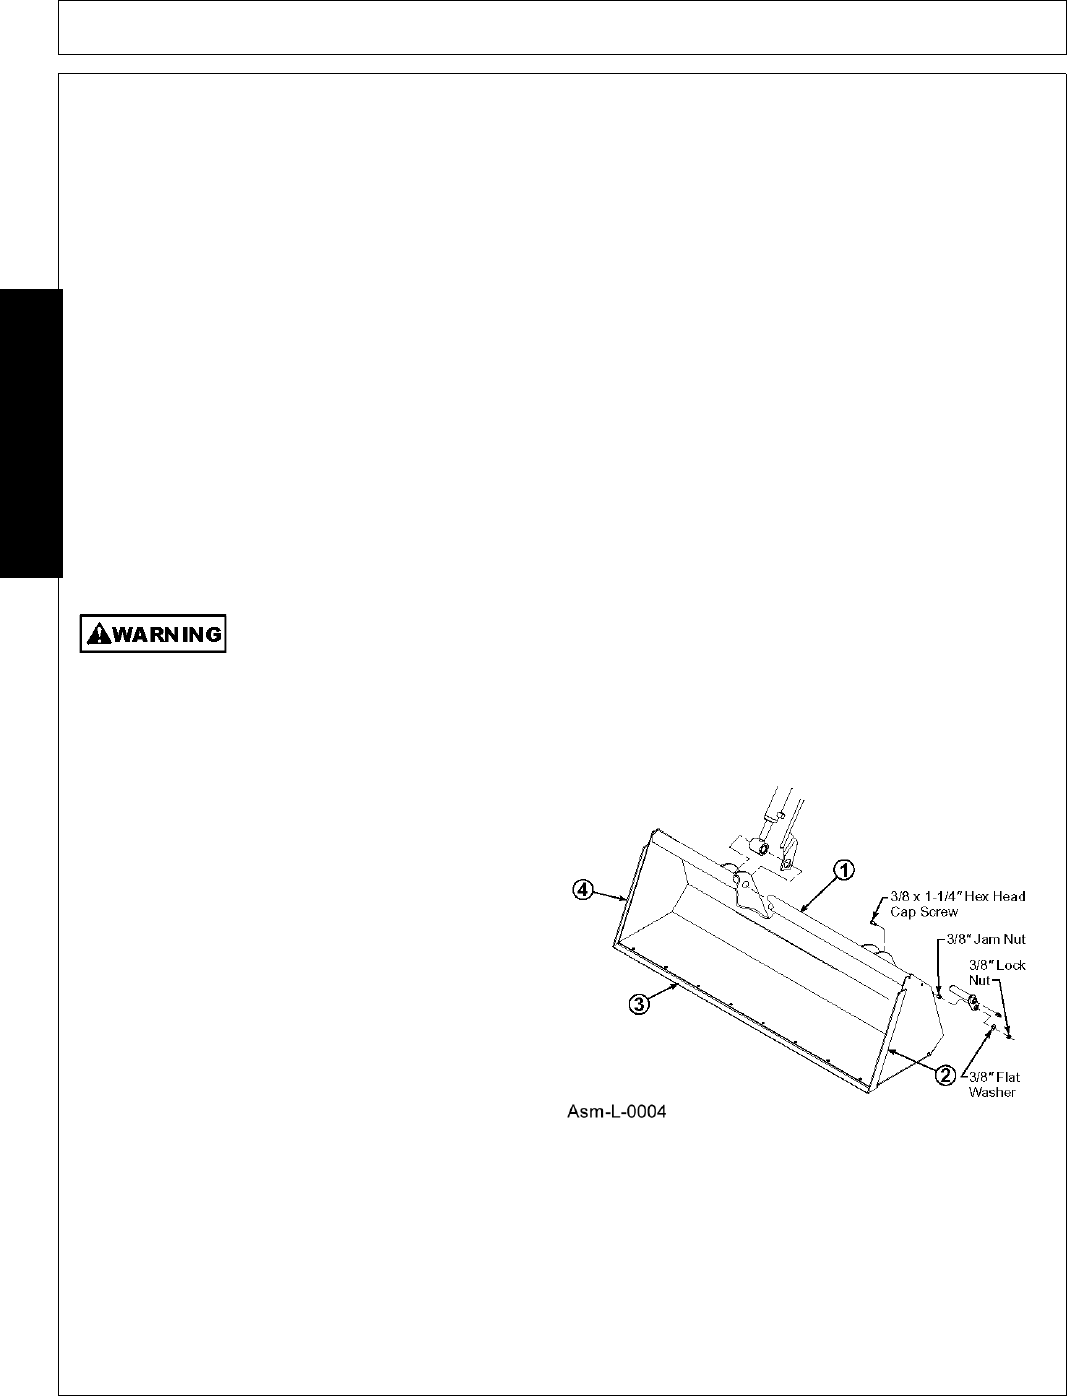
Attaching Pin on Bucket
Always wear safety glasses when removing or installing buckets.
Material bucket can be installed using tool ordinarily available.
1. Attach bucket to lift boom frame and cylinders
with four 1” pins, use two 3/8 shoulder bolts and
3/8 lock nuts at upper pin (bucket cylinder). Use
two 3/8 x 1.25 hex bolts, 3/8 jam nut, 3/8 flat
washer and 3/8 lock nut at lower pin. Position
bolt with head on inside of outer bucket ear.
Fasten bolt to ear using 3/8 jam nut. Install pin
so pin head is over jam nut and retain with 3/8
flat washer and 3/8 lock nut.
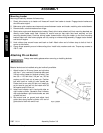
2. Install level indicator rod in level guide tube on
right bucket cylinder. Sandwich level indicator
rod angle between right inside bucket ear and
cylinder rod end.
3. Set bucket level on ground and adjust level
guide tube along bucket cylinder until end of
guide tube is flush with end of rod.