


17
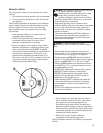
Engine Coolant System
It is important that the cooling system of the engine be
maintained properly to ensure proper performance and
longevity.
The cooling system must be maintained according to the
recommended maintenance schedule and inspection should
include:
• The regular removal of dust, dirt, and debris from the
radiator core and fan shroud.
• Inspection of coolant hoses and components for leaks,
especially at the radiator hose connections. Tighten
hose clamps if necessary.
• Check radiator hoses for swelling, separation,
hardening, cracks, or any type of deterioration.
• Inspect the radiator cap to ensure proper sealing.
NOTICE: Alcohol or methanol based anti-freeze or plain
water are not recommended for use in the cooling system at
any time.
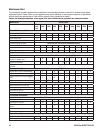
With the engine cold, check the coolant level in the coolant
recovery bottle (see Controls). Specifications for the coolant
system can be found in the Maintenance chart of this manual.
Coolant Specification - ethylene glycol 50-50 mixture w/
distilled water.
Coolant
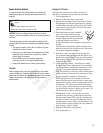
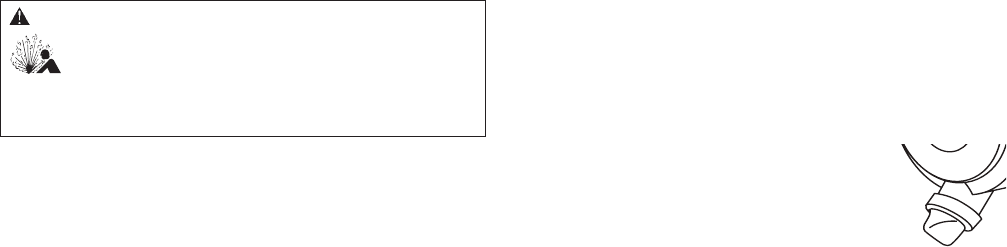
WARNING Hot pressurized coolant could cause serious
injury.
• DO NOT open radiator cap when hot.
• Before servicing, allow coolant to cool.
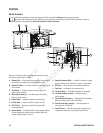
Engine Air Cleaner
Once each year service the air cleaner, as follows. If
operating in a dusty environment, service more often.
1. Turn the generator off.
2. Remove 15 Amp fuse from control panel.
3. Remove filter cartridge - Remove the service cover by
disengaging three clips and detaching cover, starting
with the bottom two clips and the top clip last. Gently
move the end of the filter back and forth, then rotate
while pulling straight out.
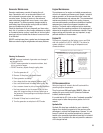
4. Clean outlet tube and check Vacuator™
valve - Use a clean cloth to wipe the
filter sealing surface and the outlet tube
surfaces. Make sure that all contaminant
is removed before the new filter is
inserted. Be careful to not damage the sealing area on
the tube.
Visually check and physically squeeze Vacuator valve
attached to service cover to make sure it is flexible and
not inverted, damaged orplugged.
5. Clean filter - Use a soft bristle brush to loosen dirt
and a vacuum cleaner to remove dirt and debris. Low
pressure air (not to exceed 25 psi) may also be used to
blow away dirt. Replace filter cartridge if any holes are
detected in filter media.
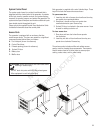
6. Install clean filter properly - Insert the filter carefully.
Seat the filter by hand, making certain it is completely
into the air cleaner housing before securing the cover
in place. To complete a tight seal, apply pressure by
hand at the outer rim of the filter, not the flexible center.
(Avoid pushing on the center of the urethane end cap.)
No cover pressure is required to hold the seal.
NEVER use the service cover to push the filter into
place! Using the cover to push the filter in could cause
damage to the housing, cover, or fasteners and will void
the warranty. If the service cover hits the filter before
it is fully in place, remove the cover and push the filter
(by hand) further into the air cleaner and try again. The
cover should go on with no extra force.
7. Reinstall service cover - Once the filter is in place,
reinstall the service cover, positioning the cover with
the arrow and the word TOP to the top. Fasten the top
clip first, the bottom two clips last. Make sure that all
mounting bands, clamps, bolts, and connections in the
entire air cleaner system are tight and verify absence of
holes in piping - repair if needed.
8. Replace 15 Amp fuse in control panel.
9. Turn the generator on.
NOT
for
REPRODUCTION