


10
www.briggsandstratton.com
8. Repeat Steps 2 through 7 until no leaks are detected.
DO NOT use the generator if leaks cannot be
stopped. Contact a qualified LP fuel professional for
assistance.
9, Turn OFF both LP fuel tank shut off valves until you
are ready to use the generator.
10. Wash off soapy residue with clean cold water and
towel dry.
11. Wait five minutes to allow all gas to evacuate the area
before starting the generator.
NOTE: The leak test must be performed in an area that
has adequate lighting in order to see if bubbles are
developing. DO NOT use a flashlight to check for bubbles.
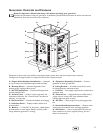
To Remove LP Fuel Tank(s)
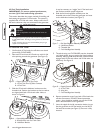
1. Confirm the LP fuel tank shut off valve is closed
(turned fully CLOCKWISE).
2. Disconnect the fuel hose from the LP tank by turning
the large coupling nut COUNTERCLOCKWISE by
hand (see Figure 9).
3. Install the protective cover over the LP fuel tank shut
off valve outlet.
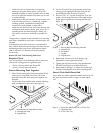
4. Remove wing nut from threaded rod by turning it
COUNTERCLOCKWISE. Lift and remove the fuel
hose/regulator assembly from the threaded rod. See
Figures 7 and 8.
5. Lift and remove the LP tank hold-down bracket from
threaded rod (see Figure 6). It may be necessary to
wiggle the LP fuel tanks to release the hold-down
bracket.
6. Carefully lift the LP fuel tank off the LP fuel tank tray.
Verify Engine Oil Level
The generator engine is shipped from the factory filled
with synthetic oil (API SJ/CF 5W-30W). This allows for
generator operation in the widest range of temperature
and climate conditions. Before starting the engine, check
oil level and ensure that engine is serviced as described in
“Maintenance”.
NOTE: The use of synthetic oil does not alter the
required oil change intervals described in the
Maintenance section.
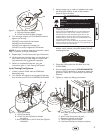
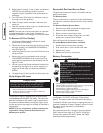
Removable Roof and Access Door
The generator enclosure includes a removable roof and
battery access door.
To Remove Roof:
There are two screws on each side of the roof located in
the half-moon roof slots. Remove the four screws and lift
roof off.
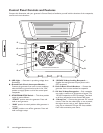
To Remove Battery Access Door:
1. Disconnect any loads connected to the generator.
2. Remove roof as described above.
3. Remove screw at top of access door.
4. Pull access door outward (away) from unit while
pulling door upward and out of base.
Door will come free of generator enclosure.
To Install Battery Access Door and Roof:
1. Guide bottom of access door into base.
2. Push access door in until it is flush with sides.
3. Replace door screw.
4. Replace roof and four roof screws.
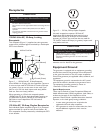
Battery Connection
The generator is supplied with a sealed, lead-acid
rechargeable 12 Volt DC, AGM type, 33 Amp-Hour,
battery. The battery cables are connected at the factory.
The battery will lose some charge in shipping and prior to
generator installation. If battery voltage is too low to start
the engine, charge the battery, as described in
“Maintenance”.
If the battery fails to take a charge, it must be replaced
ONLY with the same type of 12 Volt DC, AGM type,
33 Amp-Hour battery. DO NOT replace with liquid
electrolyte lead-acid type battery.
CAUTION
• Refer to Maintenance for oil fill information.
• Damage to equipment resulting from failure to follow this
instruction will void warranty.
Any attempt to crank or start the engine without
verifying it has been properly serviced with the
recommended oil will result in equipment failure.
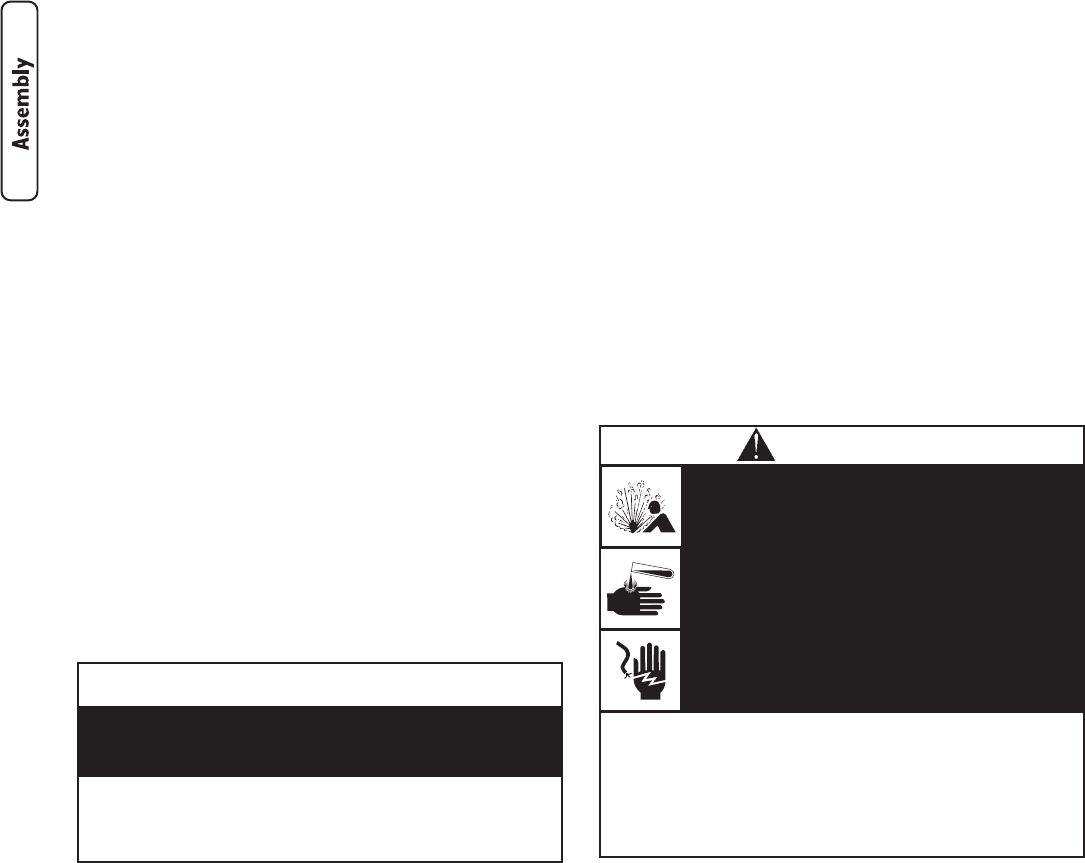
• DO NOT dispose of battery in a fire.
• DO NOT allow any open flame, spark, heat, or lit cigarette during
and for several minutes after charging a battery.
• DO NOT open or mutilate the battery.
• Wear protective goggles, rubber apron, and rubber gloves.
• Remove watches, rings, or other metal objects.
• Use tools with insulated handles.
Storage batteries give off explosive hydrogen
gas during recharging.
Slightest spark will ignite hydrogen and cause
explosion.
Battery electrolyte fluid contains acid and is
extremely acidic.
Contact with battery contents will cause severe
chemical burns.
A battery presents a risk of electrical shock and
high short circuit current.
DANGER