


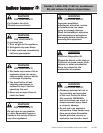

Contact 1-800-762-1142 for assistance.
Do not return to place of purchase.
®
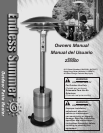
Owner’s manual: model 235000 outdoor patio heater 6/11/04
3
Contact 1-800-762-1142 for assistance.
Do not return to place of purchase.
®
Owner’s manual: model 235000 outdoor patio heater 6/11/04
4
Safety First!
Read and become familiar with this entire manual, especially the following
precautions.
If you are unsure of anything in these instructions, STOP and contact
1-800-762-1142 for assistance.
Caution: This appliance is for outdoor use only (outside any
enclosure). Always make sure there is fresh air ventilation.
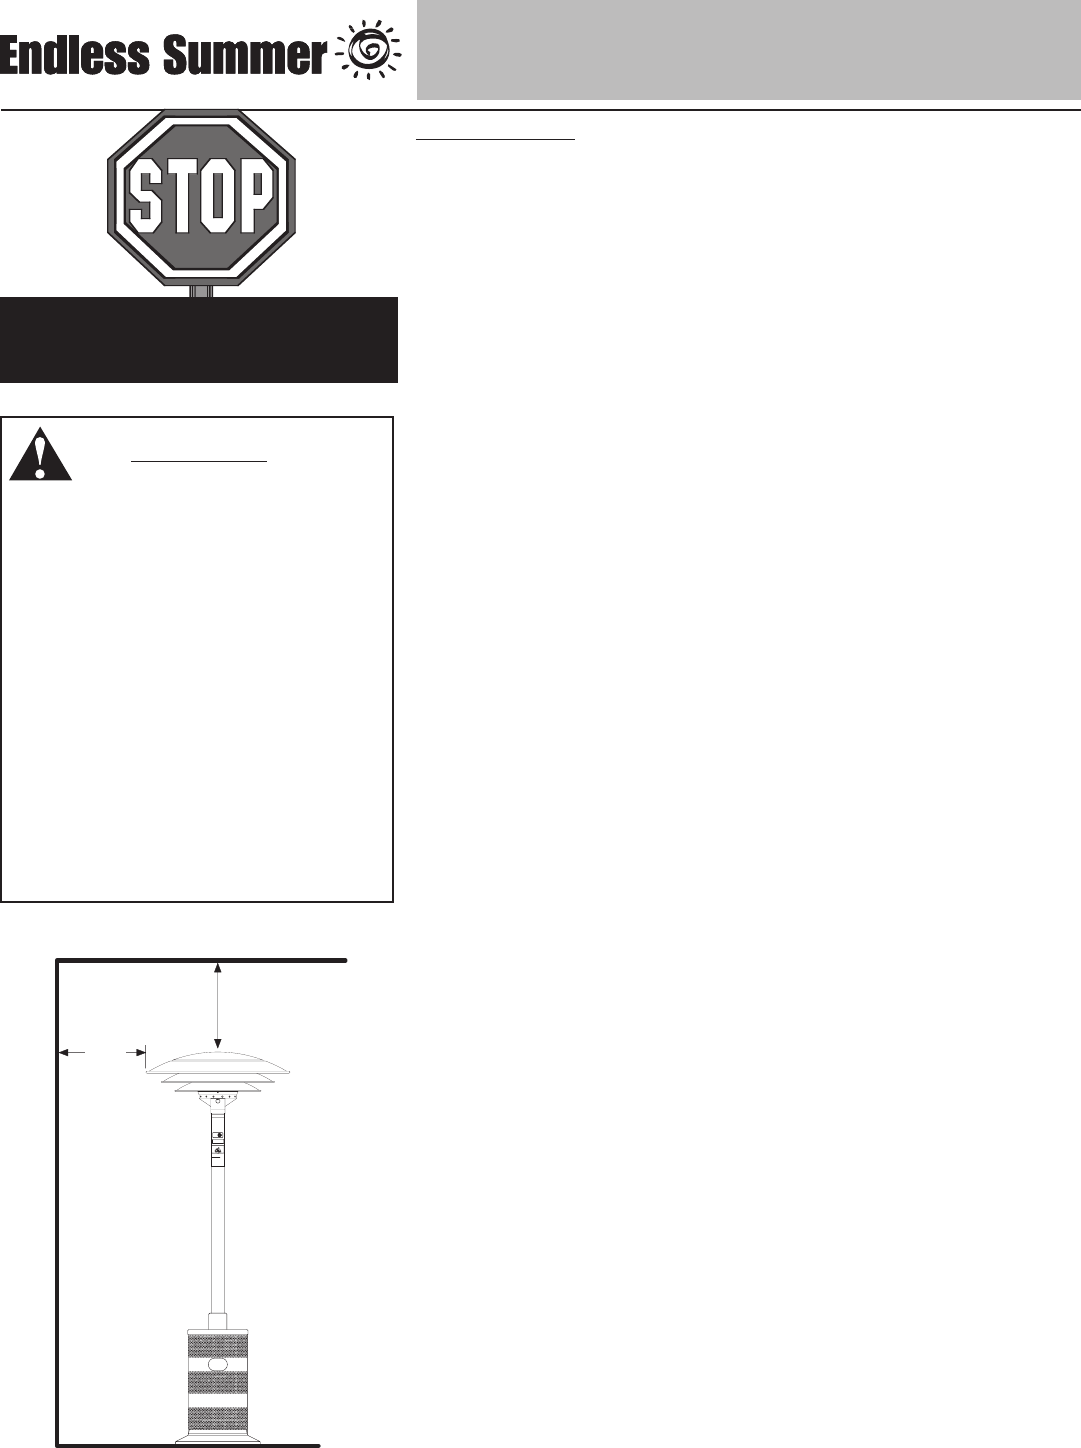
• Always maintain at least 36” clearance (top) and 24” clearance (side)
from combustible materials.
• Always place heater on a hard and level surface.
• Do not use if the wind velocity is greater than 10 miles per hour.
• Unit will operate at reduced efficiency below 40ºF (5ºC).
• Keep sprinklers and other water sources away from burner and controls.
• Always use extreme caution when near heater. Alert both children
and adults to the hazards of high temperatures, especially to avoid
burns or clothing catching fire.
• Young children and pets should be carefully supervised when they
are in the area of heater.
• Do not hang clothing or other flammable materials either on or near
heater.
• Any guard or other protective device removed for servicing the
heater must be replaced prior to operating the heater.
• Certain materials or items, when stored under heater, will be subjected
to radiant heat and could be seriously damaged.
• Do not alter heater in any manner.
• The pressure regulator and hose assembly supplied with the appliance
must be used and replacements must be those specified by the
manufacturer.
• Inspect heater before each use. If a damaged part is detected, do not
operate until an original equipment replacement part has been properly
installed. Use of unauthorized parts will void warranty and create an
unsafe condition.
• Do not attempt to use this appliance without a functional factory-
supplied gas regulator in place. If regulator becomes damaged, use only
a factory-supplied replacement.
• Prior to operating heater, replace any guards or protective devices
removed for servicing.
• During operation, do not touch burner assembly. The surface of heater’s
emitter can reach temperatures approaching 1600ºF.
• After shutdown, do not touch burner assembly until heater has cooled
(approximately 45 minutes after use).
Notice: This product should not be used with any fuel other than liquid
propane. Use of other fuels will detract from heaters performance and will
void your warranty.
Before you do anything else,
read and understand all
precautions in Safety First!
WARNING
FOR YOUR SAFETY
• Purchaser assumes all risk in
the assembly and operation
of this unit. Failure to follow
this manual’s WARNINGs
and instructions can result in
severe personal injury, death
or property damage.
• Do not use in an explosive
atmosphere. Keep heater
away from areas where
ammable liquids, gasoline,
vapors, or explosives are
stored or used.
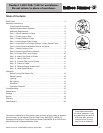
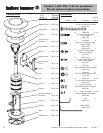
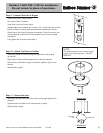
Ceiling
Wall
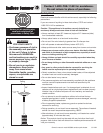
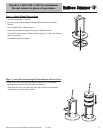
not light, repeat steps 1-3.
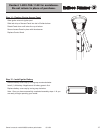
For Complete Shutdown
for outlet pressure of 11 inches water column.
appliance must be used. This regulator is set
The gas pressure regulator provided with this
clearance from the unit to combustible materials:
Depress the gas control knob, turn clockwise to the
"OFF" position. The gas supply must be turned off
at the LP-gas supply cylinder when this applianc
e
For Outdoor Use Only
Pilot
Pilot
Installation on combustible floors with minimum
Rhino
Blue
Improper installation, adjustment, alteration,
property damage . Read installation, operating
and maintenance instructions thoroughly before
service or maintenance can cause injury or
installing or servicing this equipment.
WARNING
CAUTION
is not in use.
Sides - 24", 36" below ceiling
.
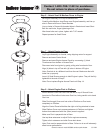
ON
ON
Push
Pus
h
Ignitor
Ignito
r
OFF
OFF
(Push in)
Enjoy outdoor living-longer
Endless Summer
knob for 30 seconds until the pilot is
burner should light. If main burner does
3. If the pilot fails to remain lit or
becomes extinguished, repeat steps
4. Turn the gas control knob counter-
clockwise to the "ON" position. Main
Lighting Instructions
1. Close LP gas cylinder valve. Depress
and turn the gas control knob clockwise
to "OFF" position, and wait 5 minutes.
2. Open the cylinder valve and turn the
gas control knob counterclockwise to the
knob). Continue to depress the control
"PILOT" position. Depress the gas control
knob and push ignitor button (located
above and to the right of the control
ignited.
1-2.
24”
36”