


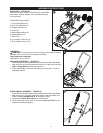
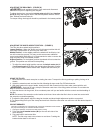


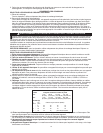
ADJUSTING THE DRAG BAR - (FIGURE K)
DANGER: Avoid accidental starting. Stop motor and disconnect
extension cord prior to adjusting the drag bar.
To adjust the drag bar, remove the hairpin cotter pin (K-1) and locating
pin (K-2). Align the drag bar hole in the desired position with the frame
hole. Reinsert bolt and cotter pin.
For deeper tilling, the drag bar should be positioned in the lowest position.
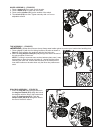
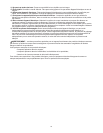
ADJUSTING THE WHEEL HEIGHT POSITION - (FIGURE L)
The Tiller has three wheel height positions.
Lowest Position - When the wheels are in their lowest position this will
allow easy transportation to and from your work area.
Middle Position - In the middle position the wheels will be lifted up, but
can still contact the ground. This may provide some users additional
control and stability while tilling. It is recommended to raise or remove the
drag bar when tilling in this wheel position.
Highest Position - In the highest position the wheels will not contact the
ground. This position can be used for deep tilling.
1. To adjust the wheel height position remove the hairpin cotter pin (L-
1) and locating pin (L-2). Align the desired wheel assembly connect-
ing rod hole with the frame bracket hole. Replace bolt and cotter pin.
USING THE TILLER
1. Move the tiller to the work area prior to starting the motor. Transport the tiller by pushing or pulling it along on its
wheels.
2. Attach the extension cord and start the tiller following all steps under On-Off Switch section.
3. With both hands on the upper handle, slowly pivot the tiller forward until the tines make contact with the soil.
WARNING: Avoid risk of injury. Keep the extension cord clear of the tilling path at all times. Do not allow the
tines to contact the extension cord.
4. Once the tines are in the ground, till at a moderate pace until you are familiar with the controls and the handling of
the tiller.
NOTE: Be aware of the extension cord's location at all times. Never allow the tiller's tines to come into contact with
the extension cord while operating.
5. To adjust the tilling depth, adjust the drag bar bracket and wheel height adjustment position as required.
6. For deeper tilling move your tiller slowly back and forth. Work the same area over and over until the desired depth is
reached.
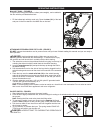
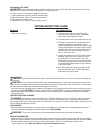
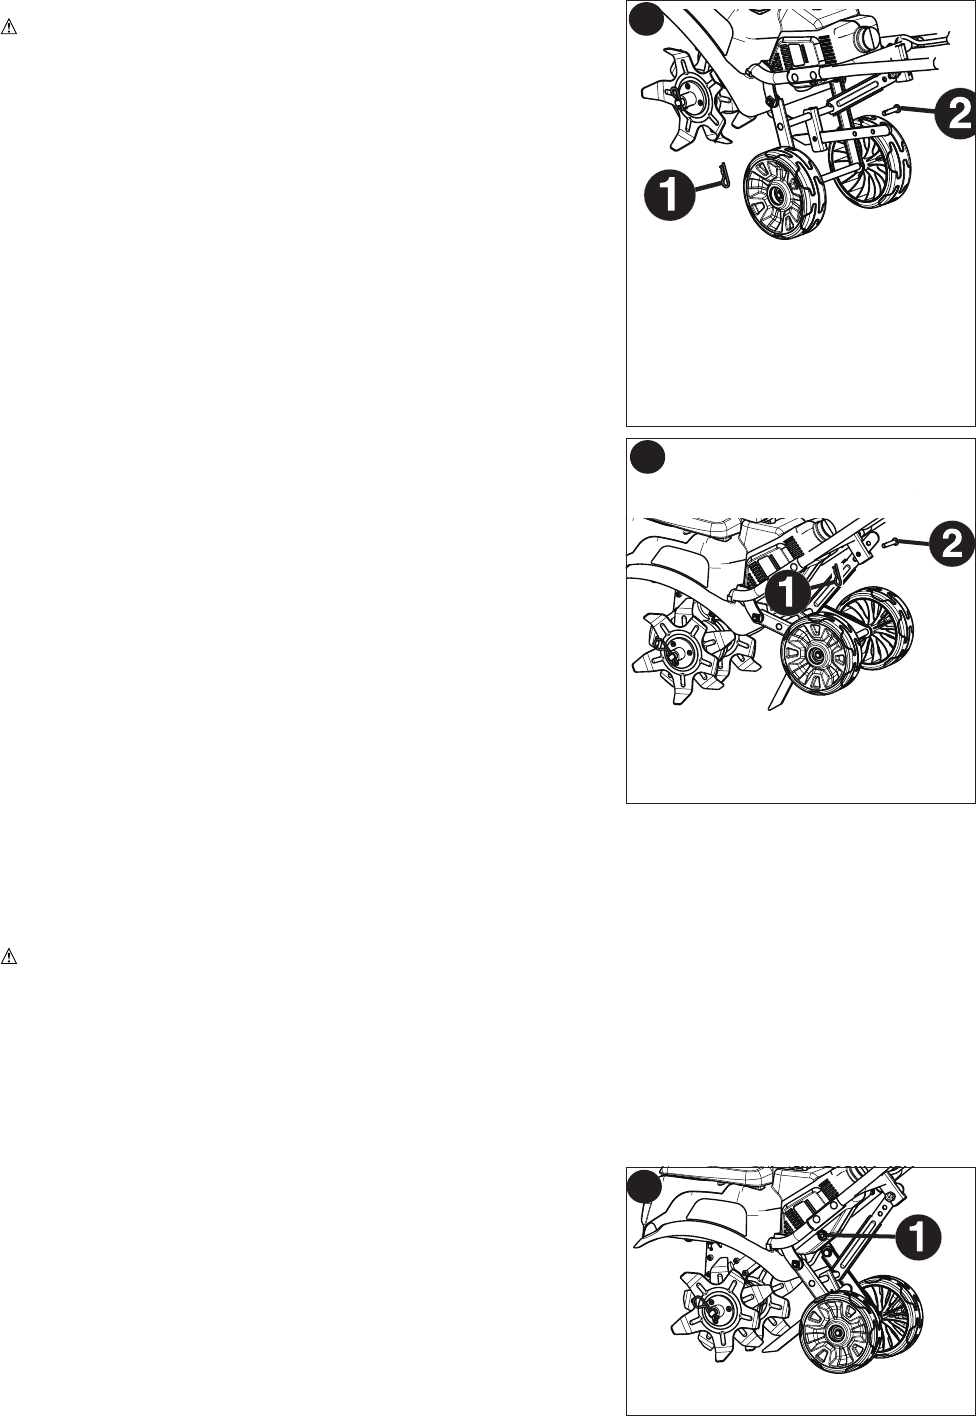
CIRCUIT BREAKER
The tiller is protected from overheating with a manually resettable circuit breaker. It
may require resetting if an overload condition existed.
1. Unplug the extension cord from the tiller switch housing.
2. Press the circuit breaker button (M-1) at the rear left side of the
motor housing.
3. Plug cord back in and restart tiller.
NOTE: The tiller may need a few minutes to cool down. Pushing the
breaker button back in will reset it.
9
K
L
M