


7
Assembly
Joining Trimmer Head Module to Handle Module
WARNING: Sharp moving blade. To prevent accidental
operation, insure that battery is disconnected from the handle
and that the protective blade sheath is in place on the blade
before performing the following operations. Failure to do this
could result in serious personal injury.
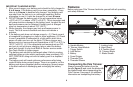
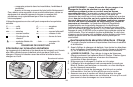
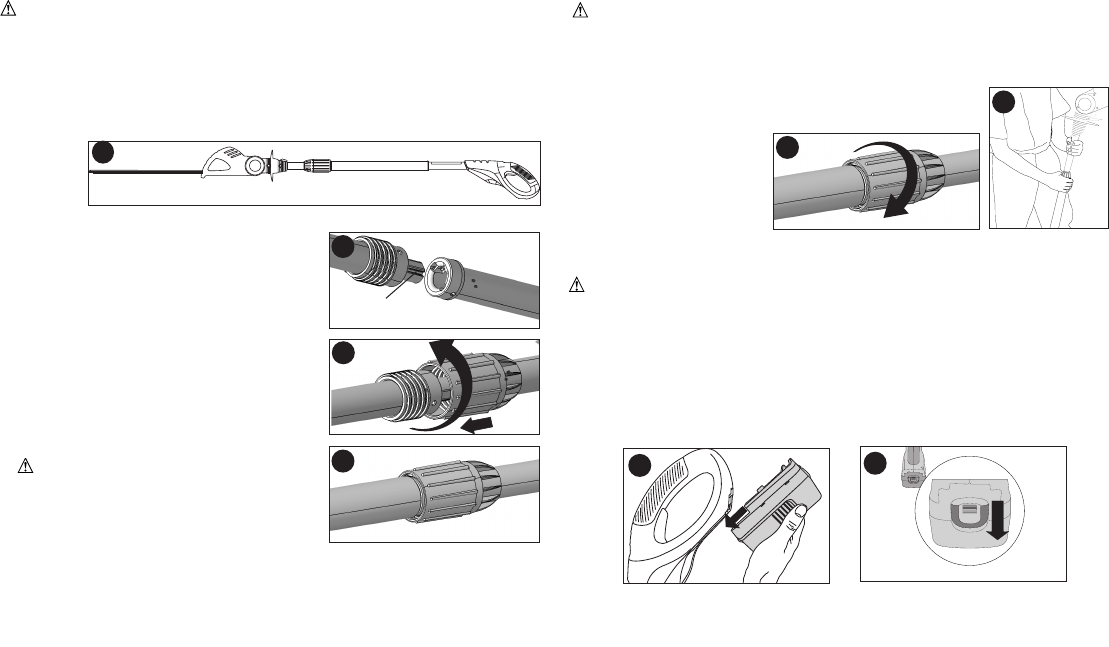
Combining the handle module (A) to the trimmer head module (B)
creates a pole trimmer that is approximately 6 foot in length as shown
in figure 3.
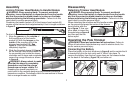
To attach the handle module to the trimmer head module:
1. Align the groove on the outside of
the coupling end of the handle
module (A) with the tongue on the
inside of the coupling end of the
trimmer head module (B). See
figure 4. Push the two sections
completely together.
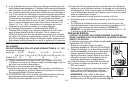
2. Slide the threaded sleeve (6) figure 5
on the trimmer head module down as
far as possible and rotate the sleeve
clockwise until it stops and completely
covers the orange threads as shown
in figure 6.
WARNING: Always check to make
sure that the sleeve is completely
threaded on and that the orange
threads are no longer visible. Not
threading the sleeve completely on
could result in the modules becoming disconnected creating a
hazardous condition. Periodically check the connections to insure
that no orange threads are visible.
Groove
4
5
6
3
Disassembly
Detaching Trimmer Head Module
WARNING: Sharp moving blade. To prevent accidental
operation, insure that battery is disconnected from the handle
and that the protective blade sheath is in place on the blade
before performing the following operations. Failure to do this
could result in serious personal injury.
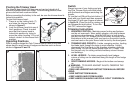
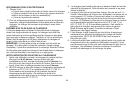
When detaching the modules rest the handle module
on the ground and grasp the center of the trimmer
head module with one
hand figure 7. Use your
other hand to loosen the
threaded sleeve figure 8
and then pull the two
halves apart.
Operating the Pole Trimmer
WARNING: Read and understand all instructions. Failure to
follow all instructions listed below may result in electric shock, fire
and/or serious personal injury.
Connecting the Battery
Place the battery in the tool as shown in figure 9 and be certain that it
is inserted fully into the tool cavity until it “clicks” into place. To
remove the battery from the tool, press down on the release button
on the back of the battery (figure 10) and slide out.
7
8
10
9