6
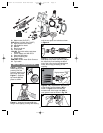
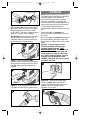
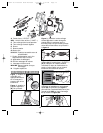
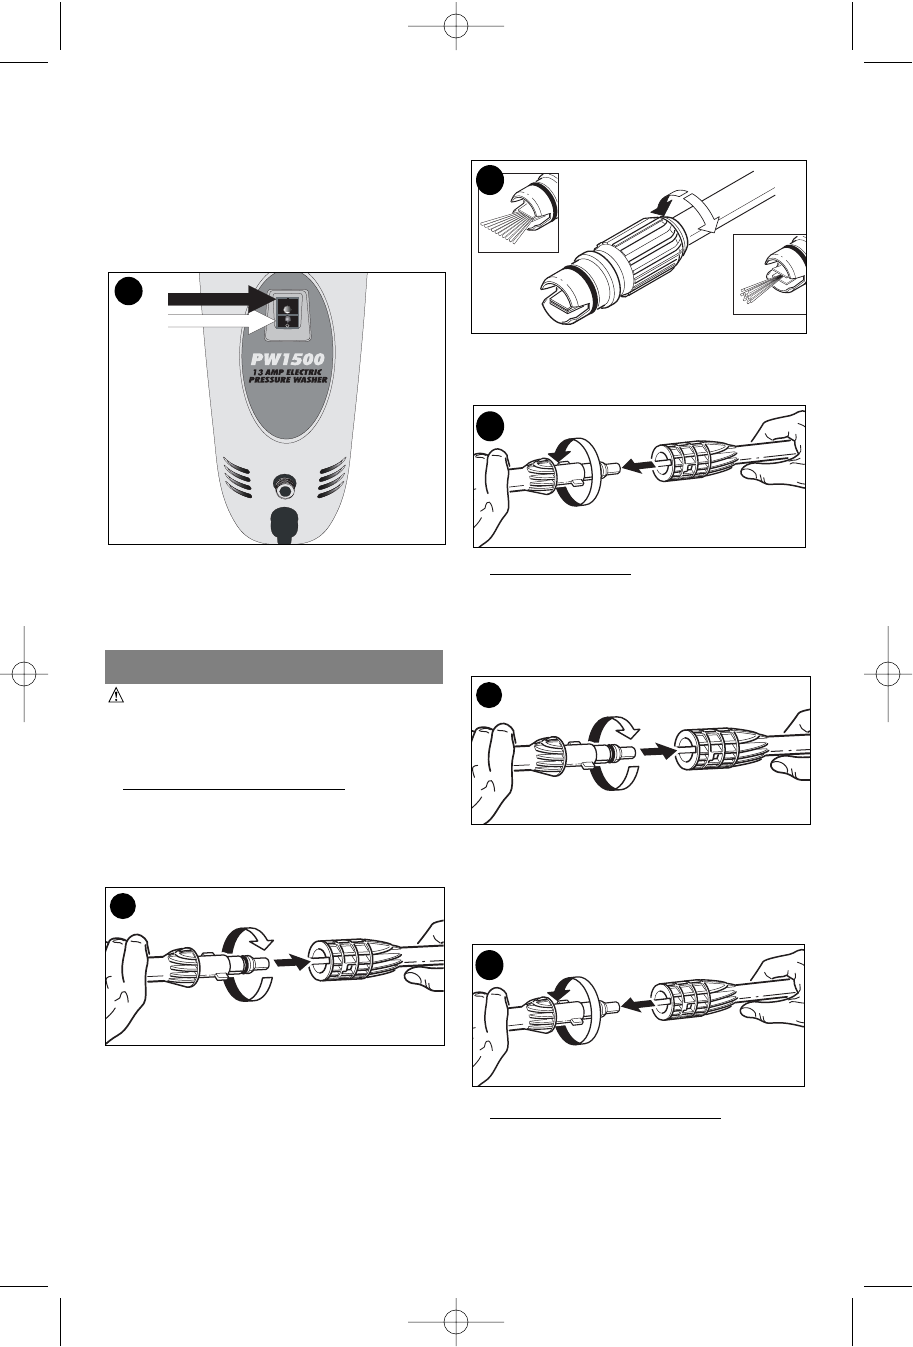
Figure 11 - Turn on the pressure washer
by depressing the top half of the switch
(L) marked “I”. The unit will run for a few
seconds as it builds up pressure, then will
shut off. It will run on demand as the gun
trigger is depressed. Turn off the pressure
washer by depressing the lower half of
the switch marked “0”.
YOUR PRESSURE WASHER IS NOW
READY TO USE - PLEASE REVIEW
THE FOLLOWING FOR DETAILS ON
ACCESSORIES APPLICATION.
ACCESSORIES
CAUTION: Before changing
accessories, turn unit off, pull trigger
to release pressure, and activate
safety catch.
• ADJUST
ABLE FAN WAND
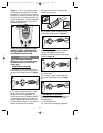
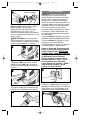
1.) Insert the fan wand (D) into the gun
wand (H) by pushing and rotating until the
two parts are locked as shown in Figure
A.
2.) To obtain maximum pressure, rotate
the fan wand nozzle in a clockwise
direction as shown in FIgure B. This
narrow stream results in deeper cleaning
in a concentrated area. For a wider fan
pattern rotate the fan wand nozzle in the
counterclockwise direction. The wider fan
pattern reduces the risk of surface
11
A
damage and allows for cleaning large
surface areas quickly.
3.) To remove, press fan wand into gun
wand and twist as shown in Figure C.
• TURBO
NOZZLE
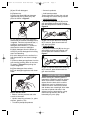
1.) Insert the turbo nozzle wand (C) into
the gun wand (H) by pushing and
rotating until the two parts are locked as
shown in Figure D.
2.) There is no adjustment required with
the turbo nozzle.
3.) To remove, press nozzle wand into
gun wand and twist as shown in Figure
E.
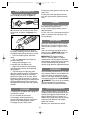
• DETERGENT
APPLICATOR
Follow manufacturer’s label directions for
mixing correct concentrations of soap
and detergents.
To use the applicator:
1.) Unscrew top of detergent applicator
B
C
D
E
598121-00 Pressure Wash Revised 11/24/03 2:00 PM Page 6


