4
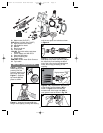
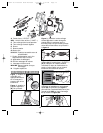
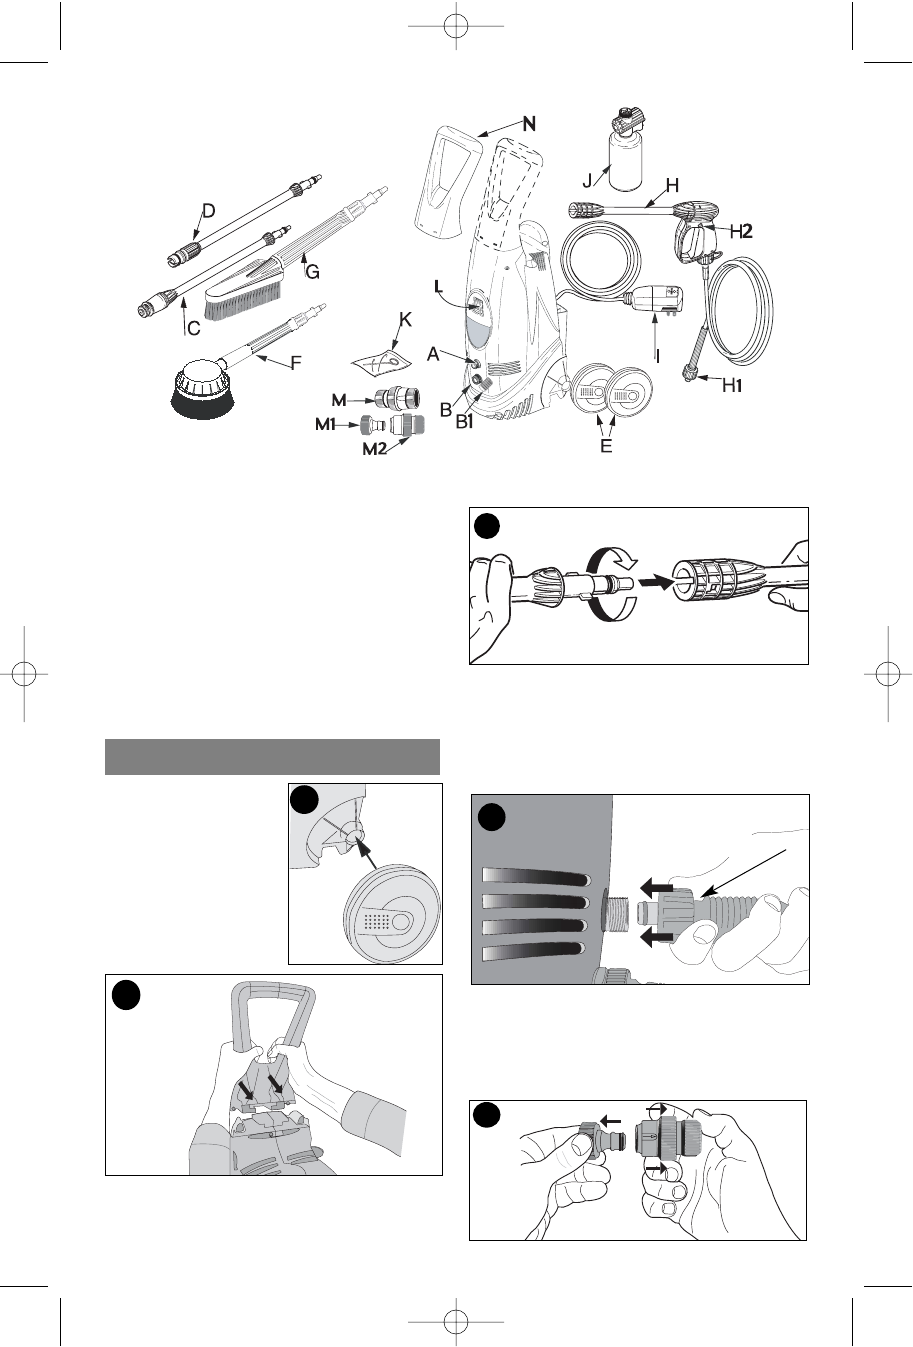
A. Water outlet (OUTLET)
B/B1 Water inlet with filter (INLET)
C. High pressure turbo wand
D. Adjustable fan wand
E. Wheels
F. Revolving brush
G. Fixed brush
H/H1/H2 Gun with safety catch/hose
assembly
I. Power supply cord with GFCI
J. Detergent applicator
K. Nozzle cleaning tool
L. On/off switch
M/M1/M2 Garden hose Quick Connect
N. Top handle
SET-UP / ADJUSTMENT
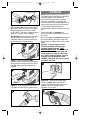
Figure 1 - Attach
wheels (E) by firmly
pressing onto the
pressure washer until
they snap into place.
Figure 2 - Snap the
top handle (N) into
place as shown.
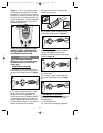
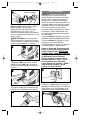
Figure 3 - Insert the fan wand (D) into
the gun wand (H) by pushing and rotating
until the two parts are locked as shown
in Figure 3.
Figure 4 - Connect the high pressure
hose (H1) to the water (OUTLET) (A) on
the cleaner by first inserting the brass
end of the hose into the threaded brass
outlet, then snugly threading on the
coupling.
Figure 5 / 5A - Separate the two portions
of the Quick Connect adapter (M) as
shown in Figure 5 and connect the
threaded end of the larger half (M2) to
your garden hose as shown in Fig. 5A.
High pressure hose
4
5
1
2
3
598121-00 Pressure Wash Revised 11/24/03 2:00 PM Page 4


