


ASSEMBLY
260/272/284 01/11 Assembly Section 3-2
© 2011 Alamo Group Inc.
ASSEMBLY
DEALER SETUP INSTRUCTIONS
Set up mower as received from factory with these instructions.
This mower is shipped partially assembled. Assembly will be easier if components are aligned and loosely
assembled before tightening hardware. Refer to bolt torque chart in Maintenance Section. All bolts are Grade 5
unless otherwise specified.
1. Position on flat surface.
2. Apply light oil to gear box input shaft.
PULL TYPE (284 ONLY) INSTRUCTIONS
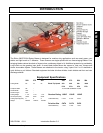
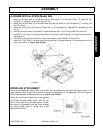
The standard Pull-Type Unit will be shipped from the factory in the following bundles: 1) Basic Assembly, 2)
Jacks haft Assembly, 3) Jackshaft Bearing Support, 4) Gearbox Protective Shield, 5) PTO Driveline, 6) Tongue
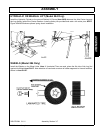
Assembly, 7) Control Rod Bundle, 8) Axle Arm Bundle and Lift Lug and or Spring Assembly, 9) Wheels, 10)
Jack, 11) Operator’s Manual and Flat Blades. Other optional bundles that may be shipped with your unit:
Ratchet Lift Screw or Hydraulic Cylinder with Hydraulic Hose and Hose Bracket, Puncture-Proof tires or 14” or
15” Wheels, Chain Guards. Extra Equipment items include: Chain Guards, Solid Guards, Dual Wheels, Hitch
and Spring Assembly (Axle).
The Components of these machines are quite heavy. Block all components up securely
before working under or putting extremities under such parts.
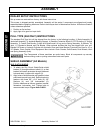
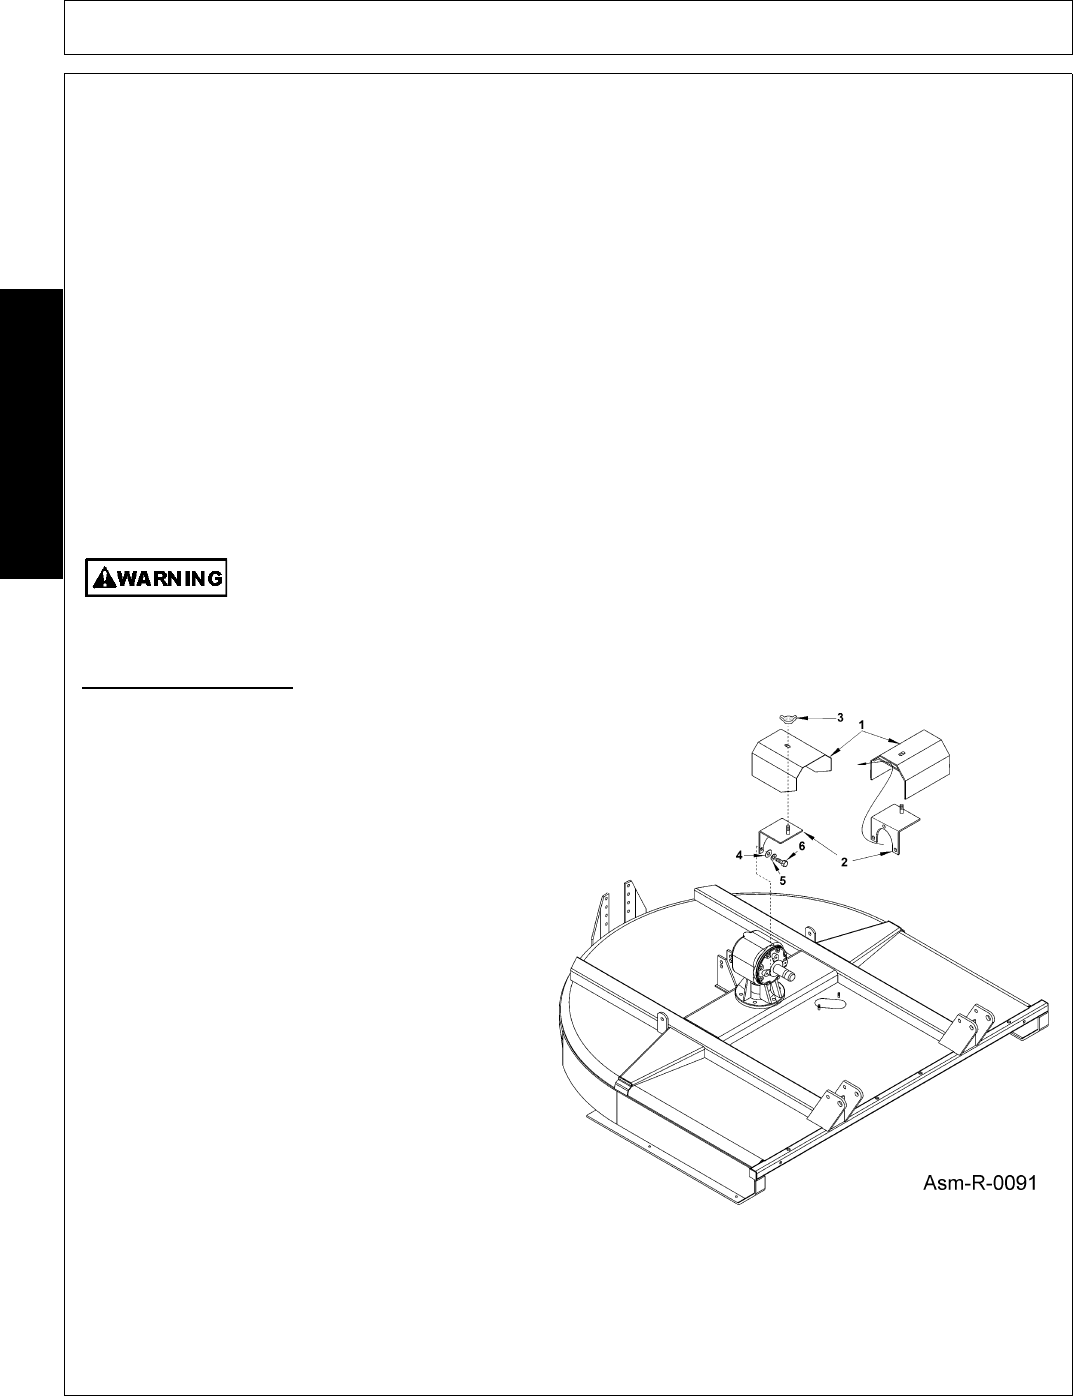
SHIELD ASSEMBLY (All Models)
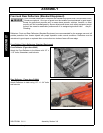
SLIP CLUTCH SHIELD
1. To attach the Slip Clutch Shield-Guide shield
bracket (2) through weldment shield (1) so that
bracket stud screw protrudes through weldment
hole and retain in place with wingnut (3).
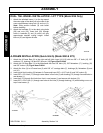
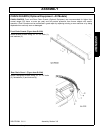
2. Align holes of shield bracket with gearbox holes
positioned around input shaft. Retain bracket to
gearbox with three 3/8” x 3/4” bolts (6), 3/8”
washers (4), and 3/8” lockwashers (5).
Position hardware as follows: gearbox, bracket,
flatwasher, lockwasher, bolt. Tighten bolts to
recommended torque. Figure Asm-R-0091.