9
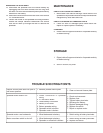
MAINTENANCE
CHECK FOR LOOSE FASTENERS
1.
Before each use make a thorough visual check of the
spreader for any bolts and nuts which may have loosened.
Retighten any loose bolts and nuts.
CHECK FOR WORN OF DAMAGED PARTS
2. Check for worn or damaged parts before each use.
Repair or replace parts if necessary.
CLEANING
3. Rinse inside of hopper and exterior of spreader and dry
off before storing.
STORAGE
1. Rinse inside of hopper and exterior of spreader and dry
off before storing.
2. Store in a clean, dry area.
TROUBLE SHOOTING POINTS
1. Material packed around plate
1. Loose connection in spreader
wiring
2. In line fuse is blown.
3. Loose battery connection
4. Battery is run down.
5. Broken spreader wiring
6. Spreader switch is broken.
7. Spreader motor is broken.
1. Wired backwards to battery.
1. Wired backwards to battery.
2. Spreader on-off switch is broken.
Hopper closure plate does not open to
the correct position.
Spreader motor doesn't run.
Spreader motor runs backwards.
Motor runs when switch is shut off.
1. Clean out around closure plate
1. Check and reconnect.
2. Replace fuse.
3. Tighten battery terminals.
4. Recharge the battery.
5. Replace damaged wiring.
6. Replace the switch
7. Repair or replace motor.
1. Switch wiring at battery terminals.
1. Switch wiring at battery terminals.
2. Replace the switch.
REMOVING THE SPREADER
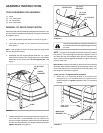
13. Disconnect the spreader from the vehicle battery by
unplugging the short wire harness from the long wire
harness. The short wire harness may be left permanently
attached to the battery.
14. Remove the fl ow control from the rear rack of the vehicle
if it is attached there.
15. Loosen the knobs on the spreader mounting brackets.
Rotate the clamps fastened underneath the vehicle
rack and lift them up through the rack to remove the
spreader.


