13
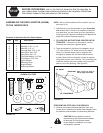
ASSEMBLINGTHEDECKADAPTER(#62468)
TO THE MOWER DECK
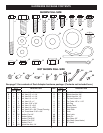
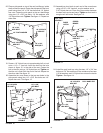
ContentsofHardwarePackforDeckAdapter:
Key qty. Description
A 2 Hex Bolt, 5/16" x 1-1/4"
B 4 Hex Bolt, 1/4" x 1"
C 2 Carriage Bolt, 5/16" x 3/4"
D 3 Hex Nylock Nut, 5/16"
E 5 Hex Nylock Nut, 1/4"
F 9 Flat Steel Washer, 1/4" Std.
G 12 Flat Washer, 5/16" Std.
H 5 Nylon Washer
I 1 Mounting Strap
J 1 Angle Bracket
K 1 Mounting Bracket
NOTE: Not all of the hardware will be used for any one
particular t up.
FIGURE 23
FIGURE 22
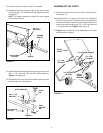
1/4" DOWN
Keep cut-off as close to
the top edge as possible.
IMPORTANT:
1/2" FROM FRONT
I
J
K
A B C
E
D
H G
F
NOT SHOWN FULL SIZE
SHOWN FULL SIZE
BEFOREPROCEEDING,look in the fold-out sheets to nd the template for
your mower deck. If written instructions are printed on the template, follow those
instructions instead of the instructions in this manual.
STOP
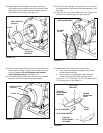
CAUTION: Mower deector must be
replaced when Vac System deck adapter
is removed. Do Not operate mower
unless adapter or deector is in place
and properly mounted.
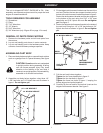
1. Identify and cut out the template for your brand and
size mower deck. If there is no template included for
your deck size, you can make your own template by
marking around a piece of cardboard held against the
edge of the deck's discharge opening.
2. FOLLOW THE INSTRUCTIONS PRINTED ON THE
TEMPLATE. If there are no instructions, use the
following instructions as a general guide.
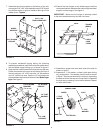
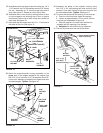
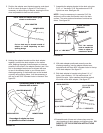
3. Tape the template to the face of the adapter, about
1/2" from front and 1/4" down from top for deeper
decks. For shallow decks, position template low
enough that adapter will not extend below bottom
of deck. Mark outline of template on face of adapter
using white crayon, nail or scriber. Drill a starting hole
inside the outline, then use a saber saw or key hole
saw to cut out the opening. See gure 23.
PERFORM THIS STEP ONLY IF NECESSARY.
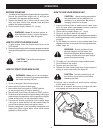
4. Remove the mower discharge deector from your
mower deck if necessary to attach deck adapter. Save
the deector and hardware for remounting deector.


