Chapter 5: Troubleshooting
To check the keyboard
5–17
To check the keyboard
Test Procedure
Use this procedure to verify correct keyboard operation.
1
Enable the graphical interface.
2 Select Self Test from the Utilities menu.
3 Select Knob and Key from the Self Test drop down list box, then click Start.
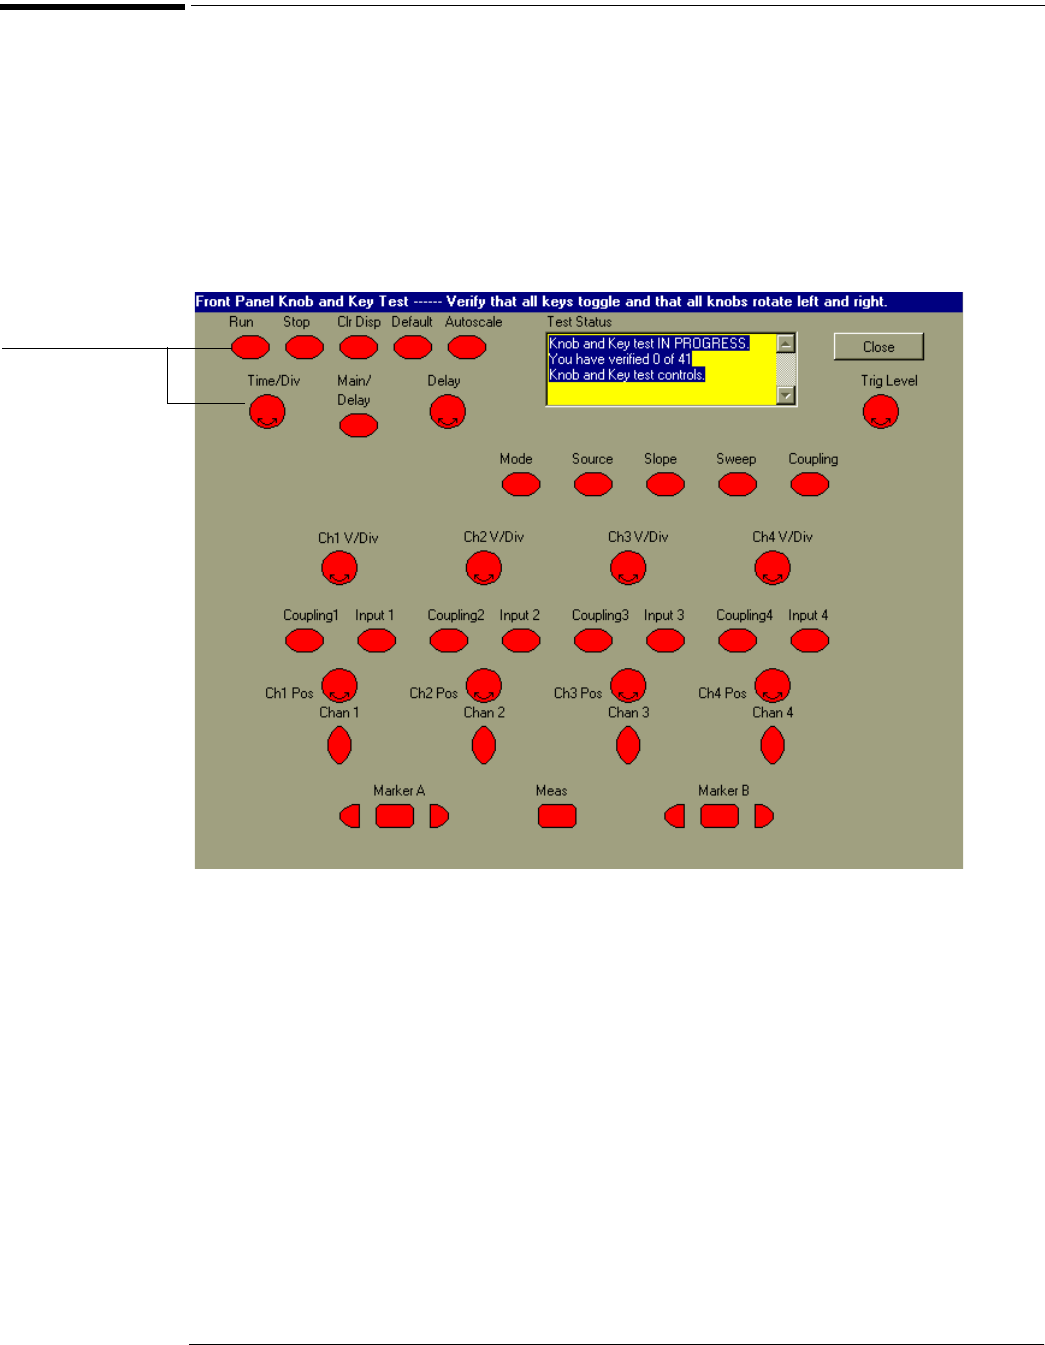
A new window appears with a symbolic representation of the keyboard. See figure 5-6.
Figure 5-6
Knob and Key Self Test Screen
4 Push each key on the keyboard until you have pushed all keys.
When you push a key, the corresponding key symbol on the display should change from red to
green.
5
Turn each knob in both directions until you have turned all knobs.
When you turn a knob in one direction, the corresponding knob symbol on the display should
change from red to yellow. When you then turn the knob in the other direction, the knob symbol
should change from yellow to green.
6
When you are finished, click Close.
If any knob failed, you should replace the keyboard assembly. If you encounter any key failures,
record the location of those failures, then go to the troubleshooting procedure that follows.
When you push a key
or turn a knob in both
directions, the
corresponding symbol
on this screen turns
green.
