13
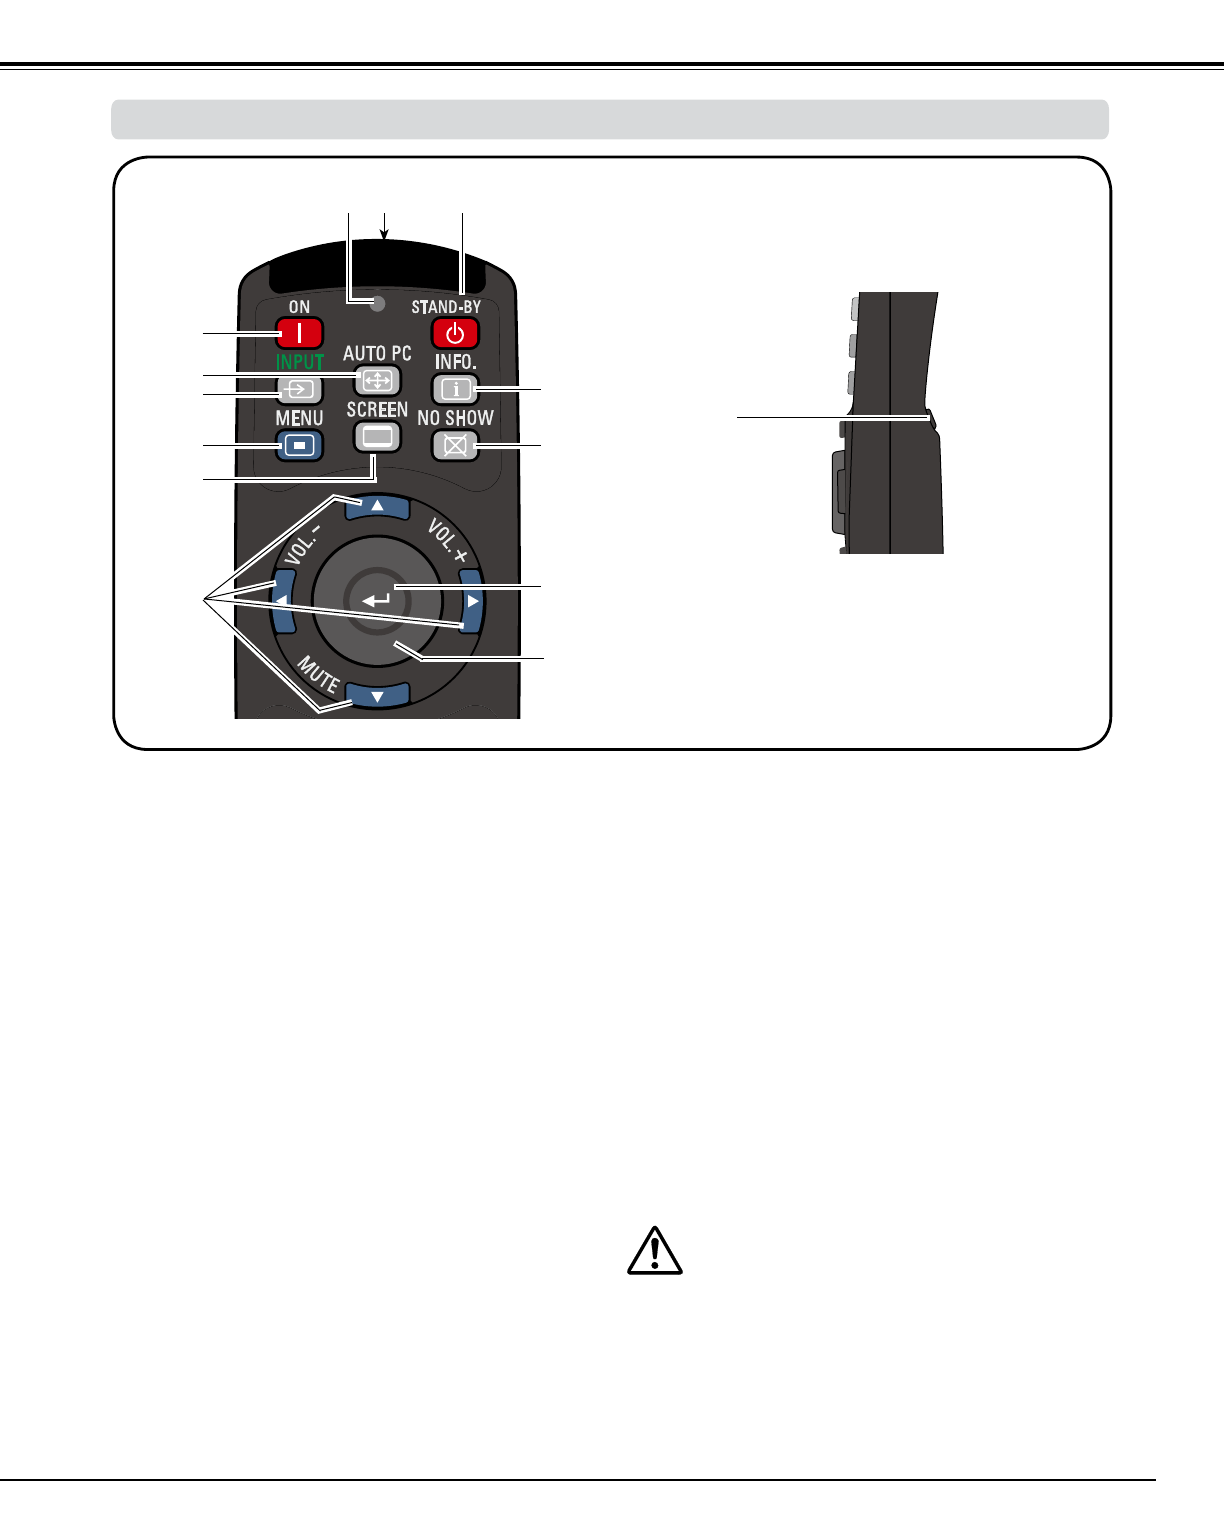
① STAND-BY button
Turn the projector off (p.24).
④ ON button
Turn the projector on (p.23).
⑥ INPUT button
Select a signal (pp.33-35).
⑧ SCREEN button
Select the screen size (p.29).
④
⑩
⑭
①
⑭ L-CLICK button
Act as the left mouse button for wireless mouse
operation (p.32).
③ SIGNAL EMISSION indicator
Light red while a signal is being sent from the
remote control to the projector.
⑨ POINT pqt u ( VOLUME – / +, MUTE) buttons
– Select an item or adjust the value in the On-
Screen Menu (p.25).
– Pan the image in Digital zoom + mode (p.43).
– Adjust the volume level (with Point t u buttons)
or mute the sound (with Point q button.) (p.28).
To ensure safe operation, observe the following
precautions:
– Do not bend, drop, or expose the remote control to
moisture or heat.
– For cleaning, use a soft dry cloth. Do not apply
benzene, thinner, spray, or any other chemical
materials.
③
② WIRED REMOTE jack
Connect the remote control cable (not supplied) to
this jack when using as a wired remote control.
⑪ SELECT button
– Execute the selected item (p.25).
– Expand or compress the image in the Digital
zoom mode (p.43).
②
⑦ MENU button
Open or close the On-Screen Menu (p.25).
⑫
⑩ MOUSE POINTER button
Move a pointer of the projector or a pointer for
wireless mouse operation (p.32).
Part Names and Functions
⑤ AUTO PC button
Automatically adjust the computer image to its
optimum setting (pp.29, 37).
⑤
⑬
⑥
⑦
⑧
⑨
⑪
⑬ INFO. button
Display the input source information (p.27).
⑫
NO SHOW button
Temporarily turn off the image on the screen (p.29).
Remote Control


