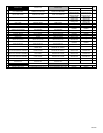
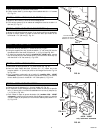
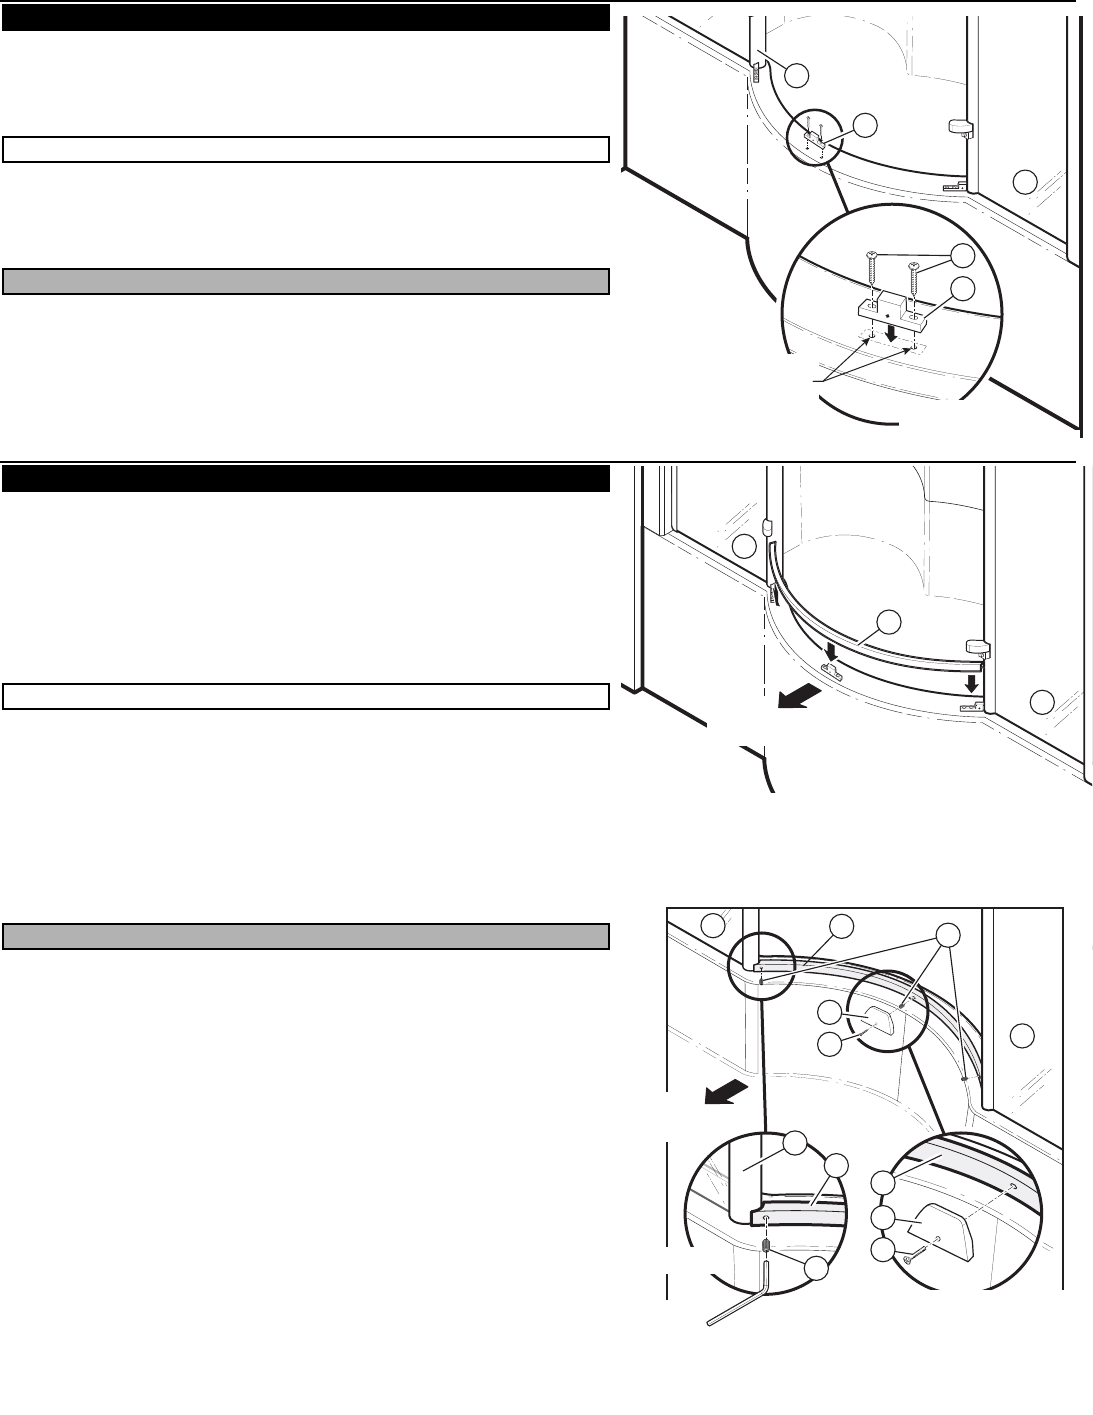
a) Align central block (I) with the 2 drilled holes.
b) Fasten central block (I) to the edge of the bathtub with #8 x 1¼" screws
(F). Fig. 5.1.
a) Alignez le bloc central (I) avec les 2 trous déjà percés.
b) Fixez le bloc central (I) sur le rebord de la baignoire avec les vis #8 x 1¼"
(32 mm) (F). Fig. 5.1.
a) Alinee los orificios del bloque central (I) con los dos orificios ya taladrados.
b) Sujete el bloque central (I) sobre el borde del baño por medio de los
tornillos #8 x 1¼" (32 mm) (F). Fig. 5.1.
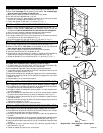
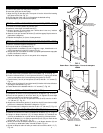
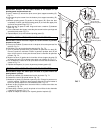
a) Cover the three (3) blocks (H, I, J) with the sill (G). Fig. 6.1.
b) Using the supplied hex key, screw the #8-32 x ¼" set screw (M) into the
threaded holes of the three (3) blocks (H, I, J). Fig. 6.2 and Fig. 6.2.1.
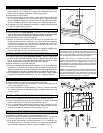
c) To install the optional door stop (K) (model 8154 / 100567 only), remove
the set screw (M) from the central block (I) and screw the door stop (K)
with the #8-32 x 1/2” flat screw (L). Fig. 6.2.2.
a) Recouvrez les trois (3) blocs (H, I, J) avec le seuil (G). Fig. 6.1.
b) Dans les trous filetés des trois (3) blocs (H, I, J), vissez les vis de
pression #8-32 x ¼" (6 mm) (M) avec la clé hexagonale fournie. Fig. 6.2
et Fig. 6.2.1.
c) Pour l'installation optionnelle de la butée (K) (modèle 8154 / 100567
seulement), enlevez la vis de pression (M) du bloc central (I) et vissez à
fond la butée (K) avec la vis #8-32 x 1/2” à tête plate (L). Fig. 6.2.2.
a) Cubra los tres (3) bloques (H, I, J) con el umbral (G). Fig. 6.1.
b) Por medio de la llave hexagonal provista, inserte los tornillos de presión
#8 x ¼" (6 mm) (M) en los orificios taladrados en los tres (3) bloques (H,
I, J). Fig. 6.2 y Fig. 6.2.1.
c) Para instalar el tope de puerta facultativo (M) (modelo 8154 / 100567
solamente), quite el tornillo de presión (M) del bloque central (I) y atornille
a fondo el tope (K) de puerta con el tornillo de cabeza placa #8-32 x 1/2”
(L). Fig. 6.2.2.
ETAPA 6 - INSTALACIÓN DEL UMBRAL
ÉTAPE 6 - INSTALLATION DU SEUIL
STEP 6 - SILL INSTALLATION
ETAPA 5 - INSTALACIÓN DEL BLOQUE CENTRAL (I)
ÉTAPE 5 - INSTALLATION DU BLOC CENTRAL (I)
STEP 5 - CENTRAL BLOCK INSTALLATION (I)
6 10003149