5
5-9
Sending Functions
File Format
Select the file format of the image to send.
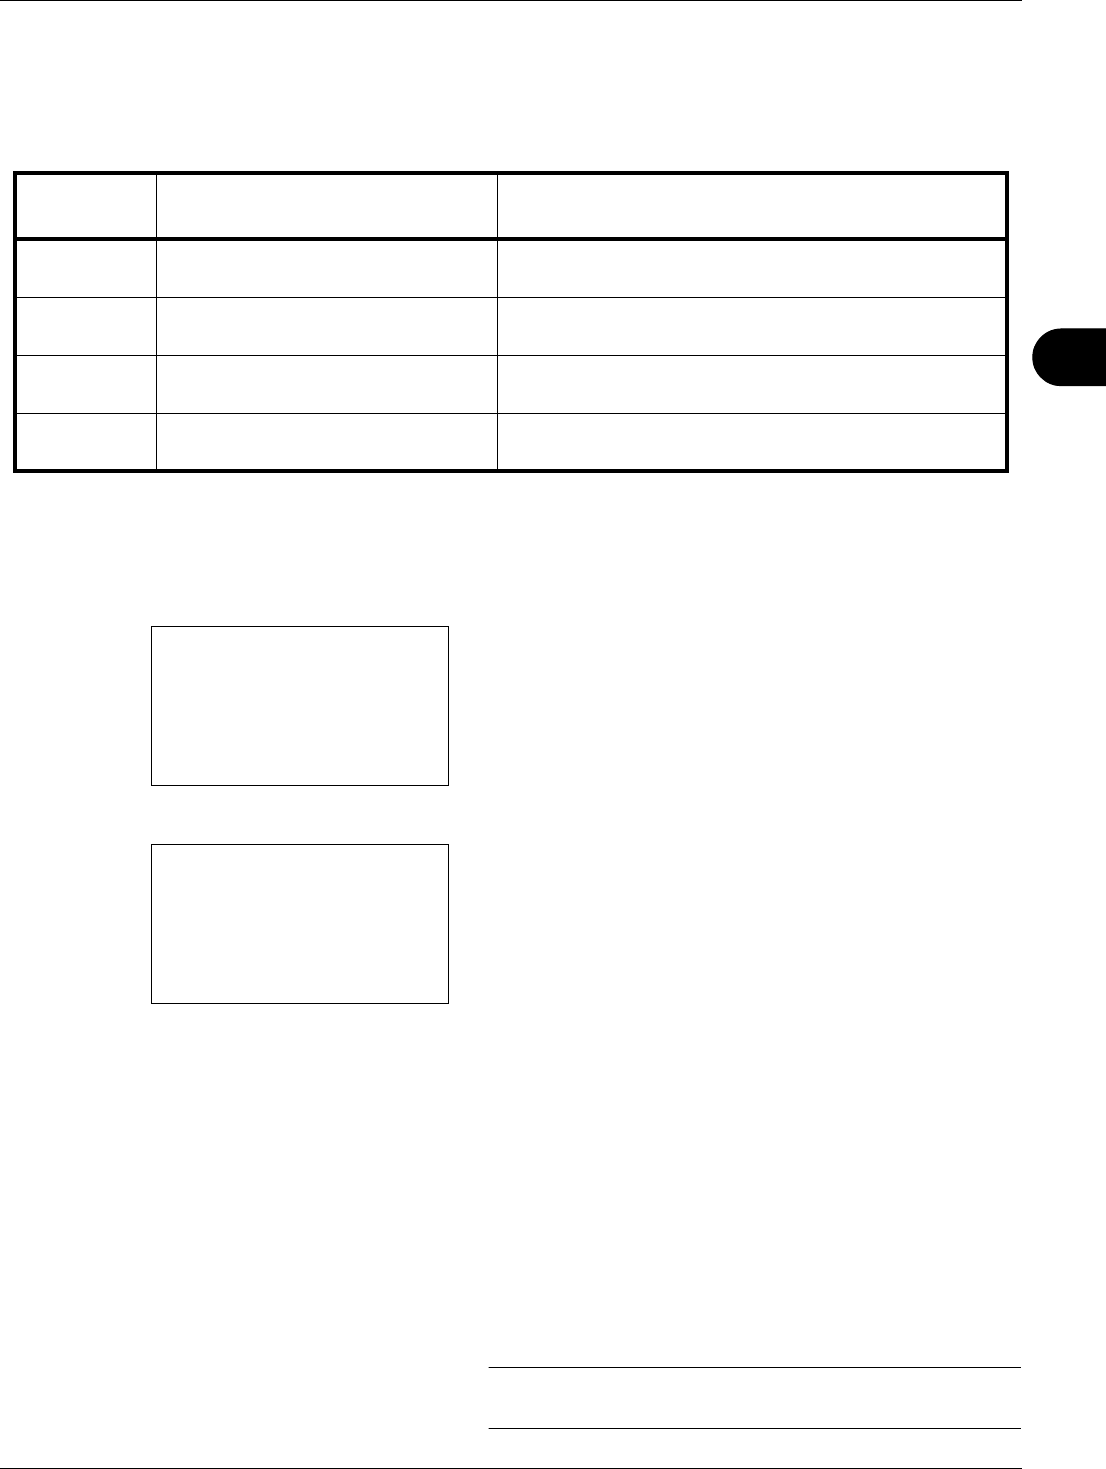
The table below lists the file formats and their details.
Use the procedure below to select the file format for transmission.
1 Press the Send key.
2 Place the original.
3 Press the Function Menu key. Function Menu appears.
4 Press the or key to select [File Format].
5 Press the OK key. File Format appears.
6 Press the or key to select the file format from [PDF],
[TIFF], [XPS] or [JPEG].
If Full Color or Grayscale has been selected for the color
mode for scanning, press [Detail] (the Right Select key)
and select the image quality.
If you selected PDF, you can specify PDF/A settings.
7 Press the OK key.
Completed. is displayed and the screen returns to the
basic screen for sending.
8 Specify the destination, and press the Start key to start
sending.
NOTE: Press the Reset key to reset the settings selected in
Function Menu.
File Format
Adjustable range of image
quality
Color mode
PDF*
* The file format can be set to [PDF/A-1a] or [PDF/A-1b].
1 Low Quality (High Comp.) to 5
High Quality (Low Comp.)
Auto Color (Color/Grayscale), Auto Color (Color/Black
and White), Full Color, Grayscale, Black and White
TIFF 1 Low Quality (High Comp.) to 5
High Quality (Low Comp.)
Auto Color (Color/Grayscale), Auto Color (Color/Black
and White), Full Color, Grayscale, Black and White
XPS 1 Low Quality (High Comp.) to 5
High Quality (Low Comp.)
Auto Color (Color/Grayscale), Auto Color (Color/Black
and White), Full Color, Grayscale, Black and White
JPEG 1 Low Quality (High Comp.) to 5
High Quality (Low Comp.)
Auto Color (Color/Grayscale), Full Color, Grayscale
Function Menu:
a
b
*********************
2
Original Size
T
3
Original Image
T
[ Exit ]
1
Color Selection
T
File Format:
a
b
*********************
2
TIFF
3
XPS
[ Detail ]
1
*PDF


