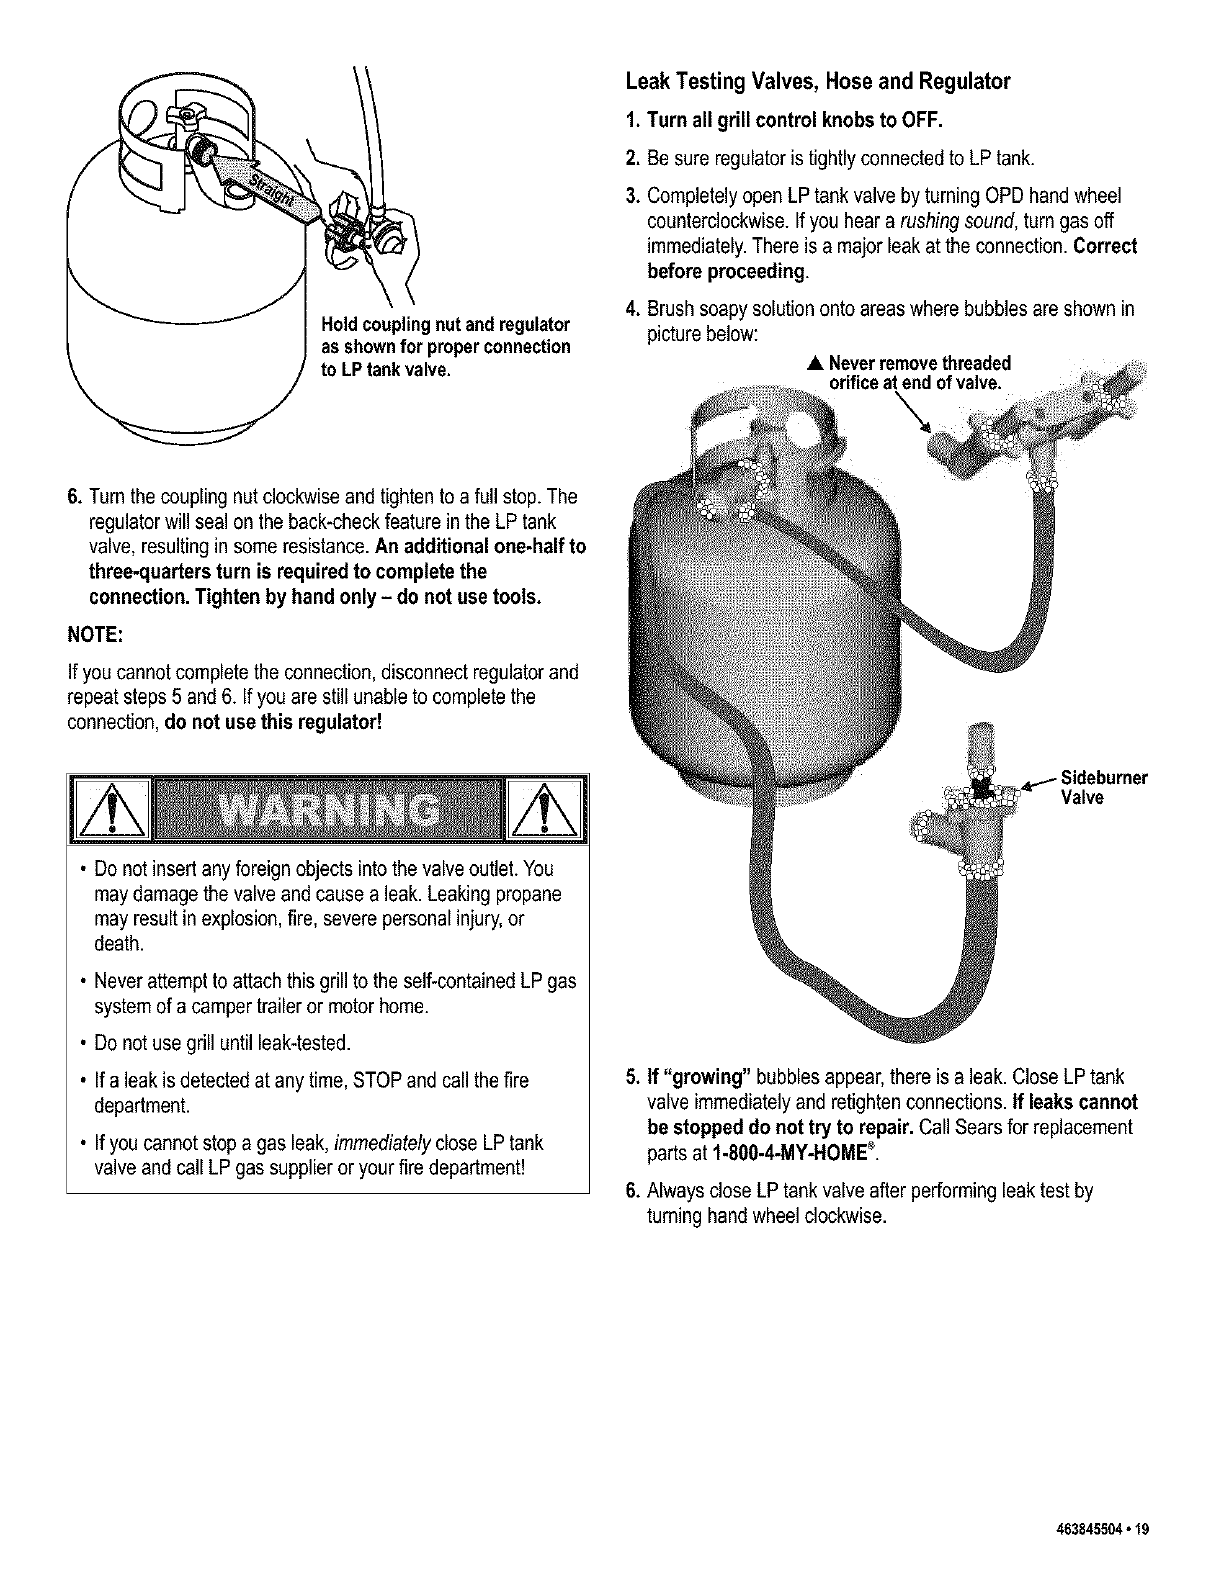
Holdcouplingnutandregulator
as shownfor properconnection
to LPtankvalve.
6. Turn the coupling nut clockwise and tightento a full stop. The
regulator will seal on the back-check feature in the LP tank
valve, resulting in some resistance. An additional one-half to
three-quarters turn is required to complete the
connection. Tighten by hand only - do not use tools.
NOTE:
If you cannot complete the connection, disconnect regulator and
repeat steps 5 and 6. If you are still unable to complete the
connection, do not use this regulator!
• Do not insert any foreign objects into the valve outlet. You
may damage the valve and cause a leak. Leaking propane
may result in explosion, fire, severe personal injury,or
death.
• Never attempt to attach this grill to the self-contained LP gas
system of a camper trailer or motor home.
• Do not use grill until leak-tested.
• If a leak is detected at any time, STOP and call the fire
department.
• If you cannot stop a gas leak, immediately close LP tank
valve and call LP gas supplier or your fire department!
LeakTesting Valves, Hose and Regulator
1. Turn all grill control knobs to OFF.
,
3,
Be sure regulator istightly connected to LP tank.
Completely open LP tank valve by turning OPD hand wheel
counterclockwise. If you hear a rushing sound, turn gas off
immediately.There is a major leak at the connection. Correct
before proceeding.
,
Brush soapy solution onto areas where bubbles are shown in
picturebelow:
• Neverremovethreaded
orifice atend ofvalve.
Valve
5. If "growing" bubbles appear,there is a leak. Close LP tank
valve immediately and retighten connections. If leaks cannot
be stopped do not try to repair. Call Sears for replacement
partsat 1-800-4-MY-HOME_.
6. Always close LP tank valve after performing leaktest by
turning hand wheel clockwise.
463845504.19


