71
Care and Maintenance
Clearing a Jam
■ Clearing a media jam
Warning:
High voltage is present in the charger section. Take sufficient care when working in
this area, as there is a danger of electrical shock.
Caution:
The printer’s fuser unit is extremely hot. Take sufficient care when working in this
area, as there is a danger of getting burned.
Make sure that you follow these guidelines to avoid frequent media jams:
• Always use high-quality plain paper and transparencies. Refer to pages 111 and on.
• Make sure that you load specialty media only in the multi-purpose tray and that you
set the media thickness switch to the correct setting for the media used.
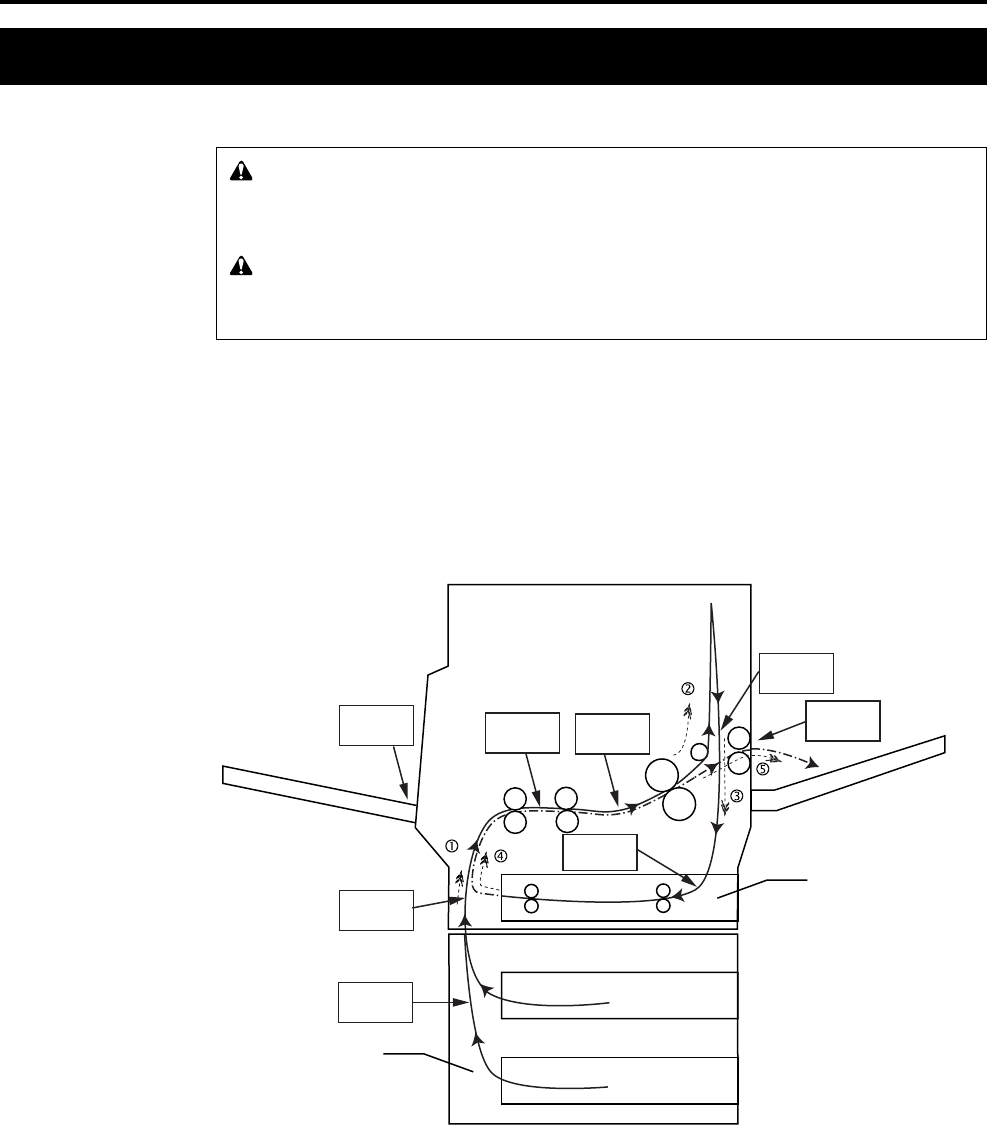
If a media jam occurs, the printer panel reports “Paper Jam.” It is followed by one of the
letters A through H that correspond to the various sensors throughout the paper path.
The following illustration shows the locations of the sensors that report media jams
(A through H).
Printer
Jam C
Jam H
Jam A
Jam D
Jam E
Jam G
Jam F
Jam B
Lower
Feeding Unit
(Option)
MP tray
Media cassette or
Duplex Unit (Option)
output tray
Notes:
• Sometimes the page on which the paper jam occurred will not be re-printed
depending on the location of the paper jam.
• Note that your hands may become dirty from unfused toner when removing paper
jams.
Frequent occurrence of paper jams may indicate you are using a paper specification
which does not suit the printer. If this appears to be the case, please change to a
different type of paper.
If you have tried changing paper types and paper jams still occur frequently, there
may be a problem with the printer. In this case, please contact your dealer.
( ☞ P. 72)
( ☞ P. 84)
( ☞ P. 73)
( ☞ P. 82)
( ☞ P. 74)
( ☞ P. 78)
( ☞ P. 80)
( ☞ P. 81)


