Chapter 1
Perimeter Wire Setup
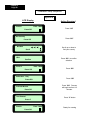
1.0 Where To Start
In order to determine the best location to begin the setup, it is best to first make some basic
decisions based on your lawn. For each zone that is set up, allow for placement of one
Perimeter Switch for that zone. Find a convenient spot outside the perimeter of each zone that
is relatively easy for you to access. A spot sheltered from the elements is preferred
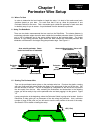
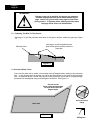
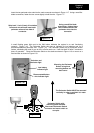
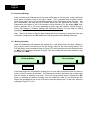
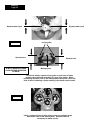
1.1 Using The RoboRuler
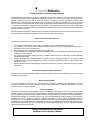
There are two basic measurements that are used on the RoboRuler. The shorter distance is
used along perimeter edges where the area outside the immediate perimeter (about 12 inches/30
cm) is free of obstacles and is the same relative height as the perimeter edge. The longer
distance is used along perimeter edges where the area outside the immediate perimeter has
obstacles or differences in the height along the perimeter edge. See Figure 1.1.
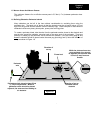
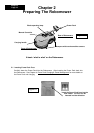
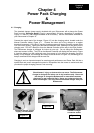
1.2 Starting The Perimeter Wire
Tear out the perforated center piece on the perimeter wire box. Puncture the plastic covering
with your finger and feel around inside the center of the wire spool for the end of the wire. Pull
the wire end out of the box. The box is designed as a dispenser for the wire so do not remove
the wire spool from the box. After reviewing the illustrations and instructions in the following
pages you will be ready to lay out the perimeter wire and start pegging it to the ground. Figure
1.2
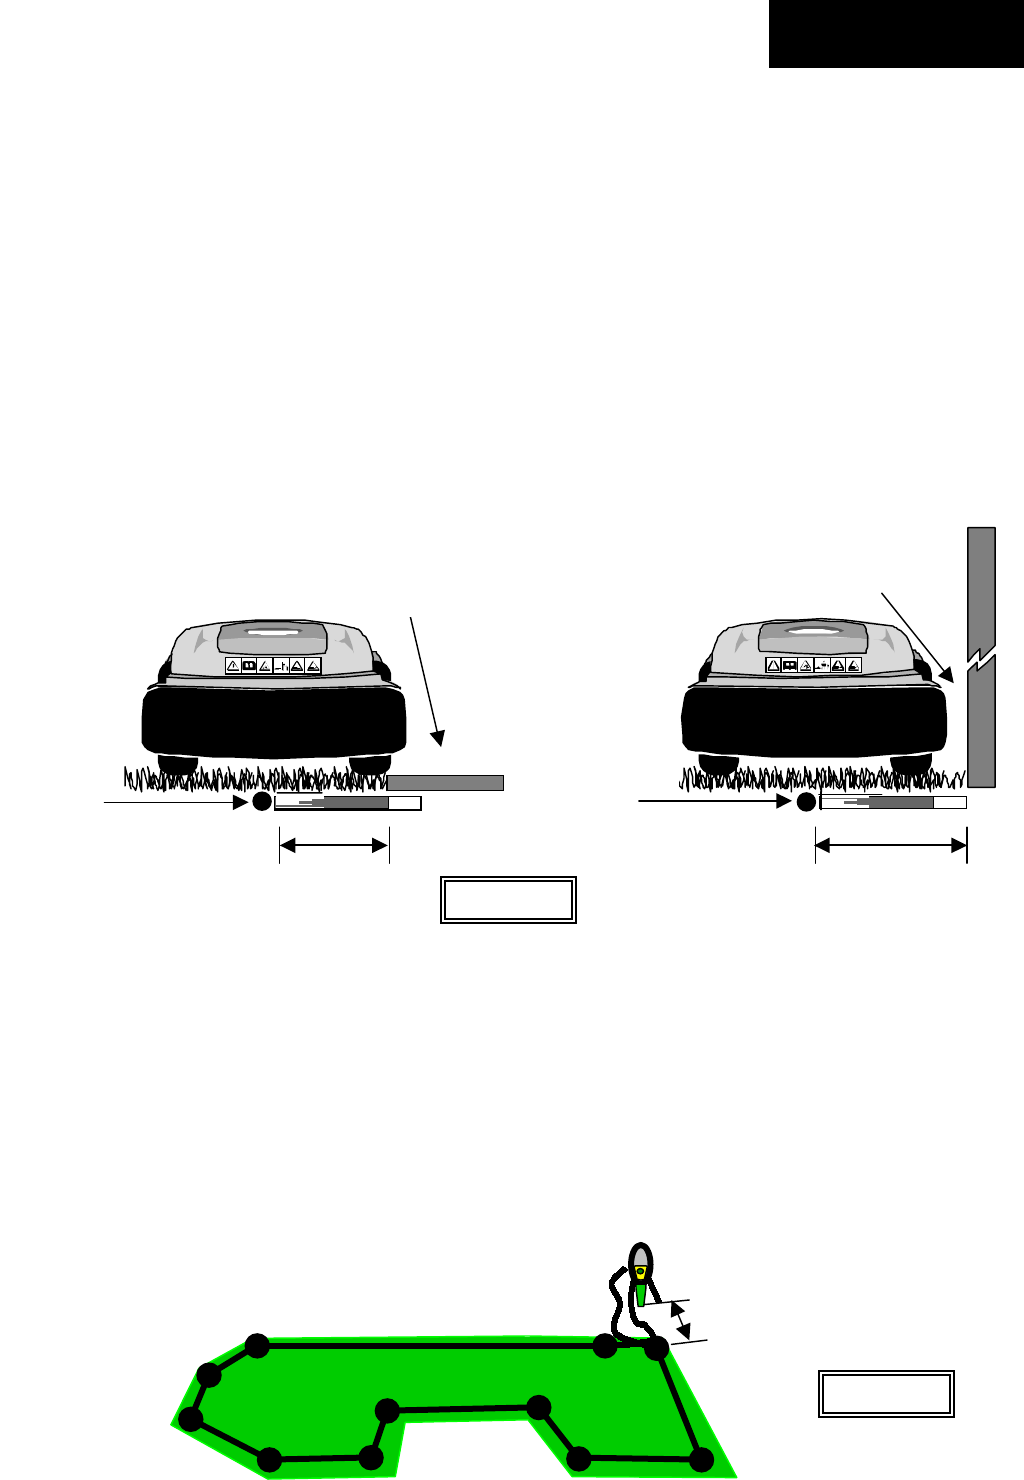
Leave enough wire at the beginning, where the Perimeter Switch is going to be located. Use the
RoboRuler to help guide you on placement of the wire along the perimeter. Use a minimum
number of pegs at this point, as you will want to test the wire position at the end of the setup.
See Section 2.5 for details on testing the setup.
Area outside perimeter. Has a wall
as an obstacle.
Short distance Lon
distance
Perimeter
wire
position
Perimeter
wire
position
Figure 1.1
Area outside perimeter. Same
basic level and free of obstacles.
Chapter 1
Page 9
>5ft (1.5m)
Figure 1.2