Maintenance
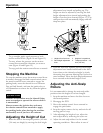
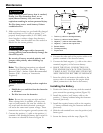
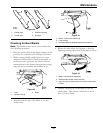
6. Attach the front support rod to the mower deck
with the clevis pin and hairpin cotter (Figure 54).
7. Install the mower belt onto the engine pulley;
refer to Replacing the Mower Belt.
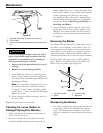
Replacing the Discharge
Deector
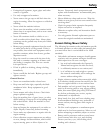
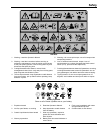
DANGER
An uncovered discharge opening could allow the
lawn mower to throw objects in the operator’s or
bystander’s direction and result in serious injury.
Also, contact with the blade could occur.
Never operate the lawn mower unless you install
a mulch plate, discharge deector, or grass
collection system.
Inspect the discharge deector for damage before
each use. Replace any damaged parts before use.
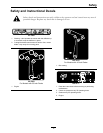
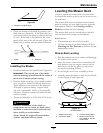
• 42 inch and 50 inch E-Series Deck
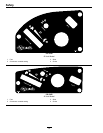
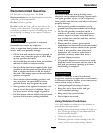
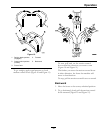
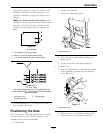
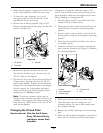
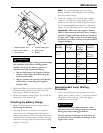
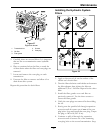
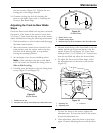
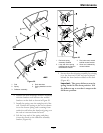
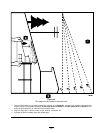
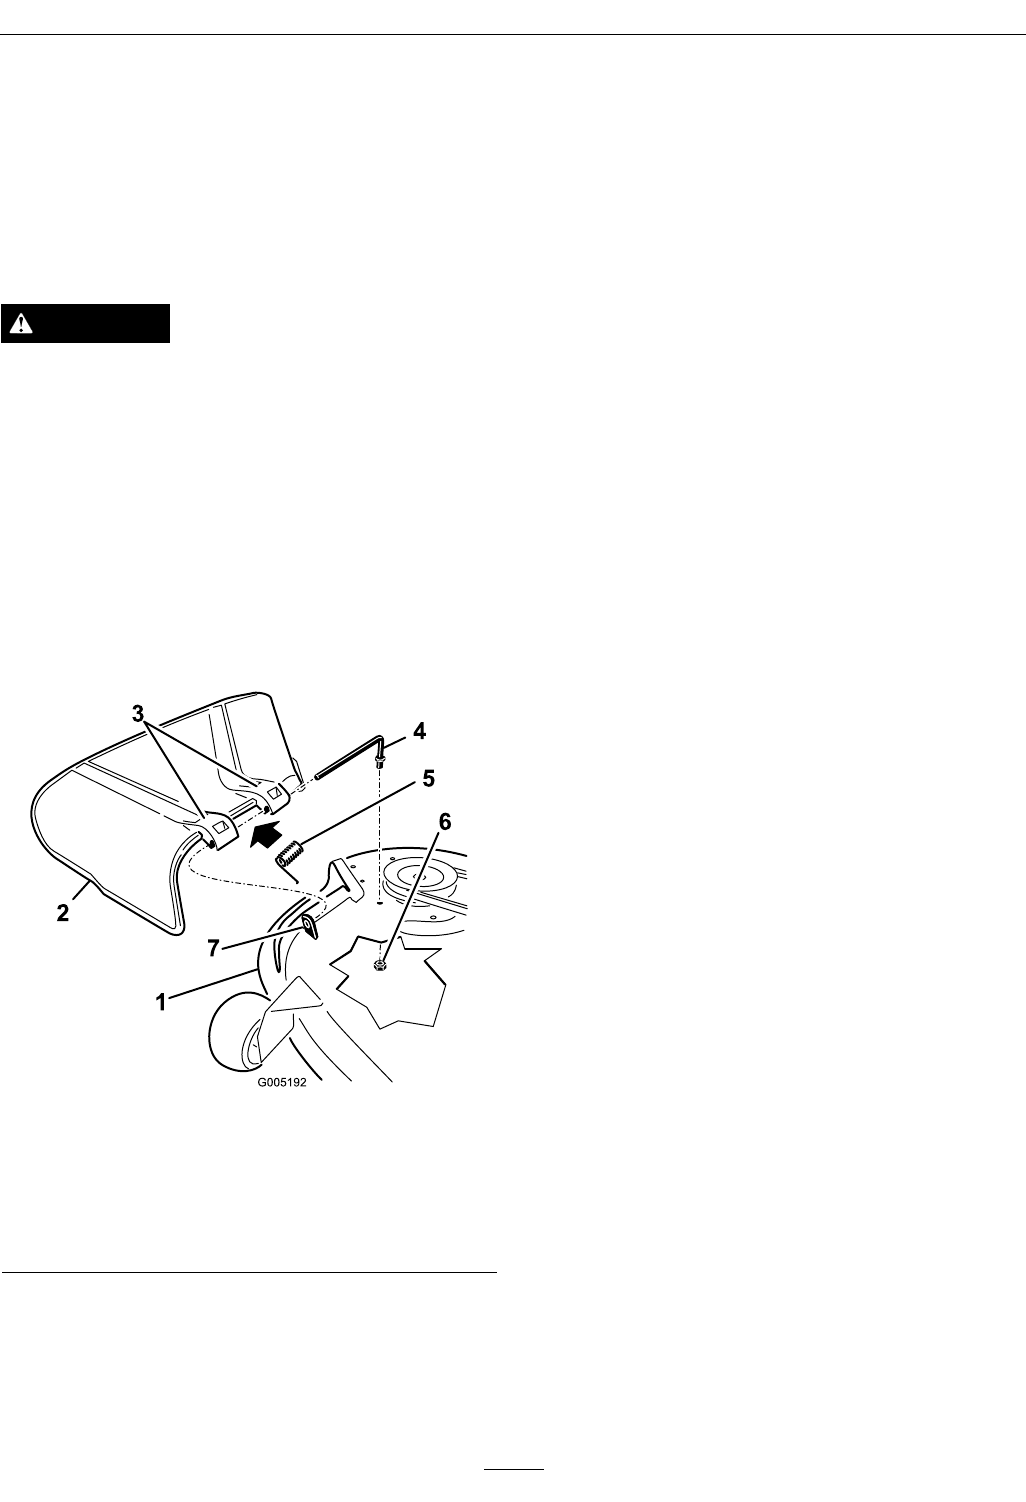
1. Locate items shown in Figure 58.
Figure 58
1. Mower deck
5. Spring
2. Discharge deector 6. Nut (3/8 inch)
3. Discharge deector
bracket
7. Short stand-off
4. Rod
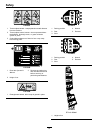
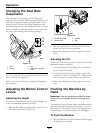
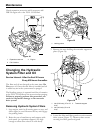
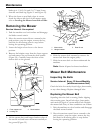
2. Remove the nut (3/8 inch) from the rod under
the mower.
3. Slide the rod out of the short stand-off,
spring, and discharge deector . Remove the
damaged or worn discharge deector.
4. Replace the discharge deector.
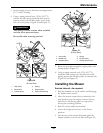
5. Slide rod, straight end, through the rear
discharge deector bracket.
6. Place the spring on the rod, with end wires
down, and between the discharge deector
brackets. Slide rod through second discharge
deector bracket.
7. Insert rod at front of discharge deector into
short stand-off on deck. Secure rear end of
rod into the mower with a nut (3/8 inch).
Important: The discharge deector must
be spring loaded in the down position.
Lift the deector up to test that it snaps to
the full down position.
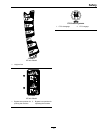
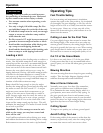
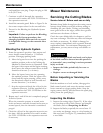
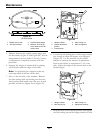
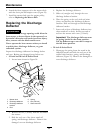
• 50 inch S-Series Deck
1. Disengage the spring from the notch in the
deector bracket and slide the rod out of the
welded deck brackets, spring, and discharge
deector (
Figure 59). Remove the damaged or
worn discharge deector.
50