5
5
1
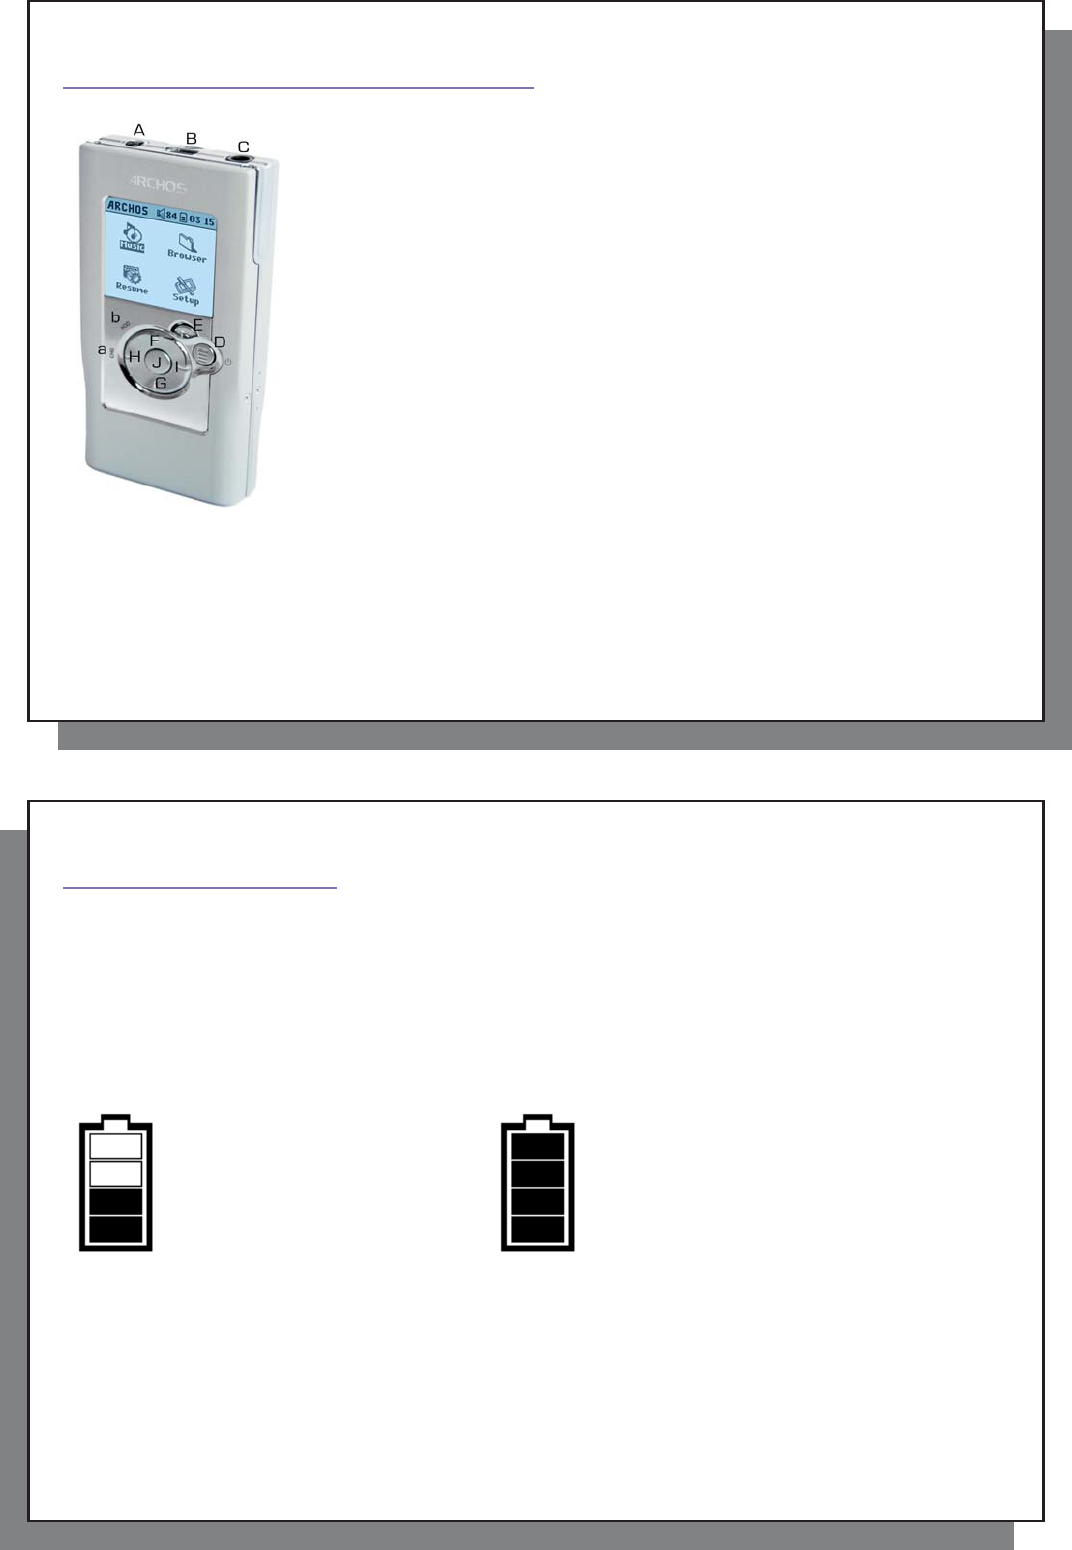
Ports, Buttons, and Connections
Ports, Buttons, and Connections
A Power jack – to connect an optional AC adapter/charger
B USB 2.0 port – To connect to your computer to transfer fi les to Gmini™ and to
charge its battery
C Headphone Jack
D On button (hold 3 seconds) & Menu options
E Off button (hold 3 seconds) & Stop/Escape
Navigation pad
F Move Up & increase volume
G Move Down & decrease volume
H Move Left (decrease value) or audio rewind
I Move Right (increase value) or audio fast forward
J Play/Pause/Enter
a CHG – Battery charging indicator
b HDD – Hard drive activity indicator
6
6
2
First Time Usage
2.1 Charging the Battery
Before using your Gmini XS100 for the fi rst time, completely charge the battery for two hours.
• The Gmini™ XS100 is charged through its USB connector. Connect the included USB cable to a running
computer and plug the other end into the Gmini™ while it is off. This will charge its internal battery. The CHG
indicator will also light up to show that its battery is charging.
• The battery is fully charged when the full battery icon appears.
Animated battery: Full battery:
The battery is currently being charged. The battery is fully charged.
• You can purchase an Archos charger/adapter to charge the battery from a wall outlet. The blue CHG indicator
lights up to indicate that the external adapter is connected. The battery will charge automatically when it is
plugged in.
• After the fi rst initial full charge, you may use the Gmini while the AC adapter is plugged in.


