MM70xG2-UM-03 2-1
2
Chapter
ACCESSING THE WEB INTERFACE FOR MODEM MANAGEMENT
Use the Web interface as the most comprehensive and convenient way to set up and manage the modem. This
chapter provides steps to help you access the Web interface pages for configuration and management of the
modem.
Access to the command line interface is available through the modem console port or over a network using a telnet
session. Not all configuration and management features, however, are supported through the command line
interface. See Appendix A: “Command Line Interface Access” on page A-1 for instruction on using the command
line interface for configuration and management.
ASSIGN IP ADDRESSES
To access the modem Web interface, the management PC must be on the same LAN
IP subnet as the modem. Default values are shown to the right. Do one of the following:
• Change the management PC IP address so that it is on the same subnet as the
modem (go to Step 1 below).
• Change the IP address of the modem 10/100Base-T (LAN) port to a value
assigned by your network administrator using the command line interface (go to
Appendix A: “Set Up the LAN” on page A-6).
Use the following steps to set up a management PC to be on the same subnet with the modem. (The example
shows instructions for a PC that is running Microsoft Windows 98 SE; instructions for other operating systems may
differ slightly.)
Step Action
1 From the Windows desktop, choose Start | Settings | Control Panel to open the Control Panel dialog.
2 From the Control Panel dialog, double-click the Network icon (shown to the right).
The Network dialog is displayed.
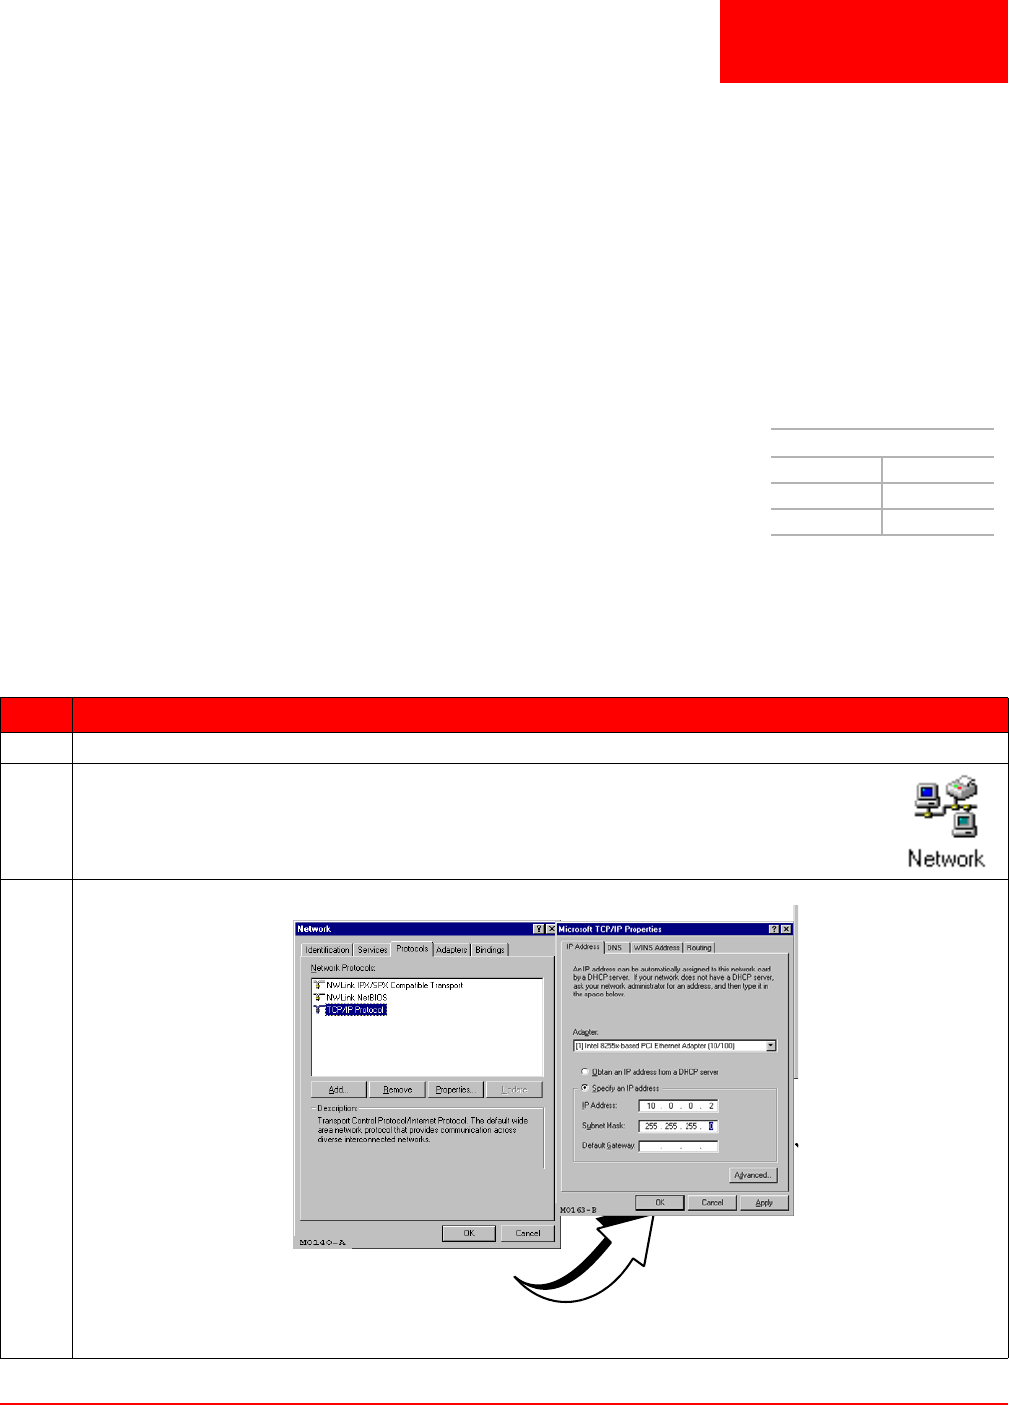
3 From the Configuration tab, double-click TCP/IP to display the TCP/IP Properties dialog (Figure 2-1).
Figure 2-1. TCP/IP Properties
Modem Defaults
Subnet: 10.0.0.0
Subnet Mask: 255.255.255.0
IP Address: 10.0.0.1
TCP/IP Network Configuration
for an Ethernet NIC
