


6
Figure 7
Figure 8
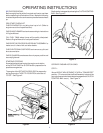
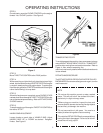
1. SET HANDLE BAR in desired position before engaging
CLUTCH CONTROL.
2. SET HEIGHT ADJUSTMENT LEVER to desired raking
height.
3. SET SPEED by moving THROTTLE CONTROL to desired
speed setting.
4. BEGIN dethatching by stepping behind DETHATCHER,
lifting “UP” on CLUTCH CONTROL BAIL and pushing machine
forward.
5. TO MAKE SHARP TURNS, release CLUTCH CONTROL
BAIL and tilt machine back on its rear wheels.
DETHATCHER DEPTH ADJUSTMENT
Normal Depth Adjustment on the DETHATCHER is
accomplished by placing the machine on a hard surface,
making sure one of the satellite shafts is at dead bottom, and
adjusting the wheels so that the fingers are just touching the
ground. (IMPORTANT: DO NOT set the fingers so that they
will penetrate the ground. This will counteract the centrifugal
force of the fingers and prevent them from doing a proper de-
thatching job).
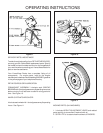
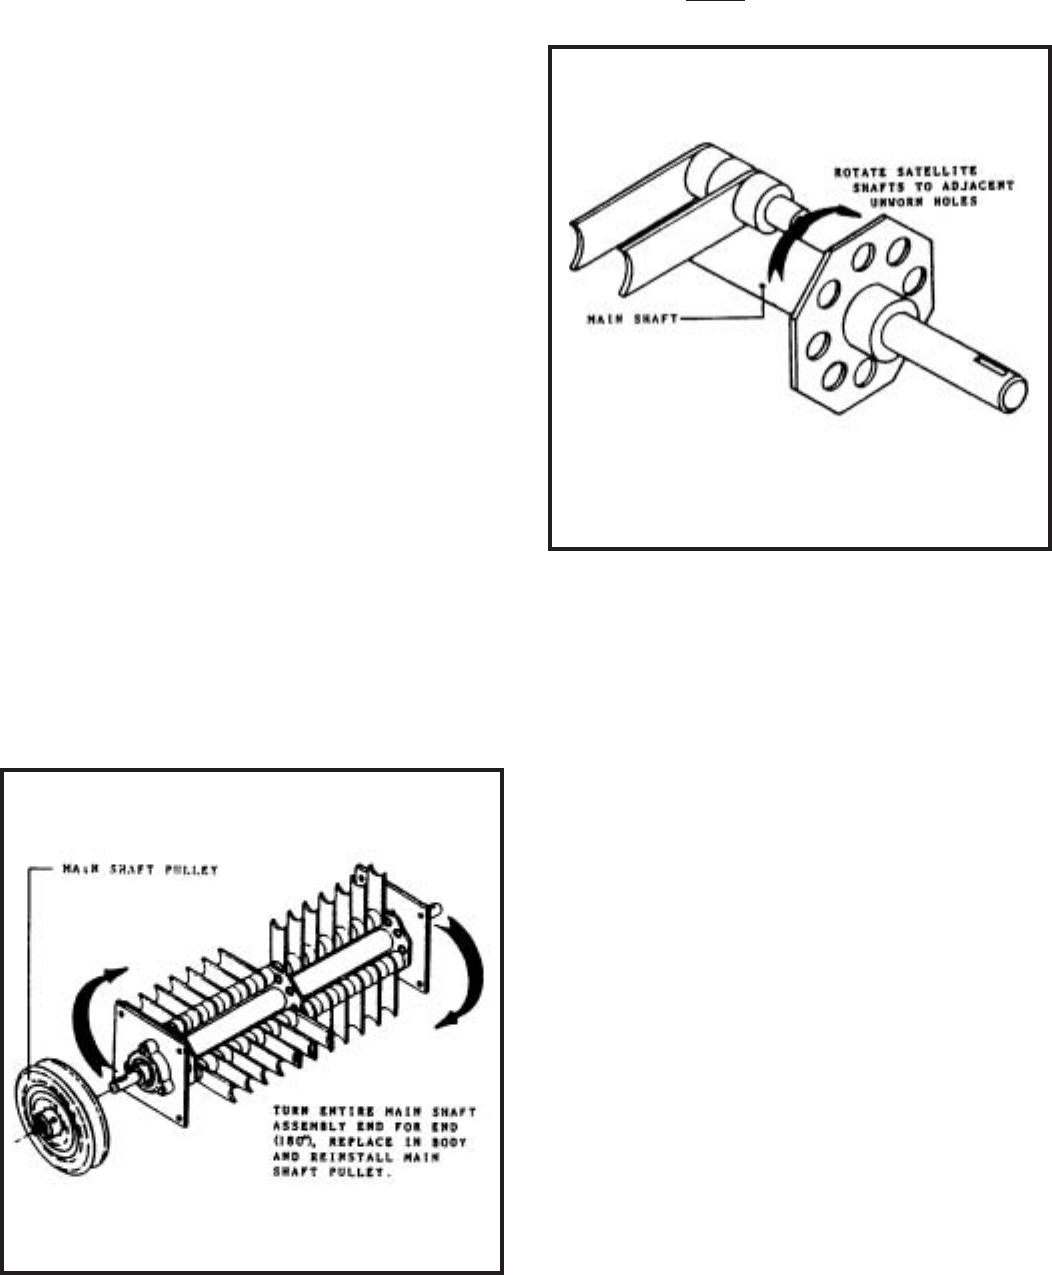
Through constant use, the raking edges of the fingers will
begin to wear. When this occurs, remove the end plates and
turn the entire Shaft Assembly, end-for-end and replace it in
the machine. This will give the fingers a new square raking
edge. See Figure 7.
SLICING PROCEDURE
The following text gives instructions for making depth
adjustments on the SLICER. For machine operation, see
“DETHATCHING PROCEDURE” in preceding column.
SLICER DEPTH ADJUSTMENT
Normal depth setting for proper blade penetration for slicing
and aerating is approximately 1/2" to 3/4" into the ground. To
obtain the proper setting, place the machine on the lawn
surface and adjust the wheel height one to two notches.
For the crawling type grasses such as Bermuda, Zoysia,
Bahia, St. Augustine, etc., the setting is obtained in the
same manner, except the wheels are raised only one notch.
For single strand grasses such as Bluegrass and Rye grass,
it is best to slice in two separate directions, perpendicular to
each other. For example, when slicing the first time,
direction of travel is north and south. Then it is best to slice
again in a east-west direction. (IMPORTANT: It is necessary
to water thoroughly after the aerating process is complete.
Fertilizer and seed, if desired, can be applied after slicing).
As the blades wear, they may be rotated four times to give
new cutting edges each time. See Figure 9.
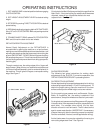
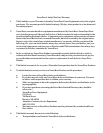
Extra holes in the Main Shaft are provided for longer life of the
Main Shaft. If the hole holding the satellite shaft becomes
distorted, rotate all four (4) satellite shafts to the next
adjacent hole. See Figure 8.
OPERATING INSTRUCTIONS