


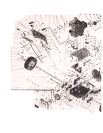
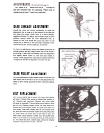
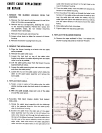
CHUTE CABLE REPLACEMENT
OR REPAIR
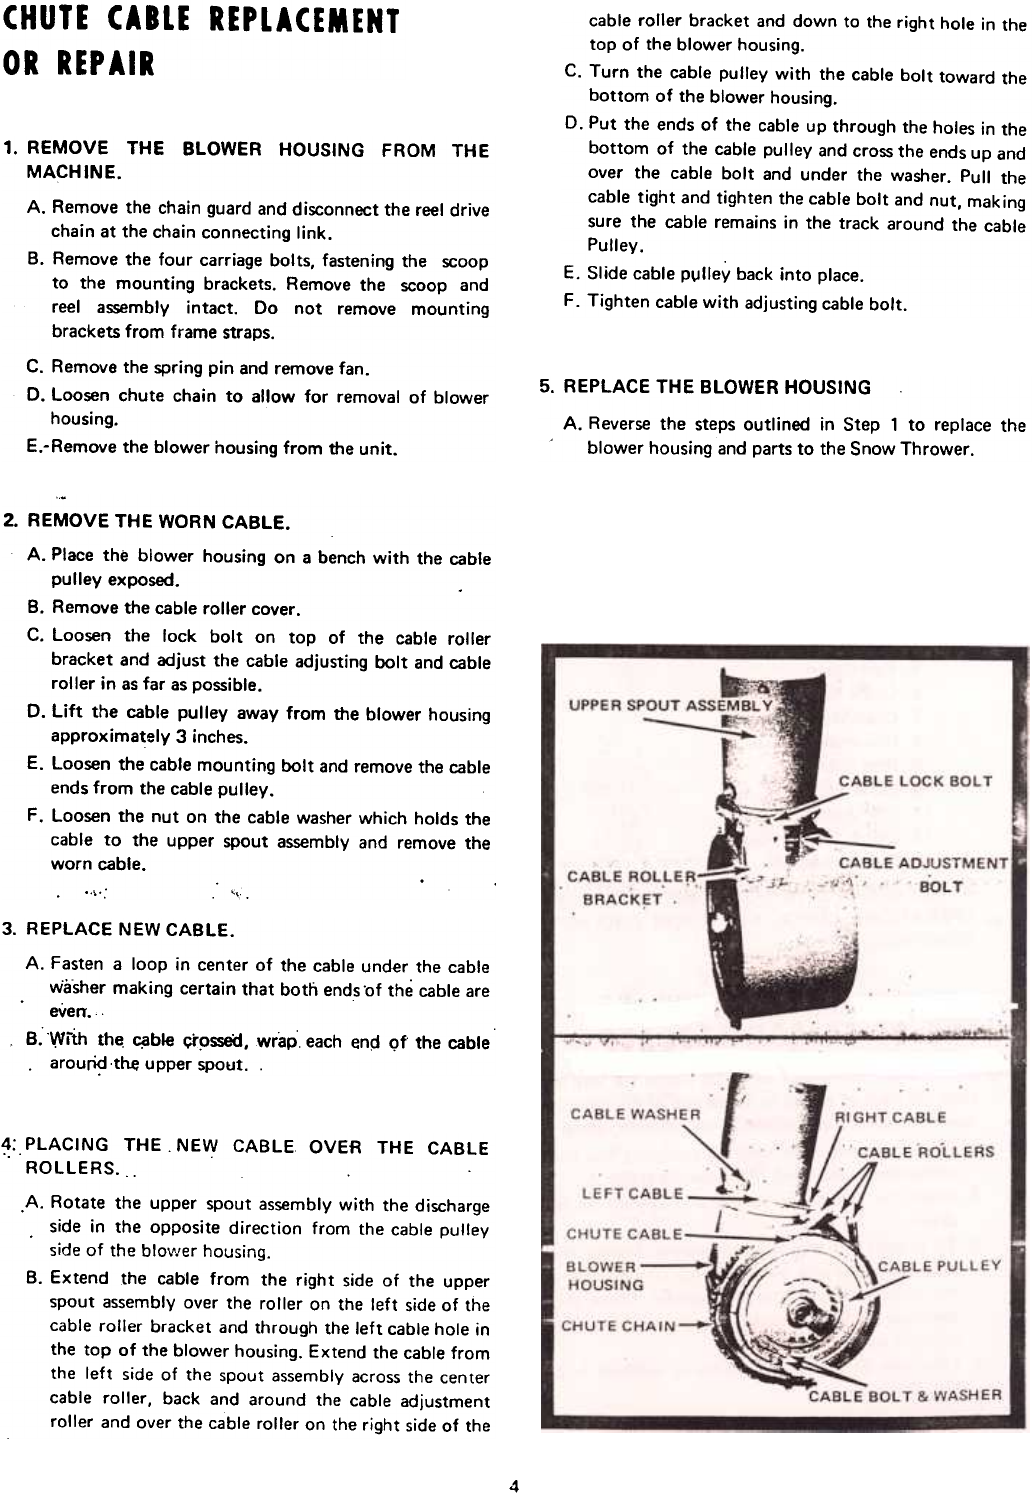
cable roller bracket and down to the right hole in the
top of the blower housing.
C. Turn the cable pulley with the cable bolt toward the
bottom of the blower housing.
D. Put the ends of the cable up through the holes in the
bottom of the cable pulley and cross the ends up and
over the cable bolt and under the washer. Pull the
cable tight and tighten the cable bolt and nut, making
sure the cable remains in the track around the cable
Pulley.
E. Slide cable p~lley back into place.
F. Tighten cable with adjusting cable bolt.
5.
REPLACE THE BLOWER HOUSING
A. Reverse the steps outlined in Step 1 to replace the
blower housing and parts to the Snow Thrower.
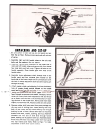
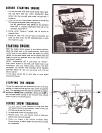
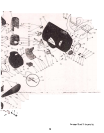
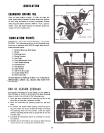
1. REMOVE THE BLOWER HOUSING FROM THE
MACHINE.
A. Remove the chain guard and disconnect the reel drive
chain at the chain connecting link.
B. Remove the four carriage bolts, fastening the scoop
to the mounting brackets. Remove the scoop and
reel assembly intact. Do not remove mounting
brackets from frame straps.
C. Remove the spring pin and remove fan.
D. Loosen chute chain to allow for removal of blower
housing.
E.-Remove the blower housing from the unit.
~
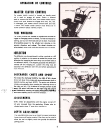
2. REMOVE THE WORN CABLE.
A. Place the blower housing on a bench with the cable
pulley exposed.
B. Remove the cable roller cover.
C. Loosen the lock bolt on top of the cable roller
bracket and adjust the cable adjusting bolt and cable
roller in as far as possible.
D. Lift the cable pulley away from the blower housing
approximately 3 inches.
E. Loosen the cable mounting bolt and remove the cable
ends from the cable pulley.
F. Loosen the nut on the cable washer which holds the
cable to the upper spout assembly and remove the
worn cable.
..\.: " .
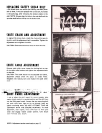
3.
REPLACE NEW CABLE.
A. Fasten a loop in center of the cable under the cable
washer making certain that both ends .of the cable are
everr.
..
B. 'With the, c.able cr9ssed, wrap each en~ <;If the cable
.arouri.d .t~ upper spout. .
~:. PLACING THE. NEW CABLE OVER THE CABLE
ROLLERS. ..
.A. Rotate the upper spout assembly with the discharge
side in the opposite direction from the cable pulley
side of the blo\"/er housing.
B. Extend the cable from the right side of the upper
spout assembly over the roller on the left side of the
cable roller bracket and through the left cable hole in
the top of the blower housing. Extend the cable from
the left side of the spout assembly across the center
cable roller. back and around the cable adjustment
roller and over the cable roller on the right side of the
4