


9 10
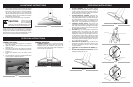
4. Take a secure hold of the grass trimmer and, without
letting it touch the g
rass to be cut, push up the safety
switch, then press the trigger on the upper handgrip.
Let the grass trimmer run for a few seconds and
“bump” the stringhead against the lawn. Nylon line will
automatically release. The cut-off blade in the debris
shield will trim off excess line.
5. To switch off the string trimmer let go of the switch.
These operations should be repeated a few times before
starting work to make sure that everything is functioning
properly and to familiarize yourself with the grass trimmer.
Start off slowly, when you have gained experience, you will
be able to use the grass trimmer to its full potential.
ADJUSTMENT INSTRUCTIONS
Fig. 10
A short or worn line
cuts less efficiently
so, to improve its operation on subsequent
occasions, bump the stringhead lightly on the
ground while the trimmer is running.(Fig 10)
CAUTION:
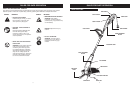
CONNECT THE CORD
1. Ensure the cord is NOT plugged into a receptacle
before this procedure.
2. Make a loop with 8″ - 10″ (20 - 25cm) of the end of the
extension cord.
3. Place the loop into the slot (A) under the rear handle
and lock into place on the cord retainer (B) as shown
in Figure 11.
4.
Connect the e
xtension cord to the tr
immer power
cord.
5.
Plug the extension cord into a receptacle ONLY when
y
ou are ready to oper
ate the tr
immer
.
TRIMMER OPERATION
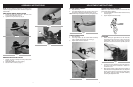
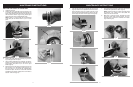
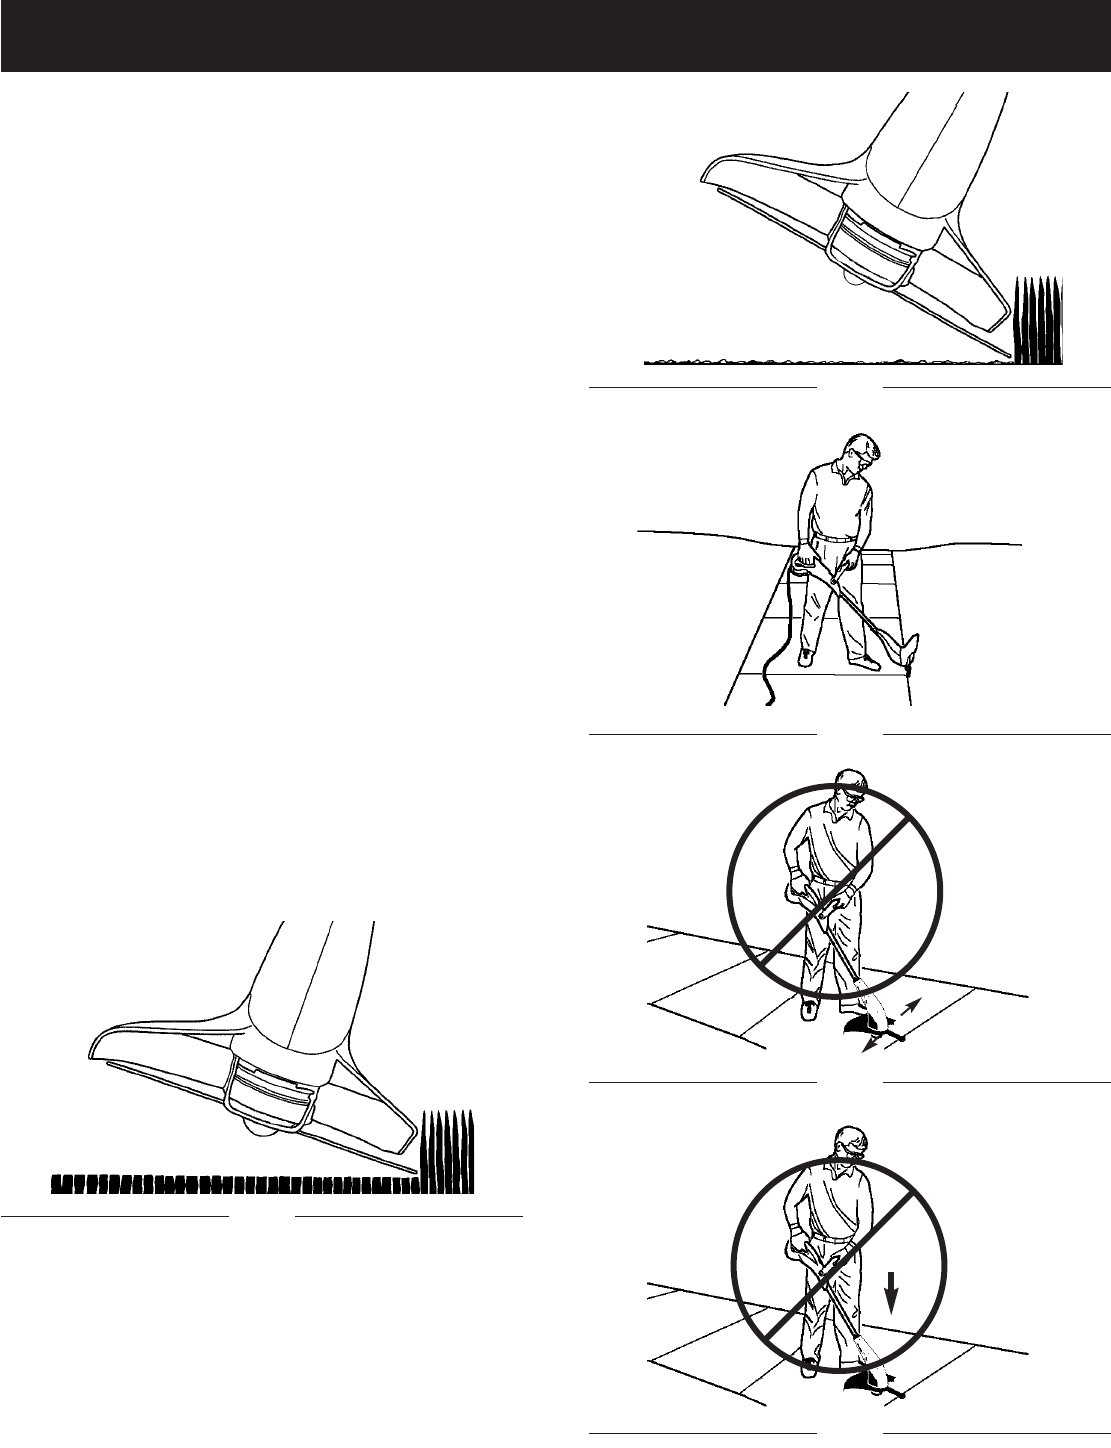
1. TRIMMING / MOWING (Fig. 12). Swing trimmer with a
sickle-like motion from side to side. Do not tilt the
stringhead during the procedure. Test area to be
trimmed for proper cutting height. Keep stringhead at
same level for even depth of cut.
OPERATING INSTRUCTIONS
Fig. 11
B
B
2. CLOSER TRIMMING (Fig. 13). Position trimmer
str
aight ahead with a slight tilt so bottom of stringhead
is above ground level and string contact occurs at
proper cutting point. Always cut away from operator.
Do not pull trimmer in toward operator.
3.
FENCE/FOUNDATION TRIMMING. Approach trim-
ming around chain link fences, picket fences, rock
walls and foundations slowly to cut close without whip-
ping string against the barrier. If the string comes in
contact with rock, brick walls, or foundations, it will
break or fray. If string snags fencing, it will snap off.
4.
TRIMMING AROUND TREES. Trim around tree
trunks with a slow approach so string does not contact
bar
k. Walk around the tree trimming from left to right.
Approach grass or weeds with the tip of the string and
tilt stringhead slightly forward.
5. SCALPING (Fig. 14). Scalping refers to removal of all
vegetation down to the ground. To do this, tilt the
stringhead to about a 30 degree angle to the left. By
adjusting the handle you will have better control dur-
ing this operation. Always keep a distance of 50 feet
(15 meters) from other people and animals when
scalping. Do not attempt this procedure if there is any
chance flying debris could injure operator, other peo-
ple or cause damage to property.
6.
OPERATING AS AN EDGER (Fig. 15). With the unit
configured as an edger, hold it so the motor is to your
left side so that debris is thrown to the rear. Always
use eye protection.
7. SWEEPING - DO NOT SWEEP WITH TRIMMER (Fig.
16)
8. DO NOT BUMP TRIMMER ON CONCRETE. This can
damage the stringhead (Fig. 17).
OPERATING INSTRUCTIONS
Fig. 12
Fig. 13
Fig. 17
Fig. 14
Fig. 15
Fig. 16
A