


12
SECTION 8: ADJUSTMENTS
WARNING:
NEVER attempt to clean chute or make any adjustments or repairs while engine is
running.
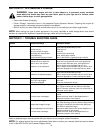
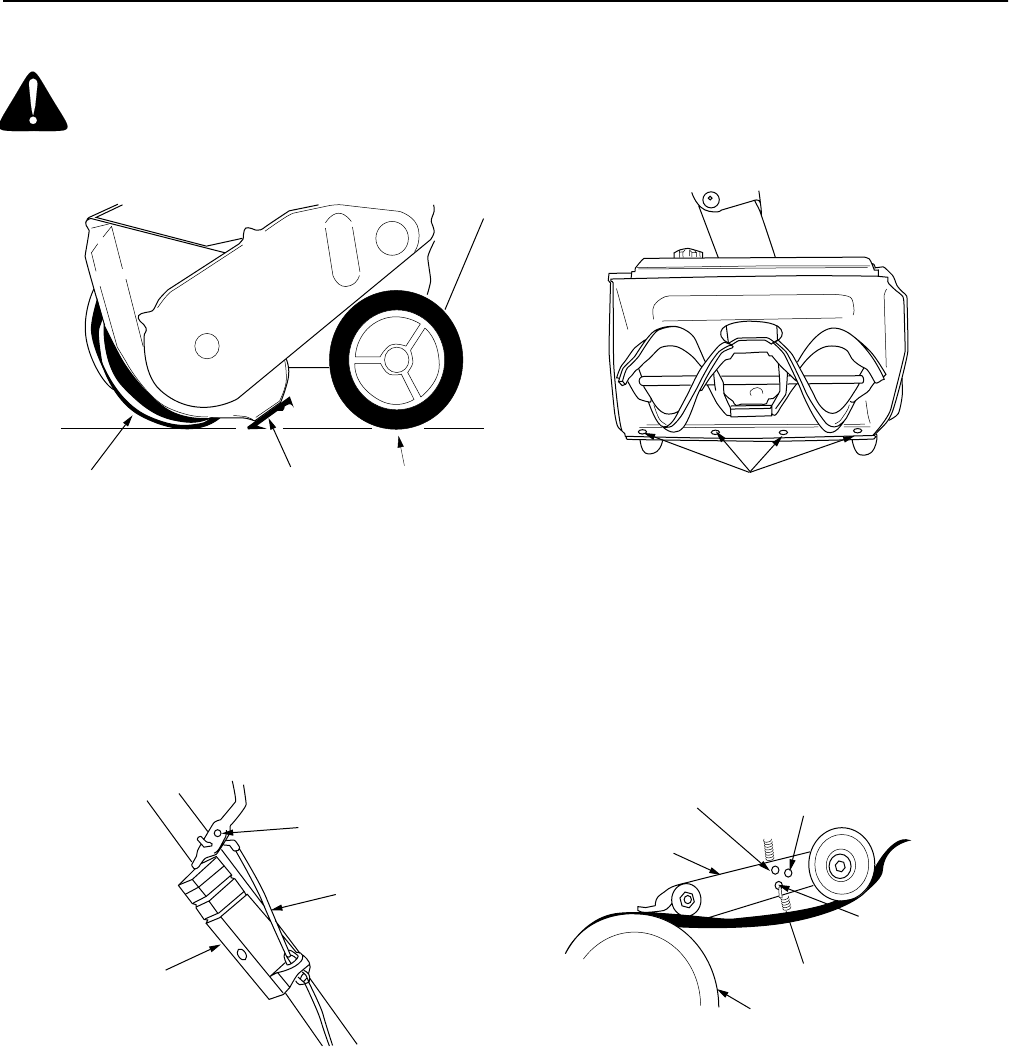
SHAVE PLATE ADJUSTMENT
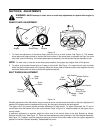
Figure 13
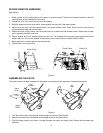
1. To check the adjustment of the shave plate, place the unit on a level surface. See Figure 13. The wheels,
shave plate and augers should all contact the level surface. If the shave plate is adjusted too high, the snow
may blow under the housing. If the shave plate wears excessively, the shave plate may be adjusted too low.
NOTE:
On new units or units with a new shave plate installed, the augers may slightly raise off the ground.
2. To adjust, tip the snow thrower back so it rests on the handle. See Figure 13. Loosen the lock nuts and bolts
which secure the shave plate to the housing. Move the shave plate to desired position and retighten the nuts
and bolts. Make certain all nuts and bolts are tightened securely.
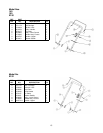
BELT TENSION ADJUSTMENT
Figure 14
Periodic adjustment of the belt tension may be required due to normal stretch and wear on the belt. Adjustment is
needed if the augers seem to hesitate while turning, but the engine maintains the same speed.
The upper hole in the control handle provides adjustment for belt tension. To adjust, disconnect the “Z” end of
control cable from the bottom hole in the control handle. Refer to Figure 14. Hook the cable into the upper hole in
control handle.
If additional adjustment is required, adjust the other end of the control cable at the Idler Bracket as follows:
Remove the belt cover. See Figure 15. There are three adjustment holes provided in the Idler Bracket Assembly.
See Figure 14. To adjust, move the extension spring on the end of the clutch cable to the next higher adjustment
position on the Idler Bracket Assembly. Reassemble belt cover.
Augers
Shave Plate
Wheels
Nuts & Bolts
Upper
Hole
Clutch
Cable
Auger
Pulley
Idler
Bracket
Spring on
End of Clutch
Cable
High Position
Middle Position
Low Position
Control
Housing