18 Owner Service
MAN0814 (3/11/2010)
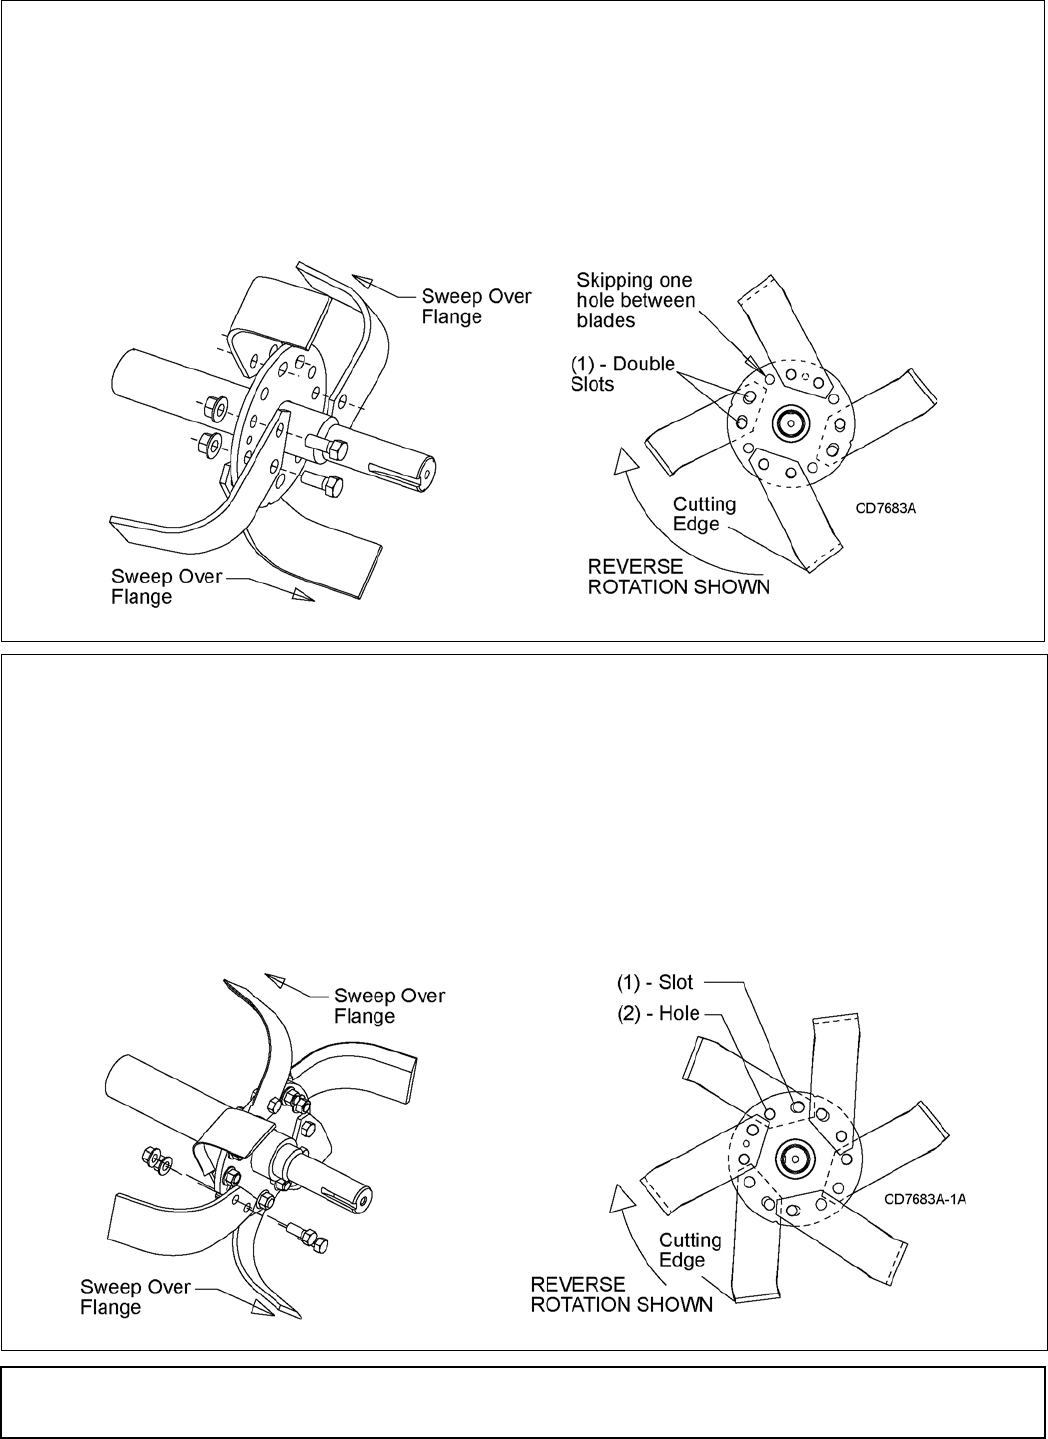
Blade Installation
Four Blade Installation
1. Remove any burrs on flanges generated from blades
that have slipped.
2. Start blade assembly with first blade installed over
the double slots (1).
NOTE: Blade cutting edges should face the direction
of rotation.
3. Install bolt heads against blades and flange nuts
against rotor flange.
4. Proceed by installing opposite blade to opposite
side of flange, skipping one hole between each
blade.
5. Completed assembly should have an empty hole
between blades. Blades should sweep over the
flange, not away from the flange.
6. Torque bolt head to 85 lbs-ft with mechanical torque
wrench.
Figure 12. Four Blade Installation
Six Blade Installation
1. Remove any burrs on flanges generated from blades
that have slipped.
2. Start blade assembly with first blade installed over
one slot (1) and one hole (2).
NOTE: Blade cutting edges should face the direction
of rotation.
3. Install bolt heads against blades and flange nuts
against rotor flange.
NOTE: Some older blades may require a lock washer
and nut for clearance instead of flange nut.
4. Proceed by installing opposite blade to opposite
side of flange using every hole.
5. Completed assembly should not have empty holes
between blades. Blades should sweep over the
flange, not away from the flange.
6. Torque bolt head to 85 lbs-ft with a mechanical
torque wrench.
Figure 13. Six Blade Installation
(Rev. 5/31/2011)
