


6 Mount Installation
MAN0788 (1/16/2009)
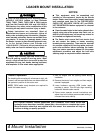
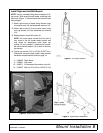
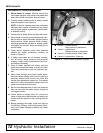
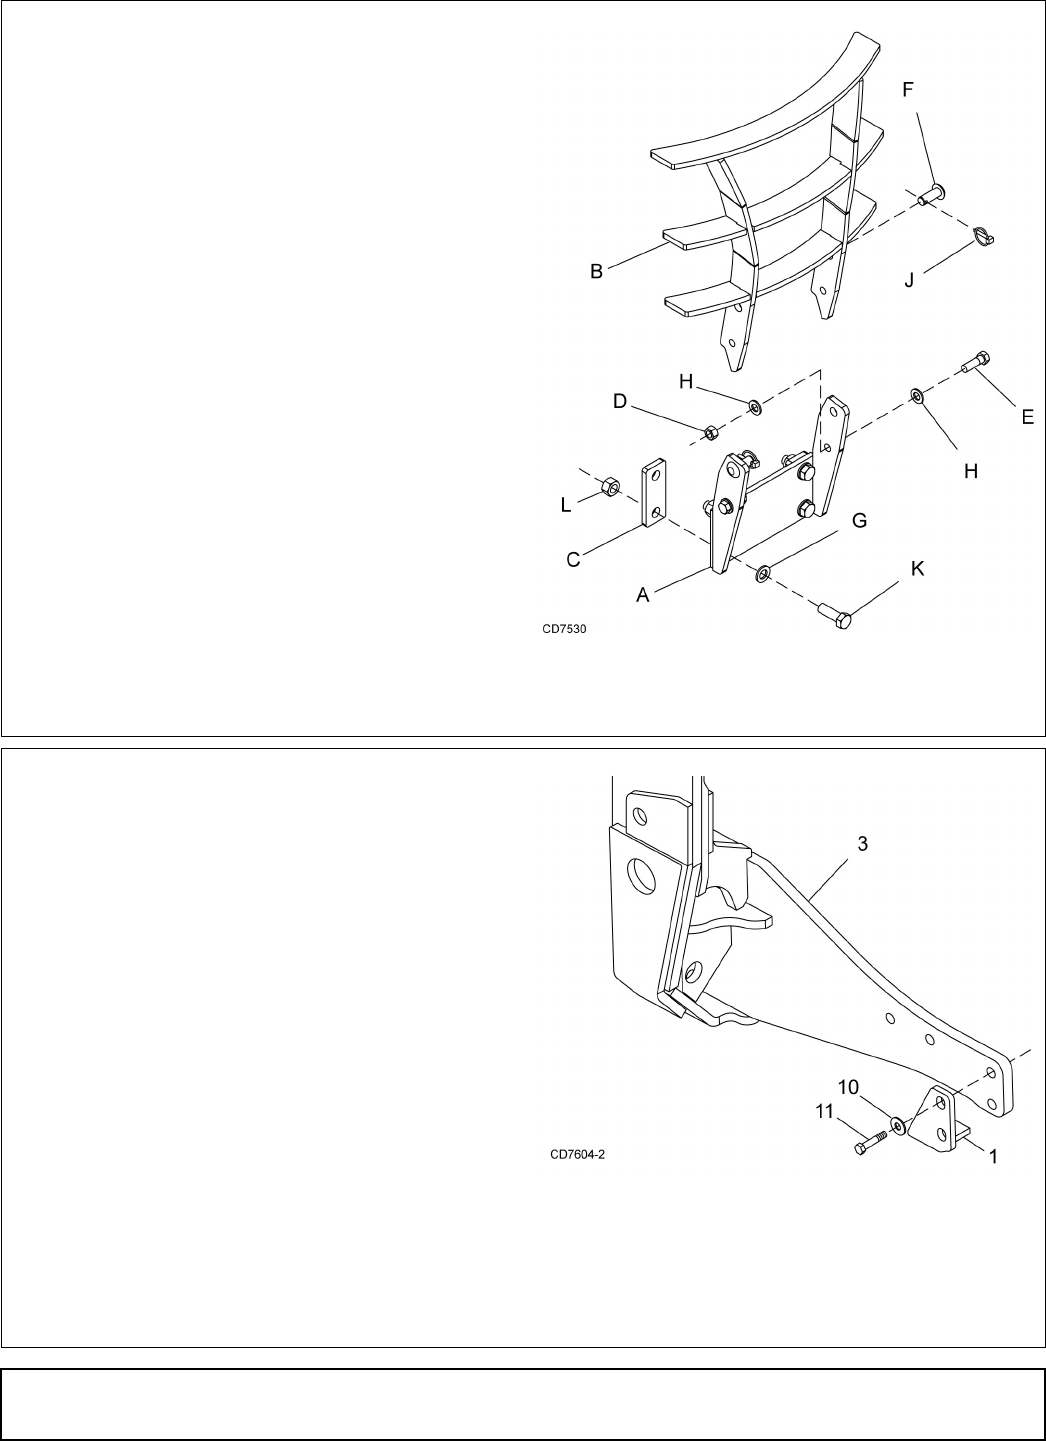
Install Optional Grill Guard
1. Attach grill guard support bracket (A) to the front
of the tractor using four cap screws (K), hardened
flat washers (G), two spacers (C) and hex nuts (L)
2. Attach grill guard (B) to support bracket (A) using
two (one per side) cap screw (E), four hardened
flat washers (H) and hex nuts (D).
NOTE: Do not overtighten cap screws (E); grill
guard must be able to pivot for access to the
battery.
3. Rotate grill guard up and secure into position
using two clevis pins (F) and lynch pins (J).
4. Torque cap screws (K) to 244 lbs-ft (330 N-m).
A. 1028909 Grill guard support bracket
B. 1028912 Grill guard
C. 1028919 Grill guard spacer
D. 230 5/8 NC Hex nut
E. 902 5/8 NC x 2 HHCS GR5
F. 26299 Clevis pin, 3/4 x 2
G. 57798 3/4 Hardened flat washer
H. 57817 5/8 Hardened flat washer
J. 304075 Lynch pin, 1/4
K. 307554 M20 x 2.5P x 60 HHCS
L. 307913 M20 x 2.5P Hex nut
Figure 4. Grill Guard Installation
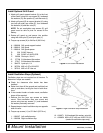
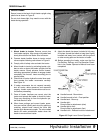
Install Oscillation Stops (Optional)
Oscillation stops are not required on all tractors. To
determine if stops are needed:
● Check tire clearance after loader has been
installed.
● Raise front tires off the ground and oscillate front
axle up and down, turning the tires in both direc-
tions.
● If tires contact loader or loader mount, oscillation
stops will be required.
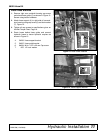
1. Remove the two from cap screws on loader
mount. Place oscillation stop over mount and
secure using two cap screws (11) and hardened
flat washer previously removed.
2. Repeat steps to install oscillation stop on opposite
side of tractor.
3. Torque cap screws (11) to 374 lbs-ft (507 N-m).
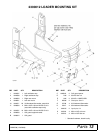
1. 1026397 Left oscillation stop
2. 1026398 Right oscillation stop
Figure 5. Right Oscillation Stop Installation
10. 1006371 3/4 Hardened flat washer, extra thk
11. 1028950 M20 x 2.5P x 80 mm HHCS CL10.9
(used with oscillation stops only)