


Service & Maintenance 29
MAN0506 (Rev. 9/5/2008)
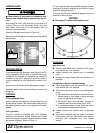
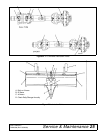
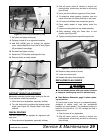
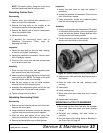
Figure 31. Drain Plug (Underside of Unit)
7. Re-install and tighten drain plug.
8. Dispose of used oil in an approved container.
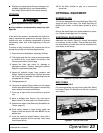
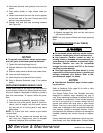
9. Add SAE 85W90 gear oil through the dipstick
cover. Use the dipstick to check the oil level (Figure
32) and add oil accordingly.
10. Re-install and tighten fill plug.
11. Reconnect PTO driveline and hydraulic lines.
12. Remove blocks or safety stands.
Figure 32. Dipstick Location
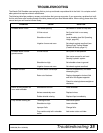
RATCHET HEIGHT ADJUSTMENT
Mechanical ratchets provide height setting for the unit.
To set ratchets, follow this procedure:
1. Clear the area of bystanders, especially children.
2. Turn the turnbuckle to achieve the desired ratchet
length (see Figure 32). Repeat Step 2 with other
ratchets.
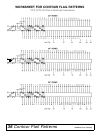
WHEEL SPACING
The rear wheels can be adjusted for alignment with
crop rows.
1. Clear the area of bystanders, especially children.
2. Shut off tractor, place all controls in neutral, set
parking brake, remove key, and wait for all moving
parts to stop.
3. Use a jack with sufficient capacity to lift the frame.
4. To determine wheel spacing, measure from the
center line of the unit. Mark positions on the frame.
5. Lift frame until wheels have cleared the ground.
6. Place safety stands or large blocks under the
frame.
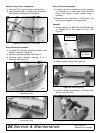
7. Loosen mounting bolts on one wheel assembly.
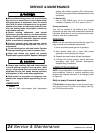
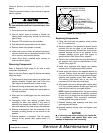
8. Slide assembly along the frame tube to new
position (see Figure 33).
9. Tighten mounting bolts to specified torque level.
Figure 33. Positioning Wheel Assembly
10. Remove safety stands or blocks.
11. Lower and remove jack.
12. Repeat with other wheel assembly.
REPLACING FLAIL KNIVES
Do not handle knives with bare hands. Careless
or improper handling may result in serious injury.
■ Read Balance Statement, page 5, before replac-
ing any knives.
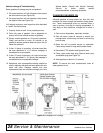
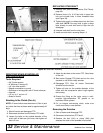
The flail knives in pairs swing on a hardened bushing,
designed to reduce wear, and are sandwiched
between two steel spacers. The hardened bushing is
bolted to the clip with a 1/2" NC carriage bolt and a
flange lock nut.
1. Clear the area of any bystanders.
2. Shut off tractor, place all controls in neutral, set
parking brake, remove key, and wait for all moving
parts to stop.
DRAIN PLUG