


24 Dealer Service
MAN0845 (1/12/2011)
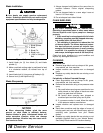
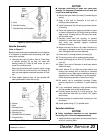
2. Install pulley (12) and split taper bushing (13) with
integral key (14) on spindle shaft. Make sure
bushing is in contact with sleeve on spindle shaft.
3. Alternately tighten split taper bushing cap screws
to 20 lbs-ft.
4. Install lock washer and nut on spindle shaft.
Tighten nut until snug, but do not over-tighten.
Check shaft to make sure it spins freely..
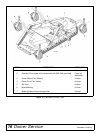
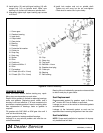
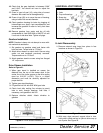
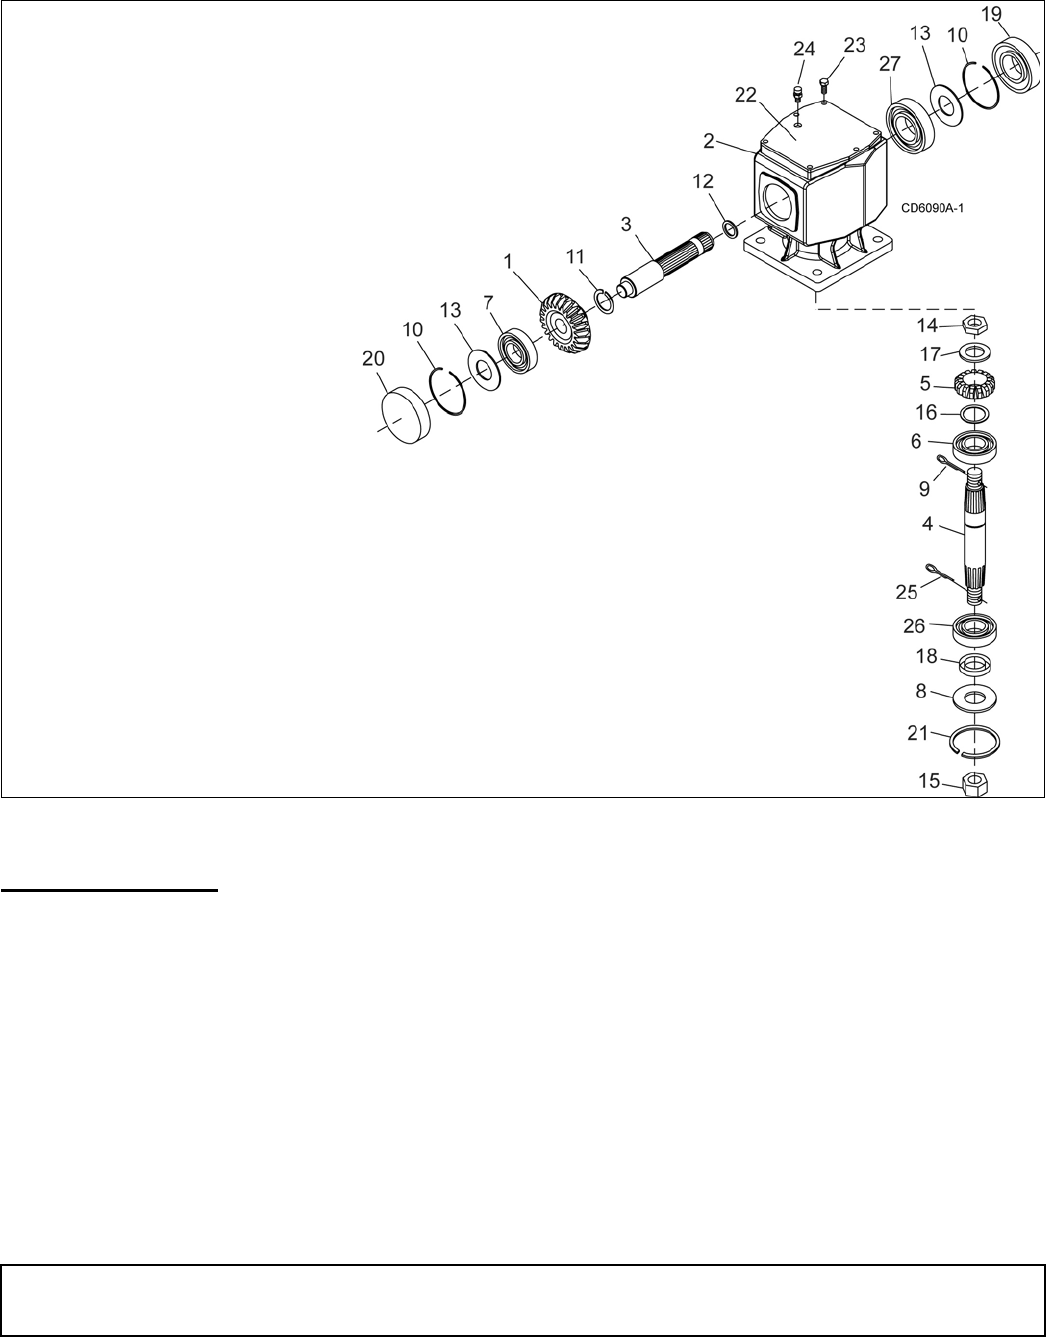
Figure 18. Gearbox Assembly
GEARBOX REPAIR
Read this entire section before starting any repair.
Many steps are dependent on each other.
Repair to this gearbox is limited to replacing bearings,
seals, and gaskets. Replacing gears, shafts, and a
housing is not cost effective. It is more economical to
purchase a complete gearbox if repair to anything other
than replacement of bearings, seals or gaskets is
required.
Fill gearbox with SAE 80W or 90W gear lube until it
runs out the side level plug.
Inspect gearbox for leakage and bad bearings.
Leakage is a very serious problem and must be cor-
rected immediately.
Bearing failure is indicated by excessive noise and side
to side or end play in gear shafts.
Seal Replacement
Recommended sealant for gearbox repair is Perma-
tex
®
Aviation 3D Form-A-Gasket or equivalent.
Leakage can occur at the vertical or horizontal gaskets
and shaft seals.
Leakage at the horizontal gasket or seal can be
repaired without removing the gearbox from the cutter.
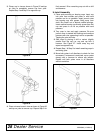
Seal Installation
NOTE: Proper seal installation is important. An improp-
erly installed seal will leak.
1. Crown gear
2. Gearbox housing
3. Input shaft
4. Output shaft
5. Gear pinion
6. Bearing
7. Bearing
8. Protective flat washer
9. Cotter pin
10. Snap ring
11. Snap ring
12. Spacer
13. Shim
14. Castle nut
15. Castle nut M24 x 2
16. Shim
17. Flat washer
18. Oil seal (40 x 80 x 12 mm)
19. Oil seal (35 x 72 x 10 mm)
20. Cap
21. Snap ring
22. Top cover
23. Bolt M8 x 14 mm
24. Breather level plug
25. Cotter pin
26. Bearing
27. Ball bearing