


12
BELT REPLACEMENT
CAUTION:
Do not use an off-the-shelf
belt.
Your tiller has been engineered with a belt made of
special material (Kevlar Tensile) for longer life and
better performance. It should not be replaced with an
off-the-shelf belt.
If belt replacement is required, order belt or belts by
part number from your nearest authorized dealer.
Part No. 754-0434—‘‘V’’ Belt
1. Disconnect and ground the spark plug wire
against the engine.
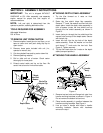
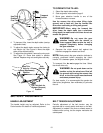
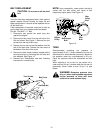
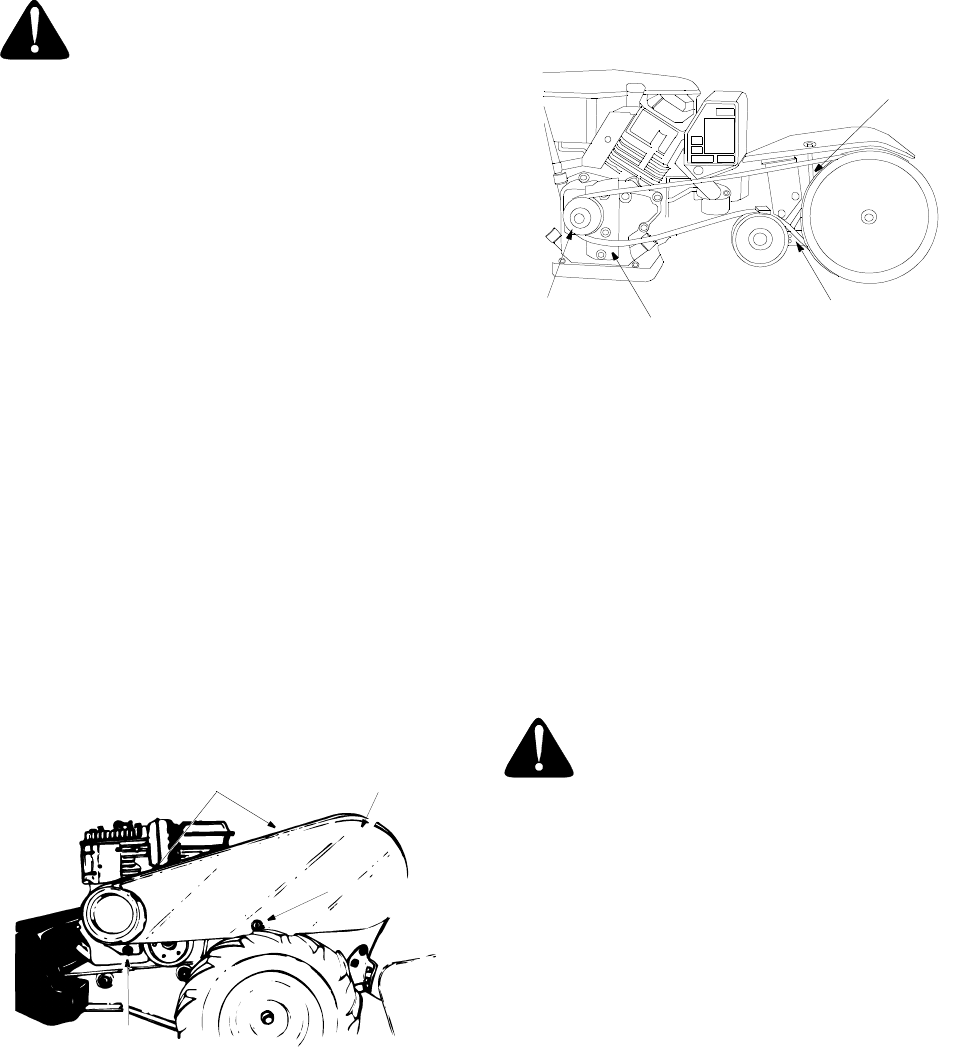
2. Remove the belt cover from the left side of the
tiller as follows: See Figure 11.Remove two torx
screws from the top of belt cover.
3. Remove the hex cap nut and flat washer from the
side of the belt cover. Remove the hex screw at
the bottom of the front of the cover.
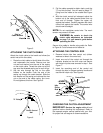
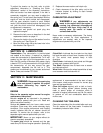
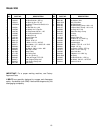
4. Remove the belt keeper bracket located behind
the engine pulley by removing two hex bolts and
lock washers. See Figure 12.
5. Remove belt. Reassemble new belt, following
instructions in reverse order.
Figure 11
NOTE: Upon reassembly, make certain the belt is
routed over the idler pulley and inside of belt
keepers by engine pulley. See Figure 12.
Figure 12
TIRES
Recommended operating tire pressure is
approximately 20 p.s.i. (check sidewall of tire for tire
manufacturer’s recommended pressure). Maximum
tire pressure under any circumstances is 30 p.s.i.
Equal tire pressure should be maintained on both
tires.
When installing a tire to the rim, be certain rim is
clean and free of rust. Lubricate both the tire and rim
generously. Never inflate to over 30 p.s.i. to seat
beads.
WARNING: Excessive pressure (over
30 p.s.i.) when seating beads may cause
tire/rim assembly to burst with force
sufficient to cause serious injury.
Torx Screws
Belt Cover
Hex Cap Nut
Self Tap
Screw
Engine
Pulley
Belt Keeper
Idler
Brkt.
Idler
Pulley
Rod
Brkt.