


11
Clean the engine regularly with a cloth or brush.
Keep the cooling system (blower housing area)
clean to permit proper air circulation which is
essential to engine performance and life. Be certain
to remove all dirt and combustible debris from
muffler area.
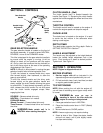
CLEANING THE TINE AREA
Clean the underside of the tine shield after each use.
The dirt washes off the tines easier if rinsed off
immediately instead of after it dries. Always towel
dry the tiller afterwards and apply a light coat of oil or
silicone to prevent rusting or water damage.
IMPORTANT: Never use a "pressure" washer to
clean your tiller. Water can penetrate tight areas of
the tiller and its chaincase and cause serious
damage to the unit.
TIRES
Recommended operating tire pressure is
approximately 14 p.s.i. on 14 inch tires and 20 p.s.i.
on 16 inch tires. (Check sidewall of tire for tire
manufacturer’s recommended pressure). Maximum
tire pressure under any circumstances is 30 p.s.i.
Equal tire pressure should be maintained on both
tires.
When installing a tire to the rim, be certain rim is
clean and free of rust. Lubricate both the tire and rim
generously. Never inflate to over 30 p.s.i. to seat
beads.
WARNING: Excessive pressure (over
30 p.s.i.) when seating beads may cause
tire/rim assembly to burst with force
sufficient to cause serious injury.
BELT REPLACEMENT
CAUTION: Do not use an off-the-shelf
belt.
Your tiller has been engineered with a belt made of
special material (Kevlar Tensile) for longer life and
better performance. It should not be replaced with an
off-the-shelf belt.
If belt replacement is required, order belt or belts by
part number from your nearest authorized dealer.
Part No. 754-0438—‘‘V’’ Belt
1. Disconnect and ground the spark plug wire
against the engine.
2. Remove the belt cover from the left side of the
tiller as follows:
• Remove two torx head screws from the top of belt
cover.
• Remove two hex cap nuts and flat washers from
front side of the belt cover. Remove the hex nut
and flat washer at the back of the cover.
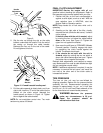
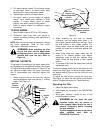
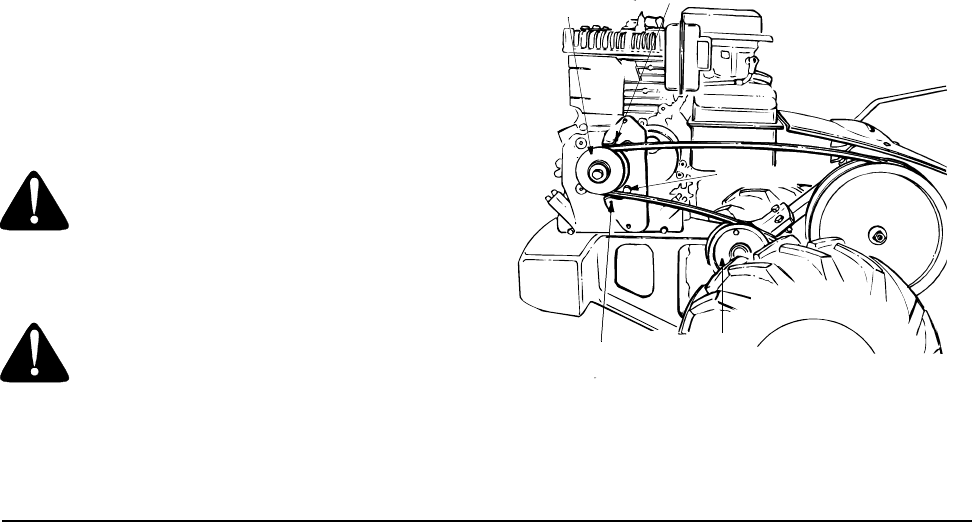
3. Remove the belt keeper assembly located
behind the engine pulley by removing two hex
bolts and lock washers. See Figure 14.
4. Remove belt. Reassemble new belt, following
instructions in reverse order.
NOTE: Upon reassembly, make certain the belt is
routed over the idler pulley and inside of belt
keepers by engine pulley. See Figure 14.
Figure 14
SECTION 11: OFF-SEASON STORAGE
If the tiller will not be used for a period longer than
30 days, the following steps should be taken to
prepare the tiller for storage.
1. Clean the exterior of engine and the entire tiller
thoroughly. Lubricate the tiller as described in
the lubrication instructions.
2. Refer to the engine manual for correct engine
storage instructions.
3. Wipe tines with oiled rag to prevent rust.
4. Store tiller in a clean, dry area. Do not store next
to corrosive materials, such as fertilizer.
NOTE: When storing any type of power equipment
in an unventilated or metal storage shed, care
should be taken to rustproof the equipment. Using a
light oil or silicone, coat the equipment, especially
any springs, bearings and cables.
Engine
Pulley
Belt Keeper
Hex Bolts
Belt
Keeper
Idler
Pulley