


16
UL-ES-Elite-WH11
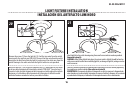
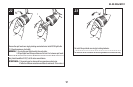
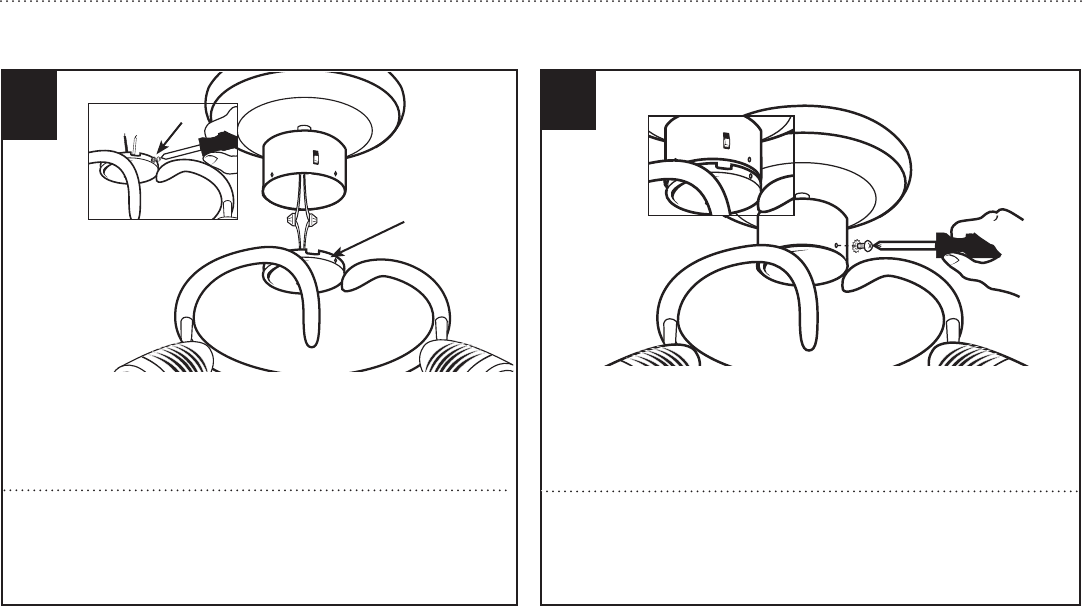
Retire los tornillos (1) de la tapa del juego de luces (2). Identifique los dos cables
en la tapa del alojamiento del interruptor rotulada “FOR LIGHT” (para las luces).
Conecte el cable azul del alojamiento del interruptor al cable negro del artefacto
luminoso y el cable blanco del alojamiento del interruptor al cable blanco del
artefacto luminoso usando las tuercas para cables incluidas.
1
2
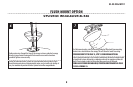
LIGHT FIXTURE INSTALLATION
INSTALACIÓN DEL ARTEFACTO LUMINOSO
21
20
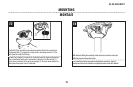
Remove the screws (1) from the light kit (2). Find the two wires from the switch
housing with the tag that says FOR LIGHT. Connect the blue wire from the switch
housing to the black wire from the light kit, and connect the white wire from the
switch housing to the white wire from the light kit with wire nuts provided.
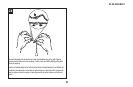
Attach light kit to the switch housing using three small screws and star washers provided.
Removed in step 20.
WARNING: When lifting light kit into place, the cut out notch in light kit should be lined up
with reverse switch location when installing light kit, or damage to light kit, wiring or reverse
switch can occur.
Conecte el artefacto luminoso al alojamiento del interruptor con los tres tornillos pequeños y
las arandelas en estrella incluidos. Que retiró en el paso 20.
ADVERTENCIA: Al momento de colocar la lámpara en su sitio, la ranura en la lámpara debe
estar alineada con la ubicación del interruptor de reversa al instalar la lámpara, de lo contrario
se puede dañar la lámpara, el cableado o el interruptor de reversa. Vea a continuación.