


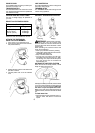


9
S Repeatuntilyouhearthelinehittingagainst
theline limiterpin (donot r epeatthis proce-
dure more than 6 times).
If problems are experienced with the auto-
matic line feed, refer to the TROUBLE-
SHOOTING TABLE.
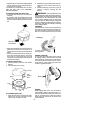
To manually feed the nylon line:
S If required, the cutting line can be fed out
manually .
S To operate, press and release manual line
feed button while gently pulling on one of
thelinesuntilthelinereachesthelinelimiter
pin.
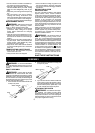
Manual Line
Feed Button
S Whentherequired amountof linei sfedout,
gently pull on the second line (there is no
need to press the manual line feed button
again).
S If the line extends past the line limiter pin,
toomuch linehas beenfed out. I ftoo much
line is fed out, remove the spool cap and
click spoolcounterclockwiseuntilthelineis
at the desired length.
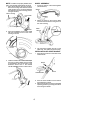
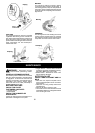
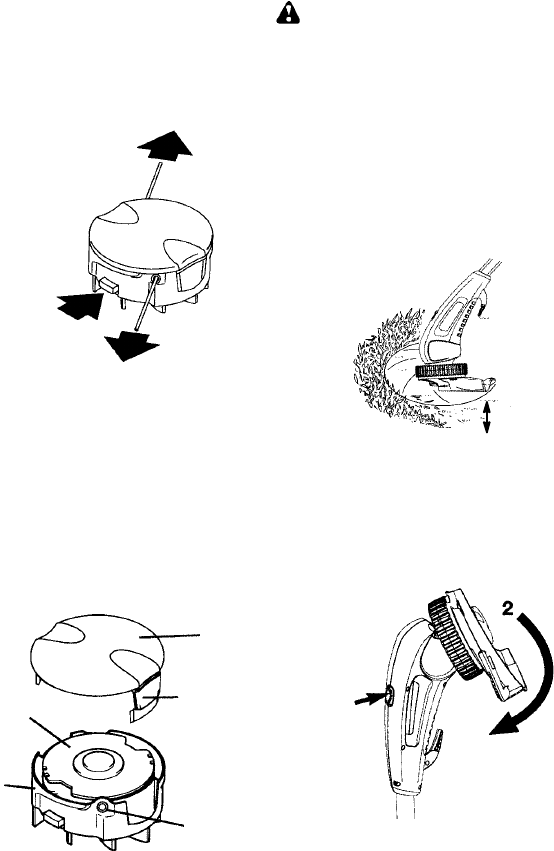
To remove spool cap:
1. Press and hold in the two cap release
latches.
2. Pull cap away from the hub.
Cap
Cap
release
latch
Spool
Hub
Eyelet
To reinstall spool cap:
1. Keep all areas of the cap and hub clean.
Failure to do so may prevent the cap be -
ing securely located in the hub.
2. Replace thecap,pressingfirmly downto-
wards the hub to ensure cap is fully se-
cured.
3. Check that the cap is secure by trying to
remove it without pressing the two
latches.
WARNING: Use only 0.065 inch (1.65
mm)diameter line.Othersizes o f l inewill notad-
vance properly andwill resultin im proper cutting
head function or can cause serious injury. Do
not use other materials such as wire, string,
rope, etc. Wire can break off during cutting and
becomeadangerous missile thatcan causese-
rious injury. See page 3for warningconcerning
other cutting devices.
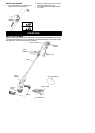
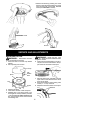
TRIMMING
Hold the bottom of the trimmer head about 3
inches (8 cm)above theground andatanan-
gle. Allow only thetip of theline tomake con-
tact. Donot force t rimmer lineinto work a rea.
Trimming
3 inches (8 cm)
above ground
EDGING POSITION
You cantwist thelower portion ofthe unitinto
an edging position. Press button and twist
lower portion of unit as shown in the illustra-
tion until itsnaps into place. Toreturn to trim-
ming position, press button and twist lower
portion in opposite direction.
Button
EDGING
While edging, allow unit to rest on wheel for
extra stability. Edge in direction shown in il-
lustration.Allowthet ipofthelinetomakecon-
tact. Do not for ce the line. Take extra caution
while edging as objects can be thrown from
the trimmer line.