23
SERVICE AND ADJUSTMENTS
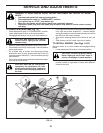
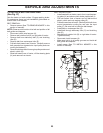
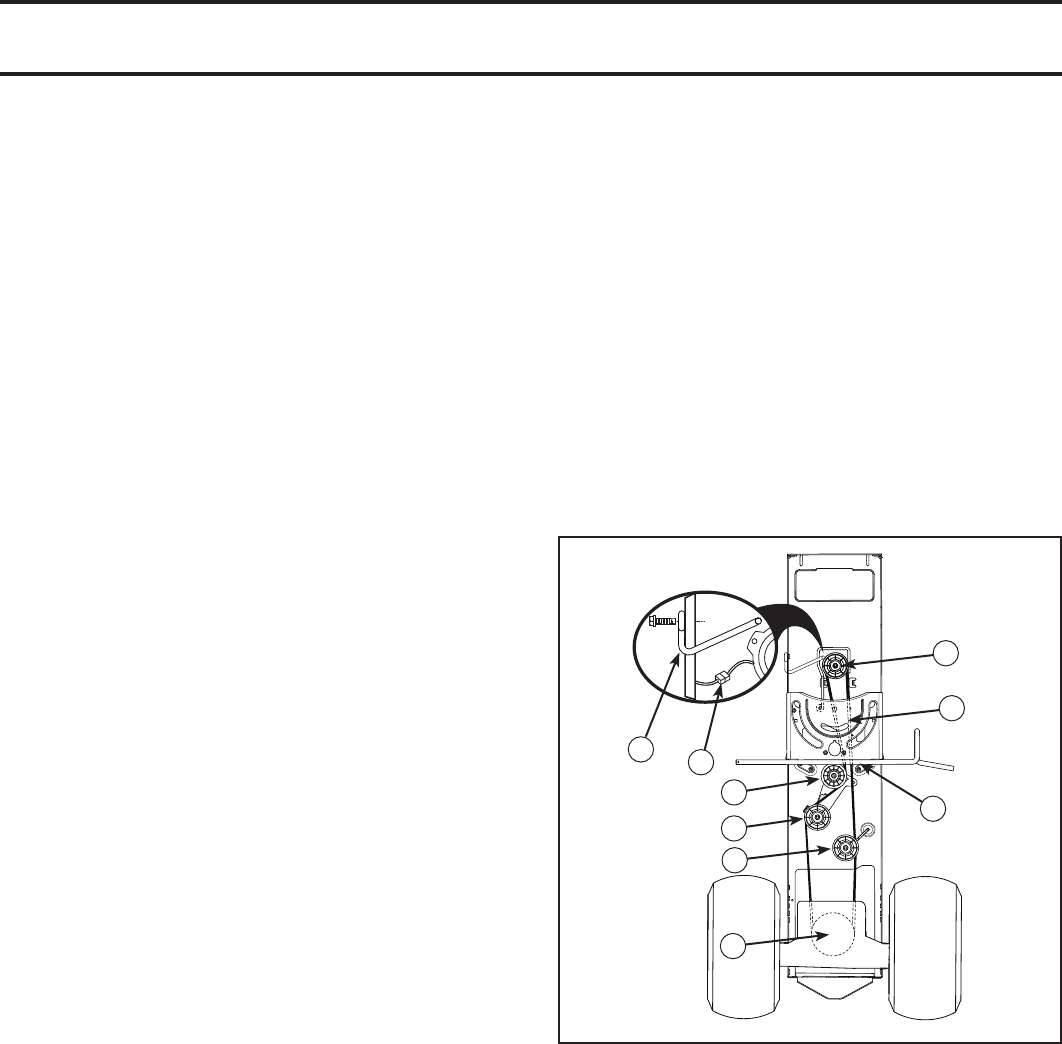
TO REPLACE MOTION DRIVE BELT
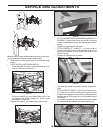
(See Fig. 27)
Park the tractor on level surface. En gage parking brake.
For as sis tance, there is a belt installation guide decal on
bottom side of left footrest.
BELT REMOVAL -
• Remove mower (See “TO RE MOVE MOWER” in this
section of manual).
NOTE: Observe entire motion drive belt and position of all
belt guides and keepers.
• Disconnect clutch wire harness (A).
• Remove anti-rotation link (B) on right side of tractor.
• Remove belt from stationary idler (C) and clutching
idler (D).
• Remove belt from centerspan idler (E).
• Pull belt slack toward rear of trac tor. Carefully remove
belt up wards from trans mis sion input pulley and over
cooling fan blades (F).
• Remove belt downward from engine pulley and around
electric clutch (G).
• Slide belt toward rear of tractor, off the steering plate
(H) and remove from tractor.
BELT INSTALLATION -
• Install new belt from tractor rear to front, over the steer-
ing plate (H) and above clutch brake pedal shaft (J).
• Pull belt toward front of tractor and roll belt around
electric clutch and onto engine pulley (G).
• Pull belt toward rear of tractor. Carefully work belt down
around transmission cooling fan and onto the input
pulley (F). Be sure belt is inside the belt keeper.
• Install belt on centerspan idler (E).
• Install belt through stationary idler (C) and clutch ing
idler (D).
• Reinstall anti-rotation link (B) on right side of tractor.
Tighten securely.
• Reconnect clutch harness (A).
• Make sure belt is in all pulley grooves and in side all
belt guides and keep ers.
• Install mower (See “TO IN STALL MOWER” in this
sec tion of manual).
electric
02953
A
B
C
D
E
F
G
H
J
FIG. 27


