


10
Chute Deflector: Lubricate the pivot points on the
chute deflector with light oil once a season.
Engine: Refer to the Briggs & Stratton Owner/Operator
manual packed with your unit for lubrication
instructions.
Maintenance
Engine
Refer to the Maintenance section of the Briggs &
Stratton Owner/Operator manual packed with your unit.
Read and follow instructions carefully
• Check engine oil level before each use as
instructed in the separate engine manual.
• Clean air cleaner’s precleaner every 25 hours
under normal conditions. Clean every few hours
under extremely dusty conditions. Replace the air
cleaner cartridge once a season. To service the
air cleaner, refer to the separate engine manual.
• The spark plug should be cleaned and the gap
reset once a season. Refer to the separate engine
manual for correct plug type and gap specifications.
Chipper Shredder
Before each use, visually inspect your chipper shredder
for loose (or missing) nuts and bolts. Securely tighten
(or replace) all hardware before operating the chipper
shredder.
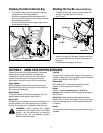
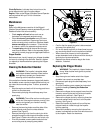
Cleaning the Reduction Chamber
WARNING: The impeller’s shredder blade
and chipper blades are sharp. Wear leather
work gloves to protect your hands when
cleaning out the reduction chamber.
If the reduction chamber becomes clogged with debris,
the shredder screen can be pivoted upward so that you
can clean the surrounding area. To do so, proceed as
follows:
• Stop the engine and wait until all moving parts have
come to a complete stop.
• Disconnect spark plug wire and keep away from
spark plug.
WARNING: The muffler and surrounding area
will be hot if the engine has been running. Use
caution and protect your hands if working
near the muffler.
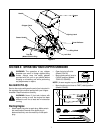
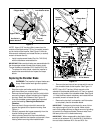
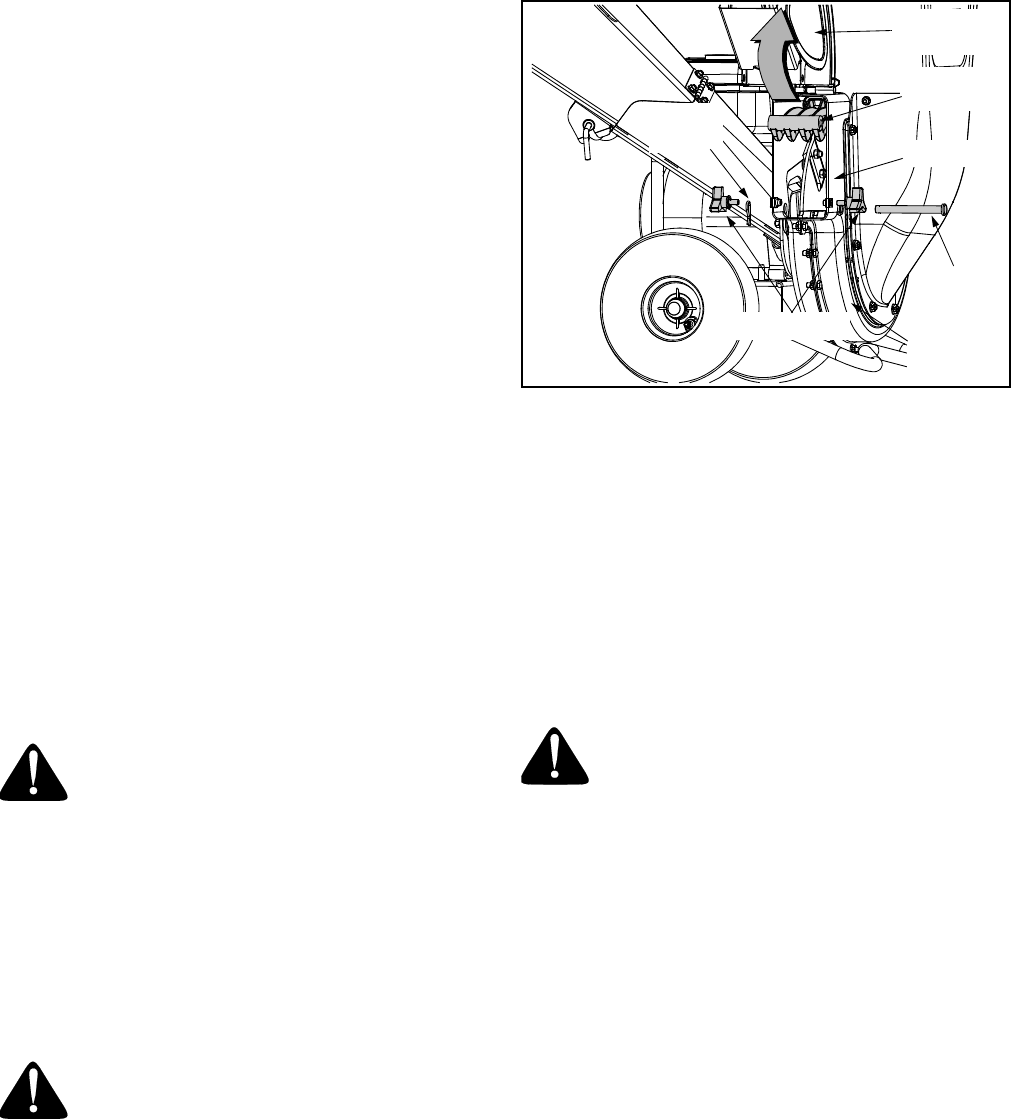
• Remove the two wing knobs on either side of the
chute deflector and pivot the chute deflector
upward. See Figure 8.
• Remove the hairpin clip from the clevis pin which
extends through the housing and shredder screen.
See Figure 8. Retain the clevis pin and hairpin clip.
• Pivot the shredder screen upward and clean the
surrounding area by scraping away debris.
Figure 8
• Confirm that the spark plug wire is disconnected
and away from spark plug.
• Pull on the starter rope two-to-three times to purge
any remaining debris from the reduction chamber
• When the area is cleaned, pivot the shredder
screen downward and re-secure with the clevis pin
and hairpin clip removed earlier.
• Reattach the debris collection bag to the chute
deflector, if desired.
Replacing the Chipper Blades
WARNING: The impeller’s chipper blades are
sharp. Wear leather work gloves to protect
your hands.
• Stop the engine and make certain the chipper
shredder has come to a complete stop.
• Disconnect spark plug wire and keep away from
spark plug.
• Pivot the shredder screen upward as instructed
under the heading Cleaning the Reduction
Chamber.
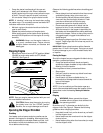
• Remove the chipper chute support brace from the
frame by removing the two hex bolts and saddle
washers which secure it. See Figure 9.
• Remove the chipper chute by removing three hex
nuts and washers which secure it to the impeller
housing. See Figure 9.
• Rotate the impeller by hand until one of the two
chipper blades is visible through the impeller
housing opening.
• Remove the blade by removing the internal hex
screws, lock washers and hex nuts which secure it
to the impeller. Retain the hardware.
Wing Knobs
Chute
Deflector
Hairpin
Clip
Clevis
Pin
Shredder
Screen
Housing
Reduction
Chamber