


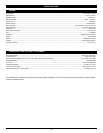

NOTE: The inner reel must be totally
dry before reinstalling it into
the outer spool. Do not
lubricate the inner reel or
outer spool assembly.
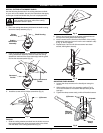
6. Place the inner reel into the
outer spool.
7. Place the bump knob, spring
and foam seal into the inner reel
(Fig. 27).
8. Press the bump knob down and
tighten clockwise.
9. Install new line as
described in Line
Installation for the
SpeedSpool
®
.
11
MAINTENANCE AND REPAIR INSTRUCTIONS
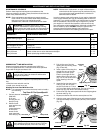
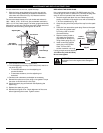
9. If winding the line becomes
difficult or if the line jams,
pull the ends of the line from
the spool (Fig. 24). Continue
winding the inner reel
counterclockwise until
approximately 6 inches of
line is left.
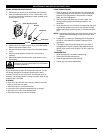
INSTALLING A PRE-WOUND
REEL
1. T
urn the bump knob
counterclockwise and
remove the bump knob,
spring and foam seal
(Figs. 28 & 27).
2. Pull the old inner reel
with existing line from
the outer spool.
3. Insert the ends of the
prewound inner reel line
into the outer spool eyelets (Fig. 26).
Push the new inner reel, arrow side
up, into the outer spool.
4. H
old the inner reel in place and
install the bump knob, spring and
foam seal (Fig. 27). Press down and
turn the bump knob clockwise.
Grasp the ends and pull firmly to
release the line from the holding
slots in the inner reel.
Releasing the Inner Reel
If the SpeedSpool
®
does not
release line correctly, pull the
ends of the line firmly from the
spool (Fig. 25). If this does not
the release line, follow the
Cleaning the SpeedSpool
®
instructions.
NOTE: Do not wind the inner
reel before installing
the second piece of
line.
CLEANING THE
SPEEDSPOOL
®
Cleaning the SpeedSpool
®
may
be necessary if:
• A jammed or excessive line must be removed
• The SpeedSpool
®
becomes difficult to wind or does not
operate correctly when bumping the head on the ground
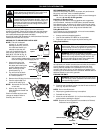
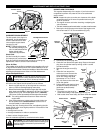
1. Hold the outer spool, and unscrew the bump knob
counterclockwise (Fig. 28).
2. Pull out the bump knob, spring and foam
seal (Fig. 27).
3. P
ull the inner reel with existing line from the
outer spool (Fig. 29).
4. Remove any existing line from the inner
reel before cleaning. Remove any debris
or grass from the knob, spring, inner reel
and foam seal. Wash the inner reel with
warm soapy water (Fig. 29).
5. Clean the shaft and the inner surface of the outer spool. To
clean the shaft underneath the plunger, press down on the
plunger (Fig. 30). Remove any dirt or debris from the shaft.
Fig. 24
Fig. 25
Bump Knob
Foam Seal
Spring
Inner Reel
Fig. 27
Fig. 26
Fig. 28
Fig. 29
Inner Reel
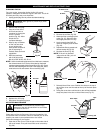
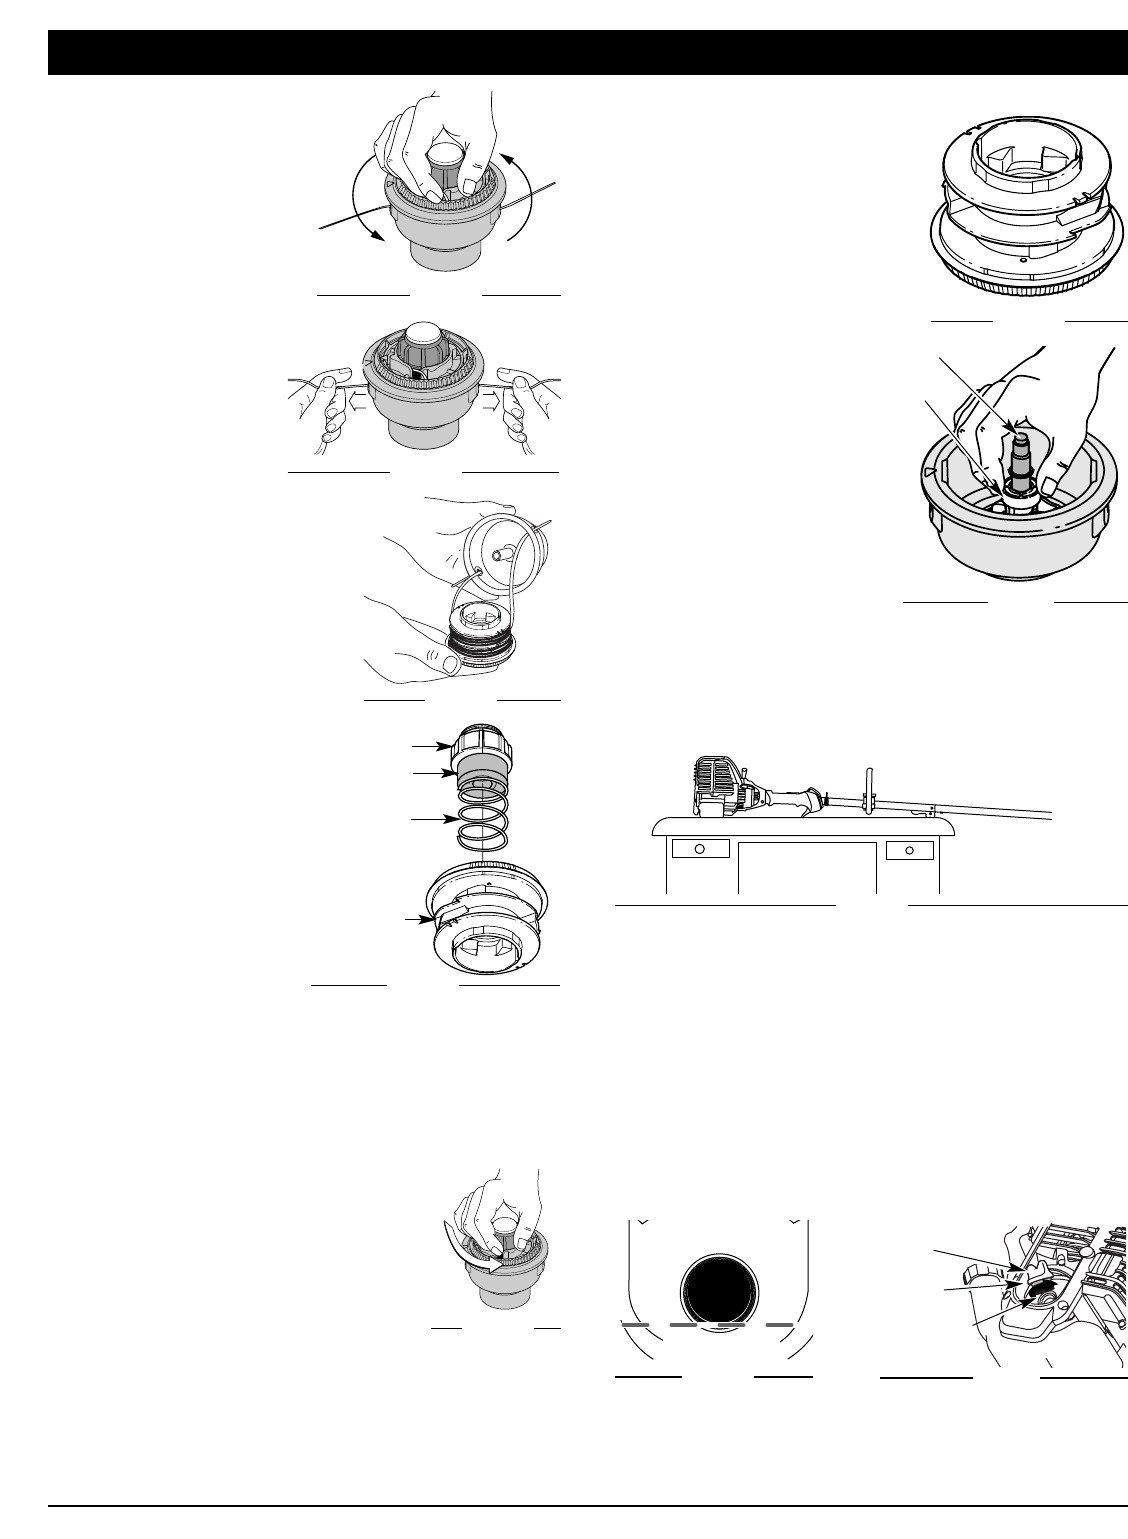
CHECKING THE OIL LEVEL
The importance of checking
and maintaining the proper oil
level in the crankcase cannot
be overemphasized. Check oil
before each use:
1. Stop the engine and allow oil to drain into the crankcase.
2. Place the engine on a flat, level surface with the cutting
head shield hanging off a work bench or table to get a
proper oil level reading (Fig. 31).
3. Keep dirt, grass clippings and other debris out of the engine.
Clean the area around the dipstick before removing it.
4. Remove the oil fill plug.
5. Look into the oil fill hole, use a flashlight if needed. The oil
should be just touching the inner most thread (Fig. 32).
6. If the oil level is not touching the inner most thread on the
oil fill hole, add a small amount of oil to the oil fill hole and
recheck (Fig. 32). Repeat this procedure until the oil level
reaches the inner most thread on the oil fill hole.
NOTE: Do not overfill the unit.
NOTE: Make sure the O-ring is in place on the oil fill plug when
checking and changing the oil (Fig. 33).
Fig. 31
Oil Fill Plug
Oil Fill Hole
O-Ring
MaxOil Fill Line
Fig. 33
Fig. 32
Shaft
Plunger
Fig. 30