9
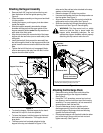
To Empty Bag
• Depress the plunger on the drawstring and slide the
plunger out to loosen bag from discharge chute
opening.
• Empty bag and reattach to the discharge chute
opening. Depress the plunger on the drawstring
and pull on the drawstring until the bag is tight
around the chute opening.
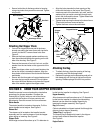
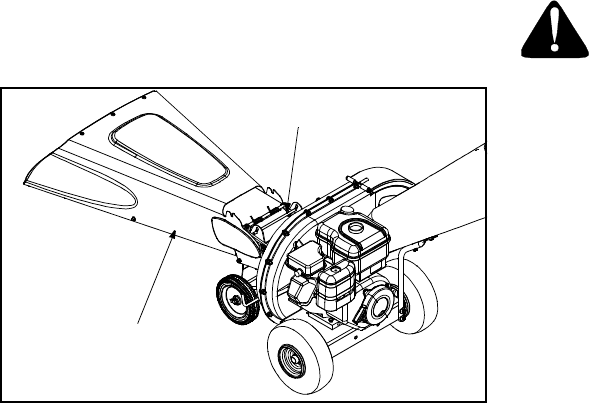
Lowering the Hopper Assembly
The machine can be operated with the hopper assemby
in either the raised or lowered positions. With the
hopper assemby pivoted down, leaves and other small
loose debris can be raked directly into it. To reposition
the hopper assembly, proceed as follows:
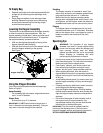
• With one hand grasp the handle at the top of the
hopper assembly and lift slightly.
• With the other hand pull out on the release rod and
lower the hopper assembly to the ground.
See Figure 7.
Figure 7
Using the Chipper Shredder
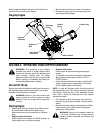
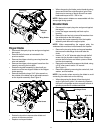
Your new chipper shredder has two feed openings.
Refer to Figure 6.
Hopper Assembly:
For shredding light yard waste, twigs and branches
up to ½-inch in diameter .
Chipper Chute:
for branches up to 3” in diameter.
IMPORTANT:
Do NOT insert branches larger than ½-
inch in diameter into the hopper assembly. Doing so
may result in serious damage to the machine.
Shredding
The hopper assemby is intended for small, light
debris such as leaves, pine needles, garden waste,
twigs and branches less than ½” in diameter.
Material fed into the hopper assemby passes
through both a shredder blade, which chops it into
small pieces and flail fingers, where the material is
shredded and broken up into even smaller pieces.
Chipping
The chipper chute is intended primarily for small
branches and limbs up to 3” in diameter. Branches
fed into the chipper chute, are chipped by a pair of
blades mounted to the backside of the unit’s
impeller.
Operating tips
WARNING: The operation of any chipper
shredder can result in foreign objects being
thrown into the eyes, which can damage your
eyes severely. Always wear the safety
glasses provided with this unit or eye shields
before chipping or shredding and while
performing any adjustments or repairs.
• Use a pruner or saw to trim smaller branches off the
main branch being fed. This will allow branches to
feed more easily into the chipper chute.
• Feed “bushy” material, such as the ends of tree
limbs with smaller branches coming off a main
branch, with the “grain” (larger diameter end first).
• When chipping branches, once the branch is
chipped down to the point it is completely inside the
chipper chute, let go of it and it will self-feed the rest
of the way.
• Avoid feeding fibrous plants (i.e. tomato vines, etc.)
into the hopper assembly until they are thoroughly
dried out.
• If feeding wet leaves, feed them in small clumps to
avoid clogging the discharge opening.
• Keep the chipper blades sharp. Difficulty feeding
material and increased vibration when feeding are
signs the chipper blades need to be sharpened or
replaced.
• Do not shut the engine off while material is still in
the chipper chute or hopper assembly. Any
unprocessed material may jam the machine and
interfere with re-starting the engine.
IMPORTANT:
The flail screen is located inside the
housing in the discharge area. If the flail screen
becomes clogged, remove and clean as instructed in
SECTION 5: MAINTAINING YOUR CHIPPER SHREDDER.
Release Rod
Hopper Assembly


