9
SECTION 5: OPERATING YOUR STRING TRIMMER MOWER
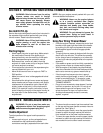
WARNING: Debris thrown from the string
trimmer mower can result in foreign
objects being thrown into the eyes, which
can cause severe eye damage. Always
wear safety glasses included with unit or
eye shields when operating the string
trimmer mower.
Gas And Oil Fill-Up
Service the engine with gasoline and oil as instructed in
the separate engine manual packed with your string
trimmer mower. Read instructions carefully.
WARNING: Never fill fuel tank indoors with
engine running or until the engine has
been allowed to cool for at least two
minutes after running.
Starting Engine
• Attach spark plug wire to spark plug. Make certain
the metal cap on the end of the spark plug is
fastened securely over the metal tip on the spark
plug. See separate engine operator’s manual.
• Before each use, remove any debris from the
engine’s air intake screen on top of engine. Debris
can cause engine to overheat.
• Prime engine as instructed in the separate engine
manual packed with your unit.
• Move throttle control lever on engine to FAST or
RUN position.
• Make sure control lever is disengaged and locked
in bracket.
• Stand behind the string trimmer mower and grasp
starter handle and pull rope out slowly until engine
reaches start of compression cycle (rope will pull
slightly harder at this point). Let the rope rewind
slowly. Pull rope with a rapid, continuous, full arm
stroke. Keeping a firm grip on the starter handle, let
the rope return to the starter slowly. Repeat until
engine starts.
NOTE: See your engine manual packed with your unit
for more detailed instructions.
WARNING: Never run the engine indoors
or in a poorly ventilated area. Engine
exhaust contains carbon monoxide, an
odorless and deadly gas. Keep hands,
feet, hair, and loose clothing away from
the trimmer and engine.
WARNING: Do not attempt to bypass the
control lever. Doing so could result in
serious personal injury or death.
Using Your String Trimmer Mower
• Once the engine is started, release the control lock
bracket on the upper right hand side of the handle
by pushing it to the right and squeeze the control
handle against upper handle to engage spindle
assembly.
• The string trimmer mower is designed with the spin-
dle off-set to the left side. This allows the operator
to trim along a fence, landscaping, or a house with-
out having to make any adjustments to the spindle
assembly.
• If the weeds or grass are tall and thick, operate the
string trimmer mower at a slower walking speed.
• With the engine off and spark plug disconnected,
clean the underside of the trimmer before and after
each use to remove any grass or weed build up.
• If the trimmer lines become too short, approxi-
mately half the original length, or worn, it will take
longer to complete the job. To change to a new
trimmer line see MAINTAINING YOUR STRING
TRIMMER MOWER.
• Do not trim on excessively steep slopes. If a slope
is difficult to stand on, do not trim. Do not trim on
slopes when the ground is slippery or wet. Trim
across the face of a slope, not up and down.
• Avoid spindle assembly contact to concrete,
asphalt, or gravel.
SECTION 6: MAKING ADJUSTMENTS
WARNING: Do not at any time make any
adjustments without first stopping engine
and disconnecting spark plug wire.
Handle Adjustment
To adjust position of the upper handle proceed as
follows:
• Loosen each wing nut, so the carriage bolts are
unseated from the handle and the handle
connectors are slightly separated from each other.
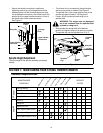
• The lower handle connector has three marked lines
on the top and the upper handle connector has one
marked line. See Figure 5.
• To raise the upper handle, move the upper handle
forward to match the single marked line with the
front marked line on the lower handle connector.
• To lower the upper handle, move the upper handle
rearward to match the single marked line with the
rear marked line on the lower handle connector.


