


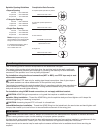
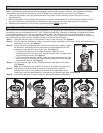
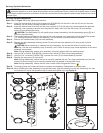

Adjustment Band Indicators
90° 180° 270° 360°
Figure 7
For reference, the adjustment band of the FLX35 and FLX55 has markers at predetermined arcs. By aligning the
adjustment band indicators to the turret arrow, you can set the sprinkler arc to 90°, 180°, 270° or 360°. The arc is
adjustable from 40°–330° in 5° increments. See Figure 7.
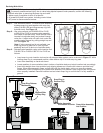
Trajectory Adjustment Procedure
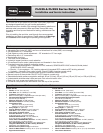
The FLX35 and FLX55 sprinkler models are designed with a dual-trajectory main nozzle.
Use the following procedure to select the sprinkler trajection of 15° or 25°.
Step 1 – Using the multi-purpose tool (P/N 995-83), pull the riser from the provided slot in the cap. Pull the riser
assembly until there is enough clearance for handling and hold onto the riser body.
Step 2 – Remove cap screw and cap to unlock the main nozzle.
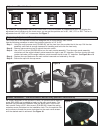
Step 3 – Use a 5/8" nut driver (P/N 995-99) to turn the main nozzle assembly. Turn the main nozzle assembly
clockwise until the angle indicator points towards the right to set 25° trajection. Continue turning the main
nozzle clockwise until the angle indicator points towards the left to set 15° trajection. See Figure 8 and 9.
Step 4 – Replace the cap. Make sure the main nozzle is secured and retained by the cap.
Step 5 – Secure the cap with the cap screw.
15°
25°
Figure 8 Figure 9
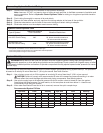
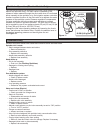
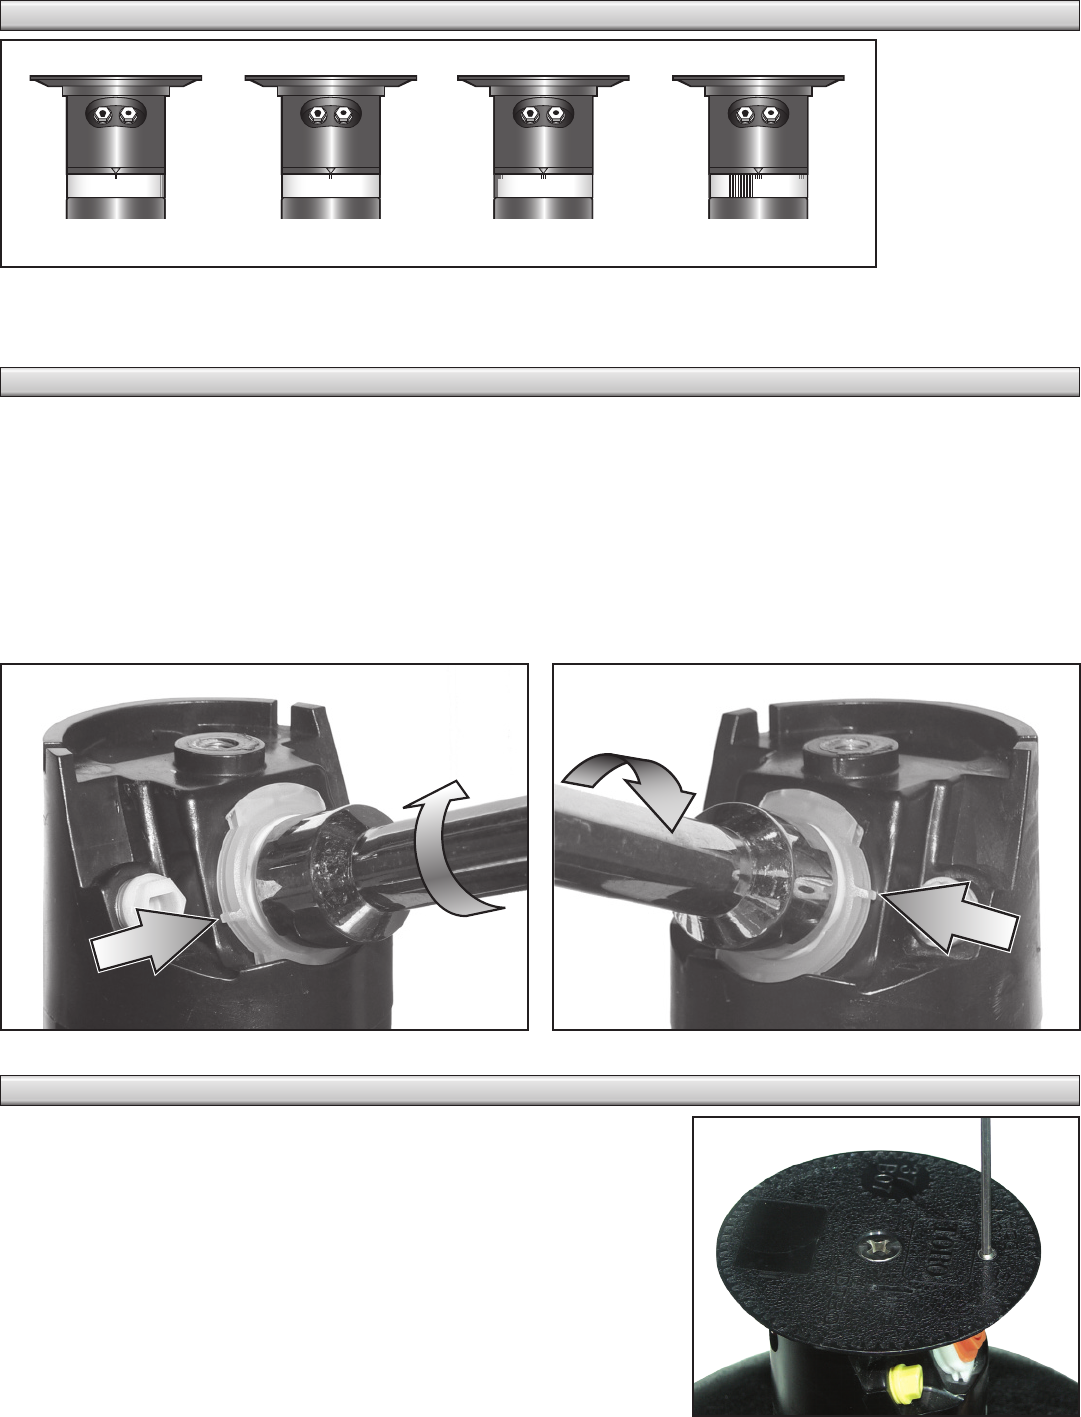
Radius Reduction - FLX34/54 and FLX35/55 Only (Not for FLX35-6/55-6)
For further refinement of the sprinkler’s radius, an optional radius reduction
Figure 10
screw (363-4839) can be added to break up the main nozzle spray. The
sprinkler cap provides an installation hole just above and in front of the
main nozzle. Using a 3/32" Allen wrench (P/N 995-82), thread the radius
reduction screw clockwise into the installation hole. Turn the sprinkler ON
and continue to thread the screw clockwise into the main nozzle stream
until the desired result is achieved. See Figure 10.