Arc Adjustment Procedure ________________________________________________________
The 835S and 855S sprinkler models can be operated in full-circle or part circle operation. In part-circle operation, the sprinkler arc
can be adjusted from 40°– 330°. When full-circle (360°) operation is selected, the sprinkler will rotate in a clockwise direction only. The
arc is factory preset at 180°. The left side of the arc, located at the end of the counterclockwise rotation, is non-adjustable (fixed).
Therefore, all arc adjustments, whether increasing or decreasing, will change the right side of the arc, located at the end of the
clockwise rotation.
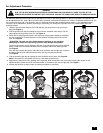
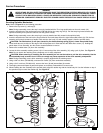
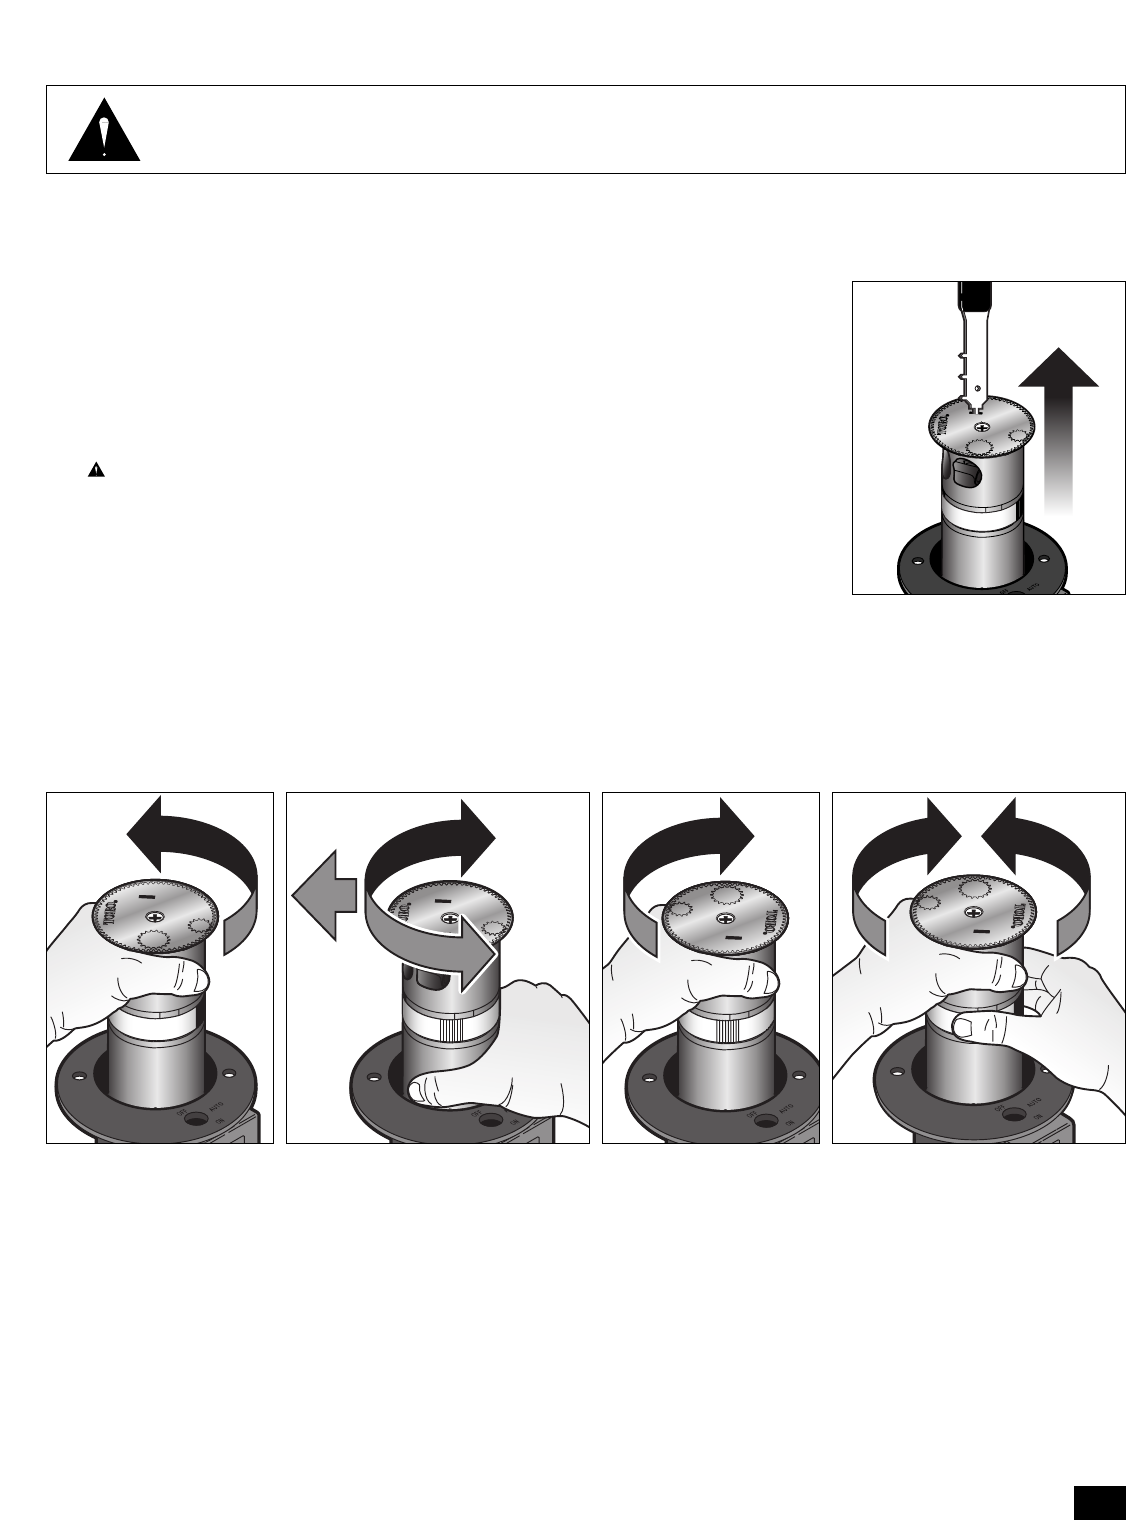
1. Using the sprinkler Multi-Purpose Tool (P/N 995-83), pull the sprinkler riser up from the
body. See Figure 3.
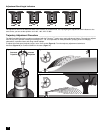
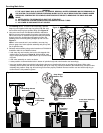
2. Find the sprinkler left stop by rotating the turret counter clockwise until it stops. The left
stop indicates the fixed stop of the arc. See Figure 4.
3. Check the left stop alignment with the left most area being irrigated. Adjust by ratcheting
the riser clockwise or counterclockwise until the sprinkler left stop points to the correct
area. See Figure 5.
CAUTION: The riser can only ratchet when the sprinkler is not operating.
Attempting to ratchet the riser during operation may damage the sprinkler.
The turret can also be used to adjust the left stop. If the left stop falls short of the desired
border, rotate the turret counterclockwise until it is aligned with the left watering border.
See Figure 4.
If the left stop exceeds the border, rotate the turret clockwise until the right stop. Continue
to advance the turret the same distance that the left stop exceeded the border.
See Figure 6.
4. Find the sprinkler right stop by rotating the turret clockwise until it stops. See Figure 6.
Note: If the sprinkler is set at 360° (full-circle), it will rotate clockwise only.
5. Adjust the arc while the turret is pointing at the right stop. Hold the sprinkler riser firmly while pressing the release on the
adjustment band. Rotate the turret counterclockwise or clockwise to the desired right stop. See Figure 7.
6. Activate the sprinkler to check proper arc setting and adjust as necessary.
3
Figure 3
Figure 4 Figure 5 Figure 6 Figure 7
WARNING
DUE TO THE HIGH OPERATING PRESSURE, NEVER STAND OR LEAN DIRECTLY OVER THE TOP OF THE
SPRINKLER OR COME IN CONTACT WITH THE SPRAY. FAILURE TO COMPLY MAY RESULT IN SERIOUS INJURY.


