


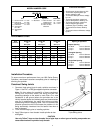


Two-Speed Sprinkler Alignment - Models 696 and 698
There are two types of full circle sprinklers which have special arcs of slower then regular speed. Alignment of
the heads is critical for proper performance. The model 696 sprinkler is a two-speed head with two 60° and two
120° arcs of speed. A red button on the drive assembly indicates it is a two-speed 60°–120° head and acts as a
pointer toward the center of the fairway or the next head in the row of sprinklers. The model 698 sprinkler is a
two-speed head with two 180° arcs of speed. A yellow button on the drive assembly indicates it is a two-speed
180° head and also indicates the center of the regular speed side. Align the sprinkler so the button points toward
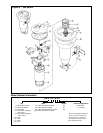
the center of the overlapped area of coverage. When a nozzle assembly is changed on either the 696 or 698
head, the main nozzle must be aligned with the small boss on the bull gear of the drive assembly.
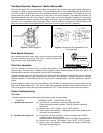
Back Nozzle Alignment
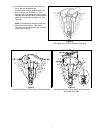
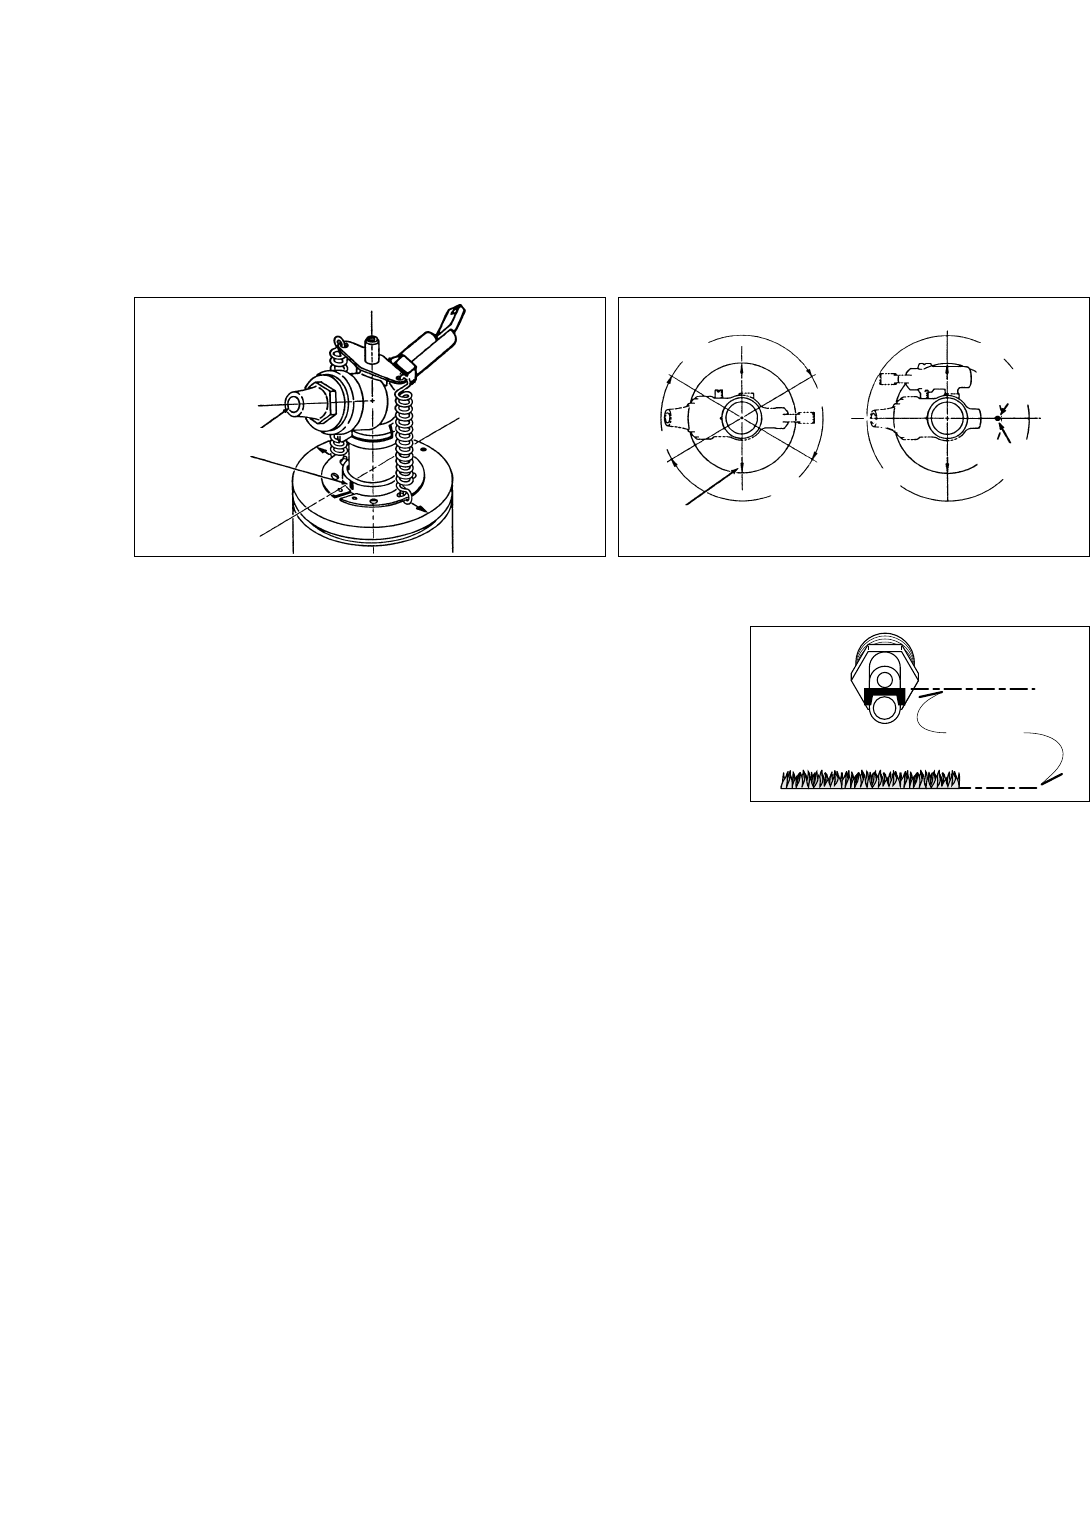
When replacing the back nozzle, align it so the nozzles are vertical and
the ramp is parallel to the ground. Use a 5/8 in. wrench to remove and
align the back nozzle. See example at right.
Pilot Valve Operation
The main function of the pilot valve is to control the operation of the main valve located in the base of the
sprinkler body. The main valve is operated by the release of water metered through the pilot valve when it is
activated either manually or automatically by the 24 VAC coil assembly.
Another important function of the pilot valve is to regulate the water pressure to the sprinkler nozzle. Pressure
regulation compensates for large variations within the system and maintains a constant pressure for optimum
sprinkler operation. The 690 series pilot valve is factory set to regulate at 80 or 100 PSI depending on sprinkler
model.
Sprinkler operation mode is set using a Toro Selector Tool (P/N 995-15) inserted through the body flange onto the
pilot valve D shaped selector-cam. The "AUTO" mode permits automatic operation from the system controller. The
"ON" mode opens the main valve for manual operation and "OFF" mode prevents the main valve from opening.
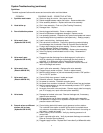
System Troubleshooting
Pilot Valve
Possible equipment failures with causes and corrective action are listed below.
PROBLEM POSSIBLE CAUSE – CORRECTIVE ACTION
1. Sprinkler will not turn on (a) No 24 VAC to coil assembly - Measure voltage with DVM.
Check wiring and controller program - Refer to Controller Operating
Instructions.
(b) Selector cam in "OFF" position - Set to "AUTO" position.
(c) Debris in pilot valve assembly - Disassemble and remove all debris (See
Servicing Pilot Valve page 8.)
2. Sprinkler will not shut off (a) Constant 24 VAC from controller - Check for voltage using a DVM. If
voltage is present, disconnect wire.
If sprinkler closes, service controller. Refer to Controller Service Manual.
(b) Selector cam in manual "ON" position - Set to "AUTO" or "OFF" position.
(c) Debris in pilot valve assembly - Disassemble and remove all debris (See
Servicing Pilot Valve page 8.)
4
Figure 2 - Nozzle Alignment
Figure 3 - Alignment of Drive Assembly to Turf
Coverage Area
RAMP ALIGNMENT
GROUND LINE
PARALLEL
Align main nozzle directly over
raised timing mark on bull gear.
120˚
Regular Speed
60˚
Half Speed
120˚
Regular Speed
60˚
Half Speed
180˚
Half Speed
180˚
Half Speed
Align yellow dot facing
opposing sprinkler row.
(Two row design)
Align yellow dot with
center of green.
(Green application)