


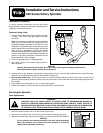

Reinstalling Nozzle/Drive Assembly
1. Part Circle Only: Holding drive assembly stationary, slowly rotate nozzle assembly counterclockwise to left side of arc pattern
(see Figure 6).
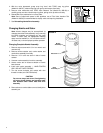
2. Check drive assembly key tab for approximately 30° upward bend, adjust if necessary (see Figure 7).
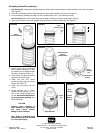
3. Insert nozzle/drive assembly into body until seal is approximately one (1) inch below top of body.
Part Circle Only: Align main nozzle orifice with left edge of watering arc before inserting (see Figure 8).
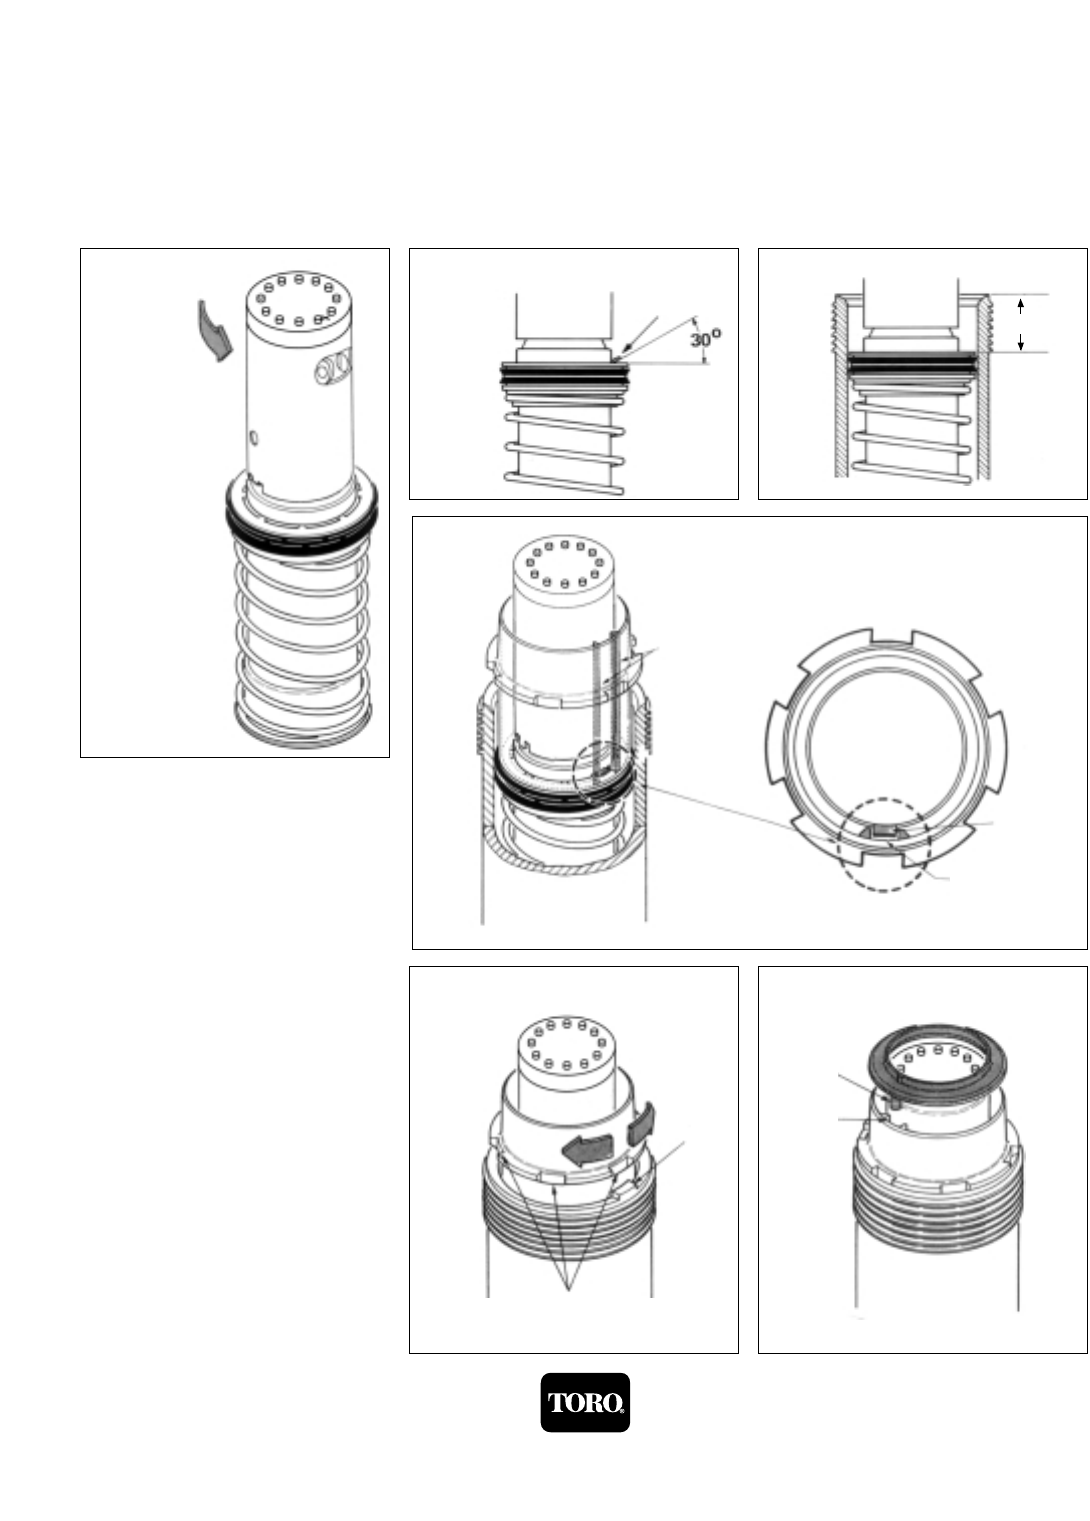
4. Place nozzle retainer over nozzle assembly aligning keyway and drive assembly key (see Figure 9).
5. Rotate nozzle retainer, interlocked
with nozzle/drive assembly, to align
the nearest of six (6) alignment slots
with tabs on body (see Figure 10).
6. Press retainer into body to interlock
alignment slot and body tab.
7. Install riser seal over nozzle
assembly placing peg into retainer
keyway (see Figure 11).
8. Install cap and secure with set
screw.
9. Check watering arc. If minor
adjustments are required (1/6 of a
turn or less); rotate sprinkler body
on riser. Do not make adjustments
by turning nozzle assembly (see
CAUTION below).
CAUTION
Rotating nozzle assembly to
make watering arc adjustments
may cause severe internal
damage to drive assembly.
Note: Refer to Illustrated Parts
Breakout Book Form No. 368-0044
for current parts listing.
4
© 1998 THE TORO COMPANY
Irrigation Division • An ISO 9001-Certified Facility
PRINTING DATE P.O. Box 489 • Riverside, CA 92502 PART NO.
FEBRUARY 1998 REV. E Printed in U.S.A. 362-0052
FIGURE 6 FIGURE 7
FIGURE 9
FIGURE 10 FIGURE 11
FIGURE 8
Rotate
Counterclockwise
Drive
Assembly Key
Nozzle Retainer
Keyway
(Shaded Area)
Nozzle Retainer
Keyway
Body
Tab
Alignment Slots
Riser
Seal Peg
Nozzle
Retainer
Keyway
Drive
Assembly
Key
1"